The strace command is a powerful debugging and diagnostic tool in Linux. It records every system call and the response it receives by a particular process. It is similar to the truss tool in other Unix-like operating systems. So, you can debug a program without needing to read its code. It is also a great tool to learn about system calls.
A system call is like an interface through which a software requests a service from the kernel.
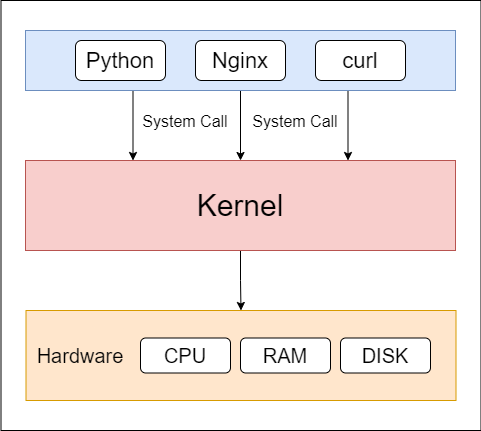
There are a lots of system calls in an operating system, but to learn about them is beyond the scope of this article.
How to install strace on Linux?
If you don’t have strace already on your system, use your system’s default package manager to install it.
For Ubuntu/Debian based systems, execute the following apt command with sudo:
sudo apt install strace
For CentOS/RedHat based systems, execute the following yum command:
sudo yum install strace
Syntax
The syntax for the strace command is given below:
strace [-ACdffhikqqrtttTvVwxxyyzZ] [-I n] [-b execve] [-e expr]... [-O overhead] [-S sortby] [-U columns] [-a column] [-o file] [-s strsize] [-X format] [-P path]... [-p pid]... [--seccomp-bpf] { -p pid | [-DDD][-E var[=val]]... [-u username] command [args] }
strace -c [-dfwzZ] [-I n] [-b execve] [-e expr]... [-O overhead] [-S sortby] [-U columns] [-P path]... [-p pid]... [--seccomp-bpf] { -p pid | [-DDD] [-E var[=val]]...[-u username] command [args] }
Executing a simple strace
Using strace without any option will output all the system calls in the same order the program made the system calls during execution.
To try it out, let’s try the strace command with the curl command:
strace curl google.com
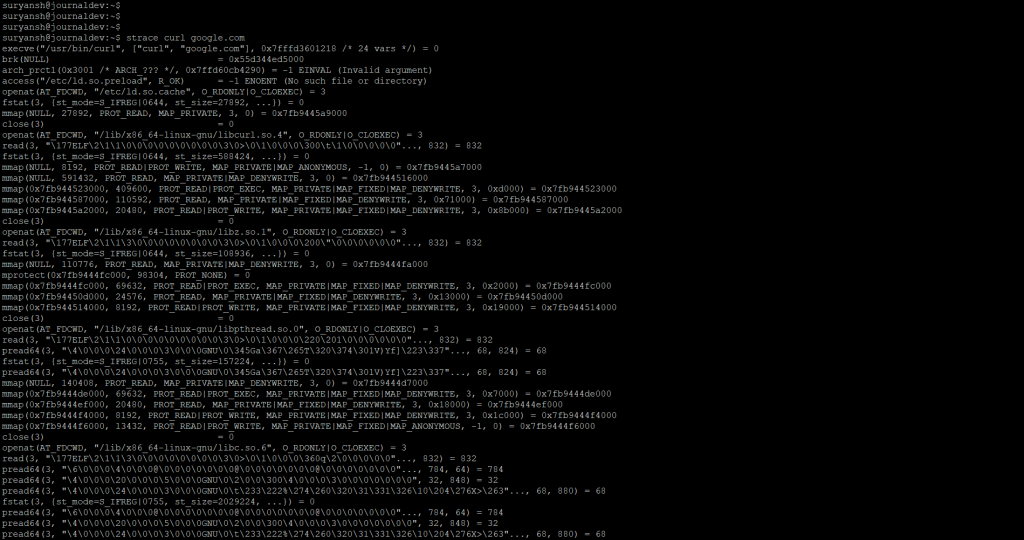
In the above image, you can see the strace command gave us a lot of output. These are all the systems calls made to print the final result, given below.

Writing output of strace to a file
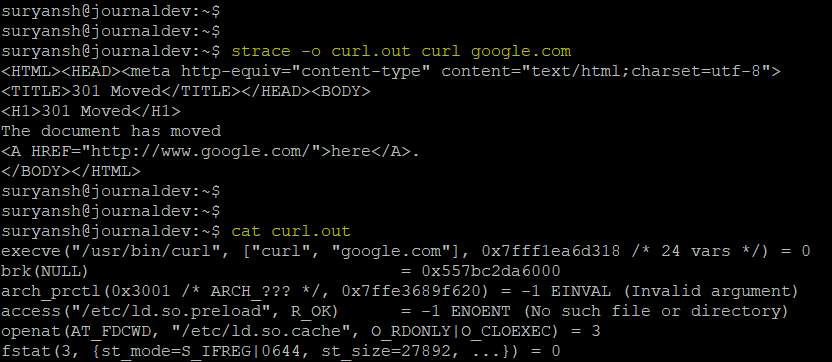
Executing strace command with -o will write the output to a file, which you can review later.
To write the output to a file of strace command for curl command execute:
strace -o curl.out curl google.com
Tracing particular system call by a process with strace
To trace a particular system call, the trace expression is used with the -e option in the strace command.
The syntax for trace expression to be used with strace command for curl command execute:
strace -e trace=syscall_set curl google.com
Where syscall_set is the specified set of the system calls.

In the above image, you can see that when we specify the socket system call in the strace command, it only prints out the socket system calls.
Similarly, we can define a set of system calls that we want to print with the strace command.
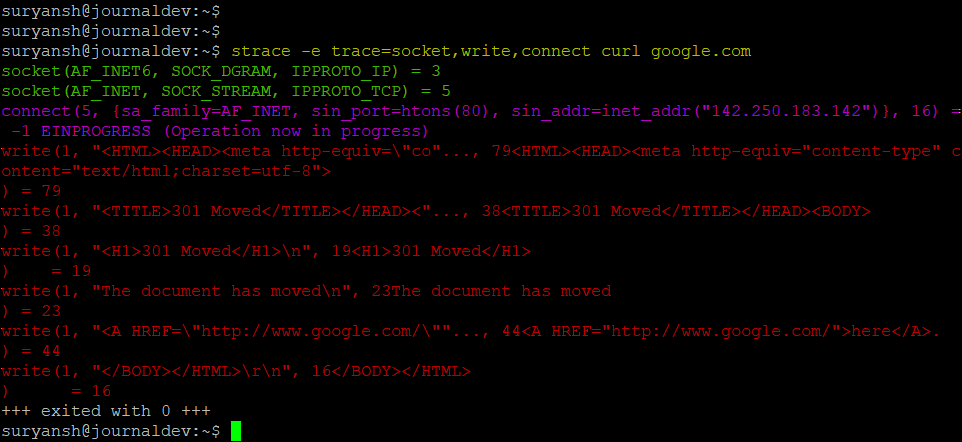
In the above image, you can see that when we define a particular set of system calls in the strace command, it only outputs those system calls made by that program in execution time.
Tracing a process with PID and the child processes with the strace command
The -p option is used to define the PID (process ID) and, the -f option is used to specify strace to follow the child processes.
Child processes are nothing but the processes created by another process. Syntax to trace a process with PID and follow the child processes:
sudo strace -f -p pid
To test it out, let’s attach strace to the bash:
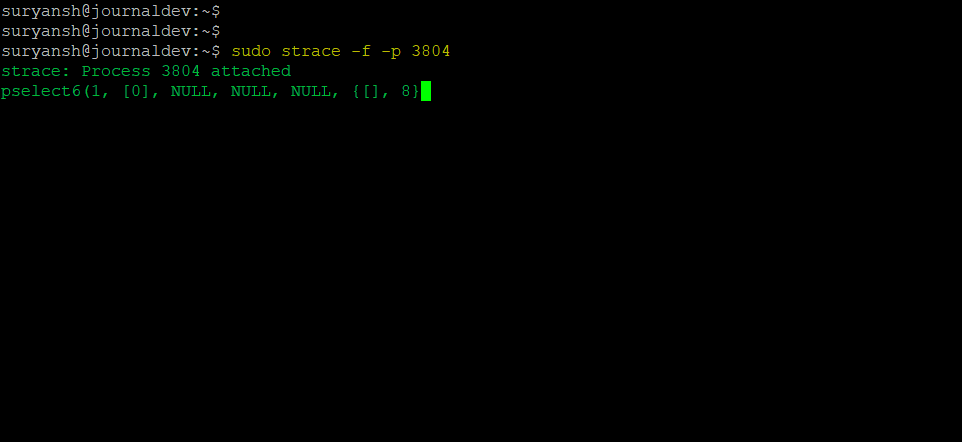
Using the ps command you can quickly find out the PID. We got two terminal sessions, one for the output of the strace command and the other terminal for an idle bash session. The PID for the other idle bash session on our system is 3804.
When we execute the above syntax, you can see that the idle bash session is waiting for the input.
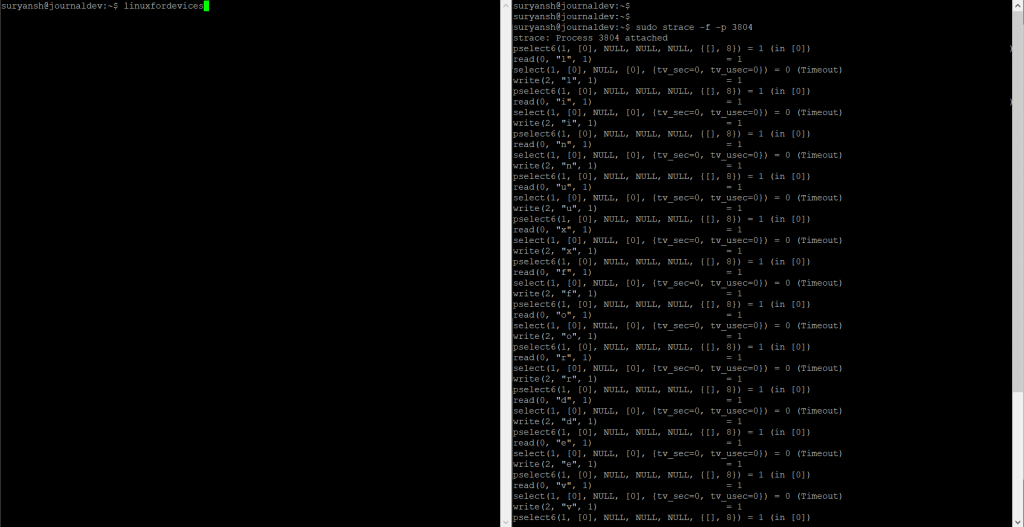
Now if we give input on the idle bash session, you can see strace giving output on the other terminal session.
Summary of system calls made by a process using strace
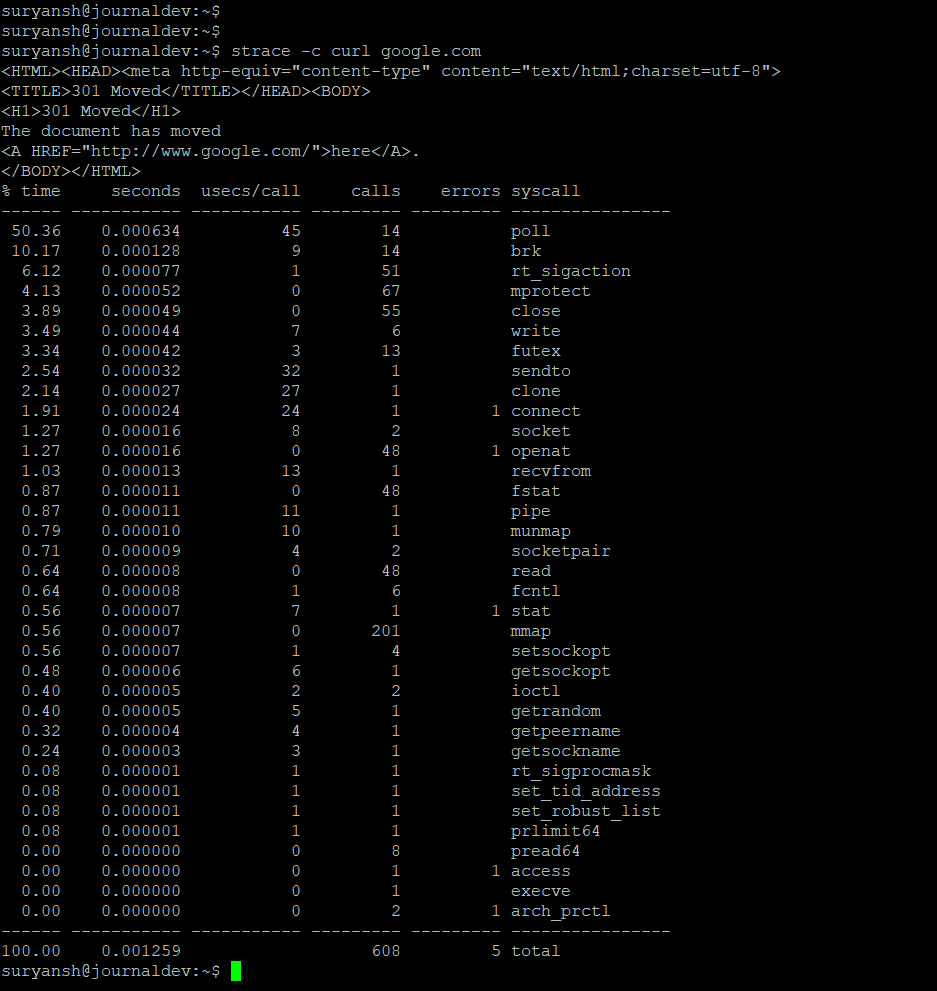
To get the summary of all the system calls made by a process, the -c option is used with strace command.
Syntax to get summary of the system calls with the strace command:
strace -c curl google.com
Conclusion
strace is a great utility for debugging, diagnostics, learning system calls, and much more. It is a very powerful and handy tool. It is available across all Linux distributions.
Thank you for reading! 😀


