The Linux terminal is a really powerful tool where you can do anything. In this article, I’m going to teach you how can you read the online free Wikipedia on your Terminal itself without going through the hassle of opening a web browser.
Installation
There are 2 methods via which you can install the wiki package on your distribution. Let’s look at each of the methods one by one.
Method 1 for Installation
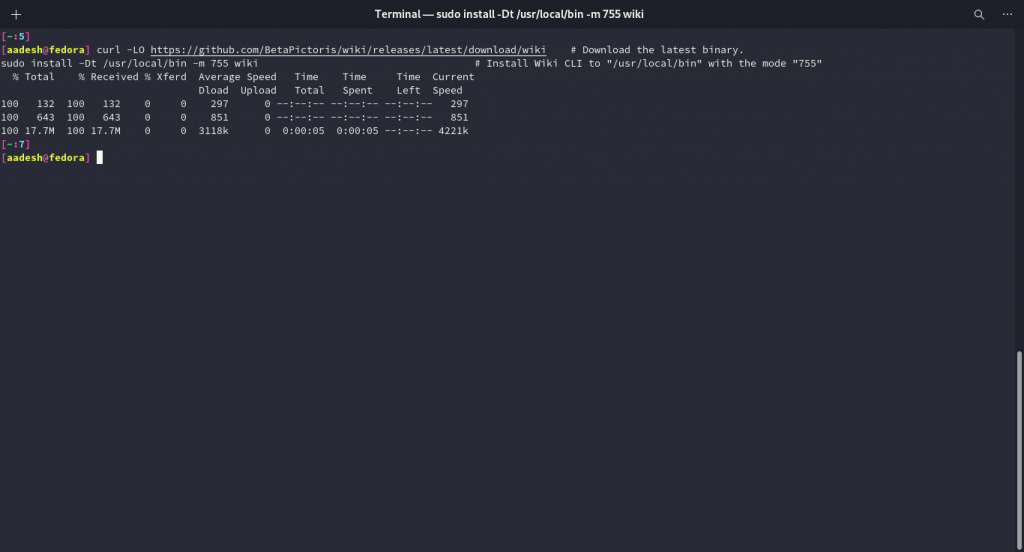
Download and install from the GitHub release page via these commands:
curl -LO https://github.com/BetaPictoris/wiki/releases/latest/download/wiki    #Download the latest binary.
sudo install -Dt /usr/local/bin -m 755 wiki # Install Wiki CLI to "/usr/local/bin" with the mode "755"

The package is now installed, skip to the Usage section to learn how to use it. Here we’ve used the curl and git commands.
Method 2 for Installation
You can also build from source, but in that case, you must have ‘Go’ and ‘Git’ dependency installed on your distribution. To do this, type the following commands in your Linux Terminal if you have Ubuntu/Debian or their derivative Operating Systems :
sudo apt update && sudo apt install golang-go git
And for Arch Linux and their derivative operating systems, Type :
sudo pacman -S go git
Now, to clone and install the project, type the following commands :
git clone git@github.com:BetaPictoris/wiki.git      # Clone the repository
cd wiki                                             # Change into the repository's directory
make                                                # Build Wiki CLI
sudo make install                            # Install Wiki CLI to "/usr/local/bin" with the mode "755"
The wiki is now installed on your system.
How to view Wikipedia in the terminal
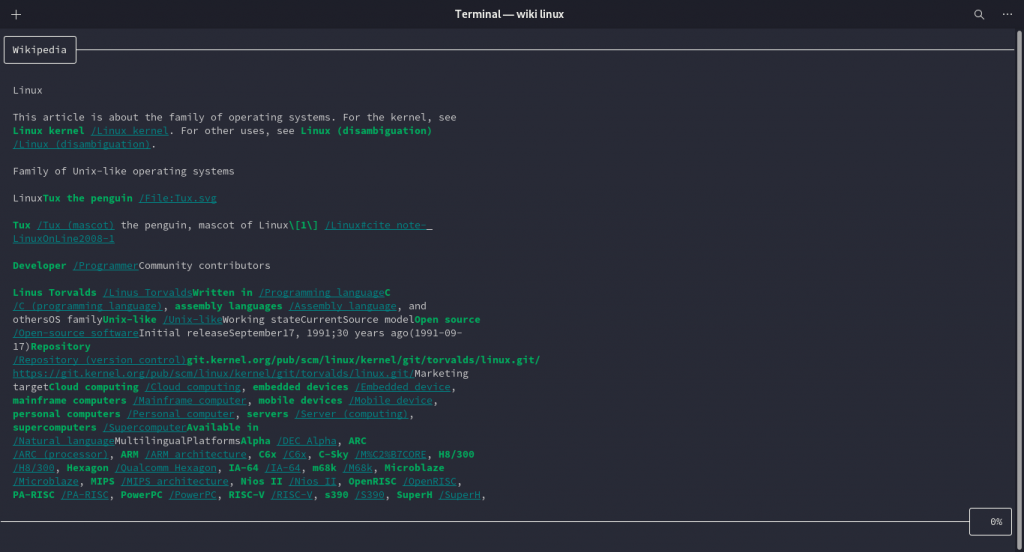
The usage is really simple, you just type wiki followed by the search term, for example :
wiki linux
The above command gives the following output :

You can scroll down with the help of the mouse or use the arrow keys to navigate. To exit, simply press the Escape key on your Keyboard.
