Screenshot is an essential thing to have, and has many practical applications, be it collaboration with colleagues and/or clients, creating tutorials for applications or websites, or for online meetings or webinars. It might also come in handy for personal knowledge management, by capturing important information such as reference materials, notes, or other valuable information.
With Windows, you have “Snipping Tool” to capture screenshots and Xbox Game Bar to make screen recording. With macOS, you have “QuickTime Player” and “Screenshot” apps to take screen recording and screenshots, respectively.
So while Windows and macOS users have their built-in tools for screen capturing, Linux users often look for applications to fulfill this need. This is where Spectacle comes into play. Spectacle is a screenshot tool designed specifically for Linux Systems by KDE, and is the go-to choice for most Linux users for its ease of use, versatility and customization.
Installing Spectacle On Linux
Method 1 : Using package manager
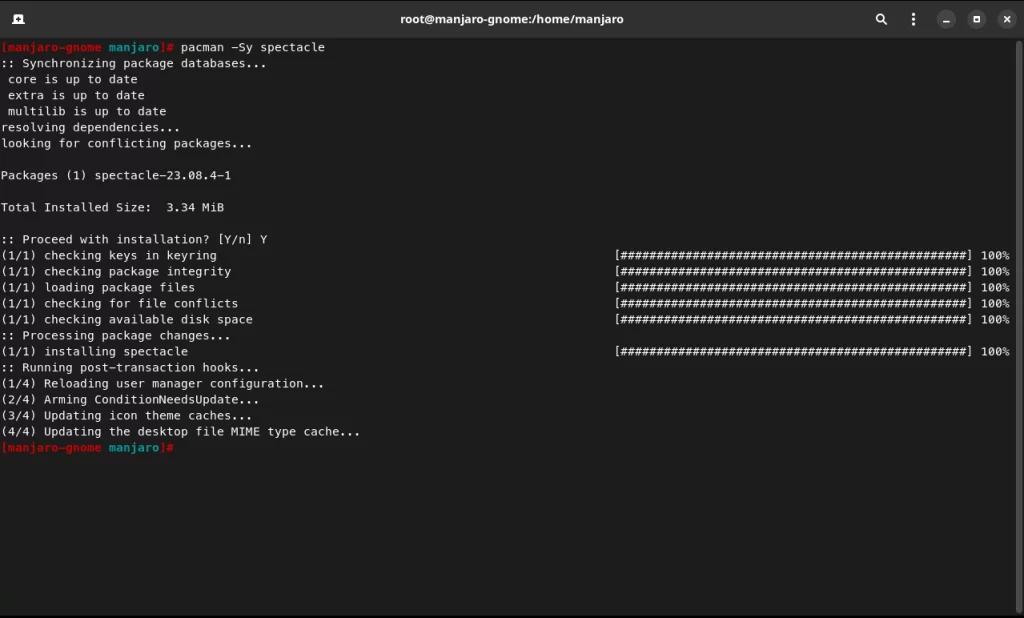
You can directly install Spectacle using the default package manager for your distribution. In my case, I’m using Manjaro (Arch-based distribution), with the package manager being pacman. So in my case, I’ll be running the following command –
sudo pacman -Sy spectacle
In case you’re using a Debian or Ubuntu based distro, use the following command –
sudo apt install spectacle
Or if you’re using Fedora, you can run the following command –
sudo dnf install spectacle
Method 2 : Using flatpak.
If your distribution supports flatpak, you can install it by referring to this article. Otherwise, if you already have flatpak installed, you can run the following command –
flatpak install flathub org.kde.spectacle
Customising Spectacle
After installing spectacle, you might want to customize it according to your own needs. Spectacle provides a very user-friendly interface for customizing the screenshot settings. To access this menu, you first have to open spectacle and then press on the Configure Spectacle button. By default, whenever you open spectacle, it’ll take a full-screen screenshot. And the default screenshot key would be the print screen or “PrtSc” key.
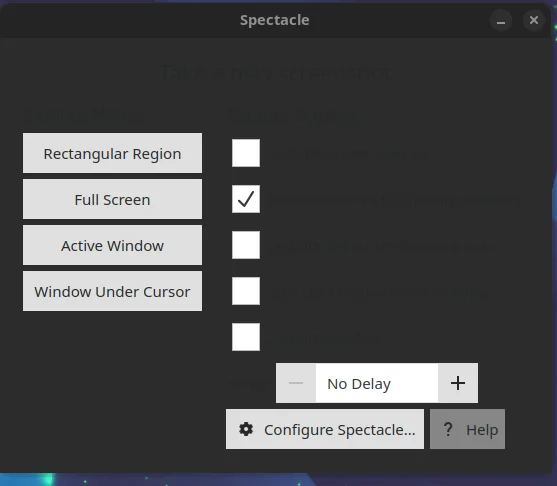
When opening the configuration menu, you will be greeted with this window.
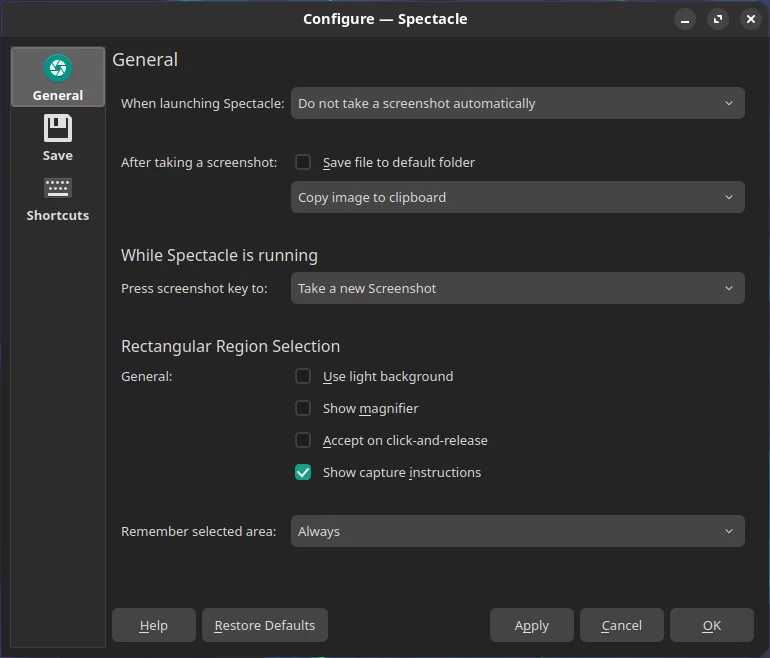
We’ll only be going over the main settings that you might want to change from the default settings. The first one being changing the default behavior when opening Spectacle. It’s set to take a full-screen screenshot by default, which might not be desirable, hence you can change it not take a screenshot or take a screenshot using the last captured mode. Apart from that, you might want to change the settings for rectangular region selection so that it suits your needs.
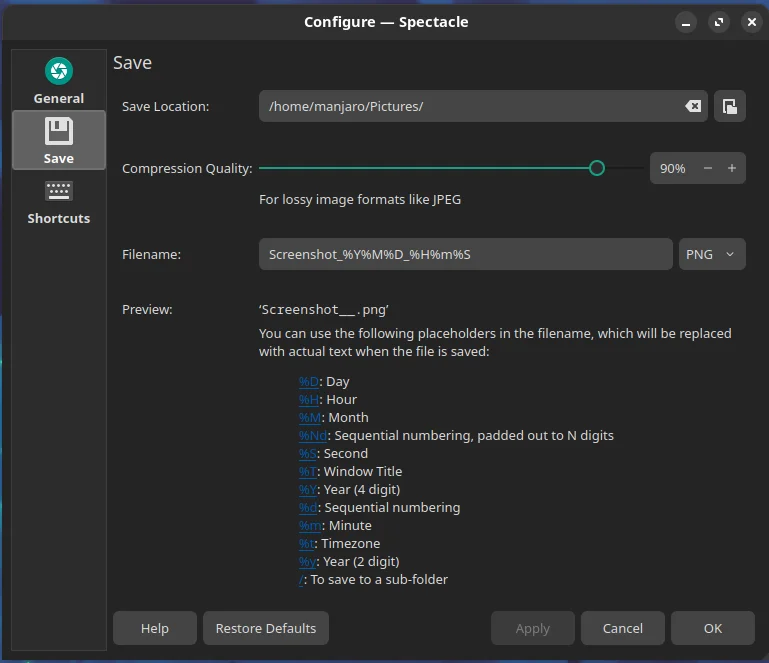
Moving on to the Save settings, the main setting you might want to tinker is the save location. You can assign one particular folder labelled as “screenshots” to better organize your files or any other folder according to your need. Other than that, you might want to delve deeper into the compression quality of the image as well as the default filename of the saved screenshot. But for most cases, the default settings in these seem sufficient.
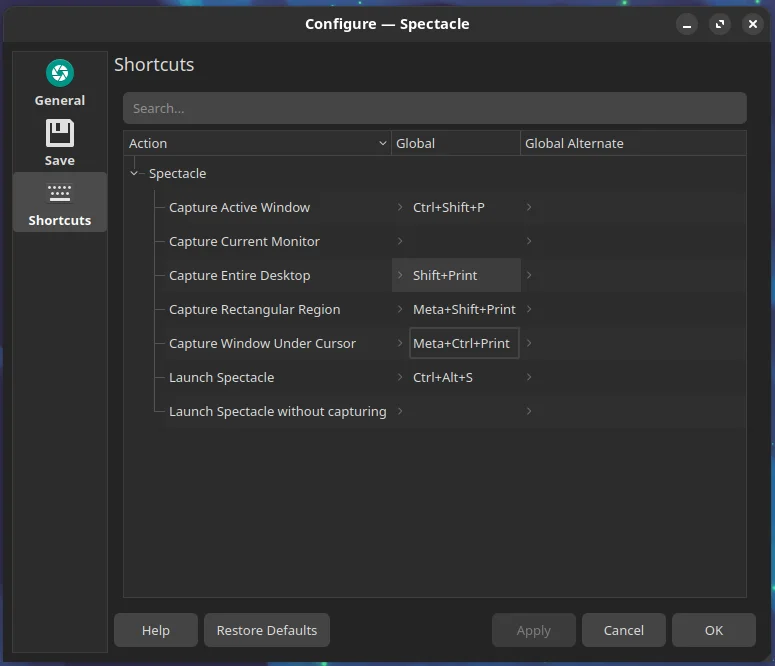
Next, in the shortcuts menu, the one thing you might want to have a shortcut for is for launching Spectacle and for capturing screenshots. You can set custom shortcut by pressing on the relevant shortcut you want to customize, then click on Custom and press the Shortcut key you want to set for that particular setting.
Conclusion
In this module, we discussed Spectacle, which is the go-to screenshot tool for Linux users due to its seamless integration with the KDE Environment, along with its user-friendly interface and easy configuration options. We also explored the various ways you can customize Spectacle to best suit your needs. If you want to look at the source code for Spectacle, you can do so from here. If you face any bugs while using Spectacle, you can report them over on this link – https://bugs.kde.org. In case you’re looking for screen recording tools, you can refer to this article.

