In this tutorial we’ll install LetsEncrypt on Nginx web server on a Debian machine.
What is LetsEncrypt?
LetsEncrypt is a not-for-profit certificate authority providing digital certificates for secure connections enabling HTTPS for websites and services. Certificates can be automatically obtained, configured for use, and even renewed on time securely and transparently.
What do you need to install LetsEncrypt on Nginx?
A debian machine with a fully functional Nginx web server installed and, a domain name of your own.
The easiest way to secure Nginx with LetsEncrypt is using the Certbot’s Nginx plugin, and following the prompts.
What is Certbot?
Certbot is the most popular ACME client, officially recommended by LetsEncrypt for users with shell access. It can obtain, install, and renew certificate automatically with no downtime. It is available on most platform, and easy to use.
Steps to Setup LetsEncrypt on Nginx
The recommended way of installing Certbot is through snapd, so we’ll be first installing snapd since Debian doesn’t come pre-installed with snapd.
Step 1: Install Snapd
Before installing the Certbot make sure your repositories are up-to date on your Debian machine by using the apt command:
1 | sudo apt update |
To install snapd execute the following command,
1 | sudo apt install snapd |
and then:
1 | sudo snap install core |
Step 2: Install Certbot using Snap daemon
Now after we have successfully installed snap daemon and we are ready to install Certbot! We can install certbot by executing the following command,
1 | sudo snap install --classic certbot |
Output:
1 2 3 | suryansh@journaldev:~$ sudo snap install --classic certbotcertbot 1.14.0 from Certbot Project (certbot-eff*) installedsuryansh@journaldev:~$ |
Now with that message above, we have successfully installed certbot.
To make the certbot command now available for usage, execute the following command with sudo:
1 | sudo ln -s /snap/bin/certbot /usr/bin/certbot |
Step 3: Installing LetsEncrypt on Nginx using Certbot’s autoconfiguration
Execute the following command, and follow the terminal prompts to automatically obtain, and install the certificate using Certbot’s autoconfiguration.
1 | sudo certbot --nginx |
You need to enter your email at this step,

Now following after entering your email, you need to go through the Terms of Service of LetsEncrypt with the link provided to the Terms of Service, if you agree with it, enter Y

Next, if you wish receive the campaigns from the organization, enter Y

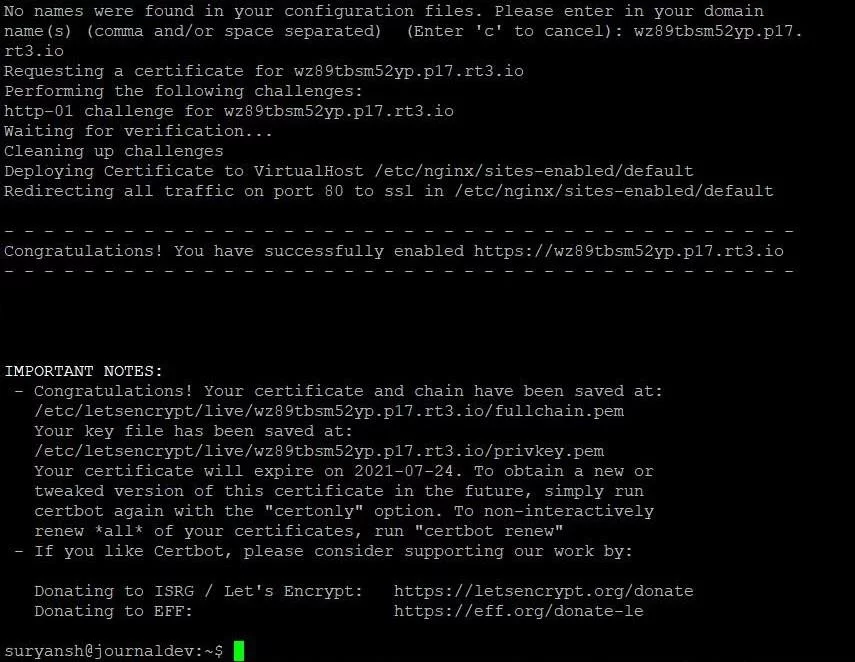
Now you are required to enter the domain name for which you are obtaining the certificate for,

This is what a successful HTTP challenge for validation of domain looks like,

Now the certificate is successfully installed with Nginx and is automatically configured by certbot to redirect all the traffic from the HTTP to HTTPS, with this you’ll be able to visit your website over HTTPS.
Step 4: Testing Certbot’s Automatic Renewal
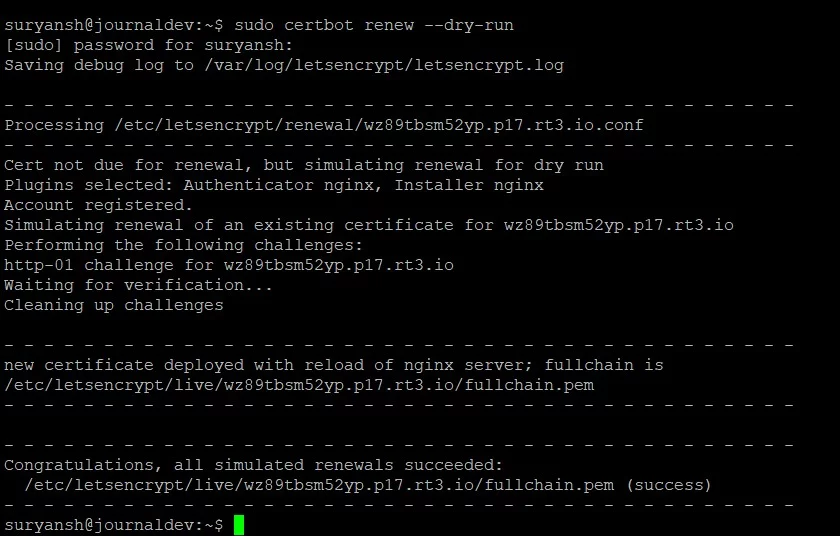
Now once you are done with everything it is important to test out the Certbot’s automatic renewal service, which will automatically renew the certificate so that it may not lead into any inconvenience. Execute the following command to test our the automatic renewal,
1 | sudo certbot renew --dry-run |
A successful test would look like the following:

Conclusion
LetsEncrypt is a great service to obtain free SSL certificates to provide secure connections, and usage of certbot makes it easier to obtain, configure, and renew the certificate automatically. We hope you now know how to setup LetsEncrypt on Nginx web server!


