In this article, we’ll teach you how to install Skype on Linux.
Steps for installing Skype on Linux (Ubuntu)
Follow the most comfortable procedure below to install Skype on Linux (Ubuntu).
How to install Skype on Ubuntu graphically?
You can install Skype directly from Ubuntu’s Software Center. Follow the steps below to install Skype on your Ubuntu machine.
Step 1: Launch Ubuntu’s Software Center
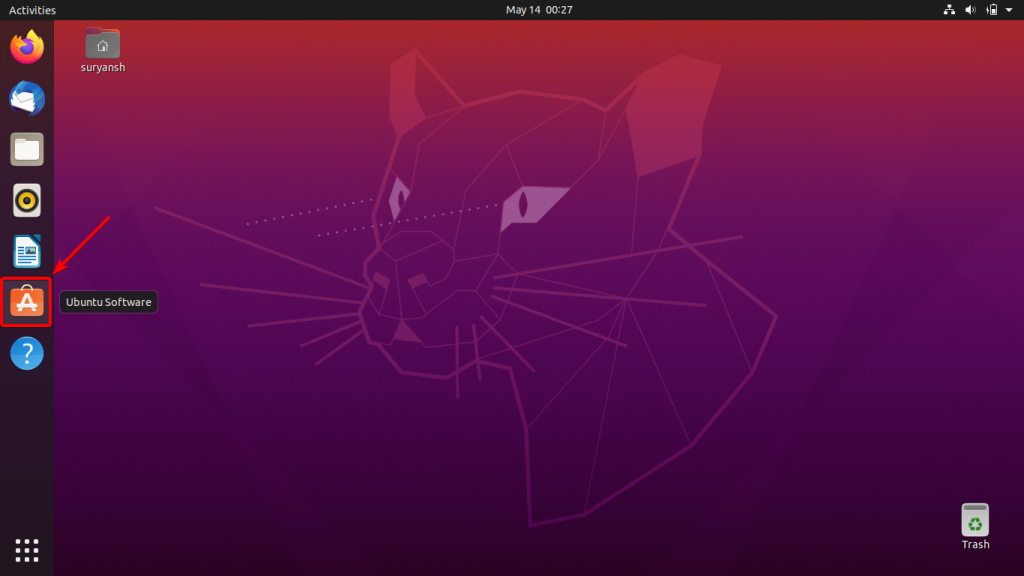
To launch Software Center, click on its icon from the launcher on the left side of your screen.
Step 2: Search for Skype in Software Center. Click on the search icon to open the search box, and then enter Skype in the search box to search for it.
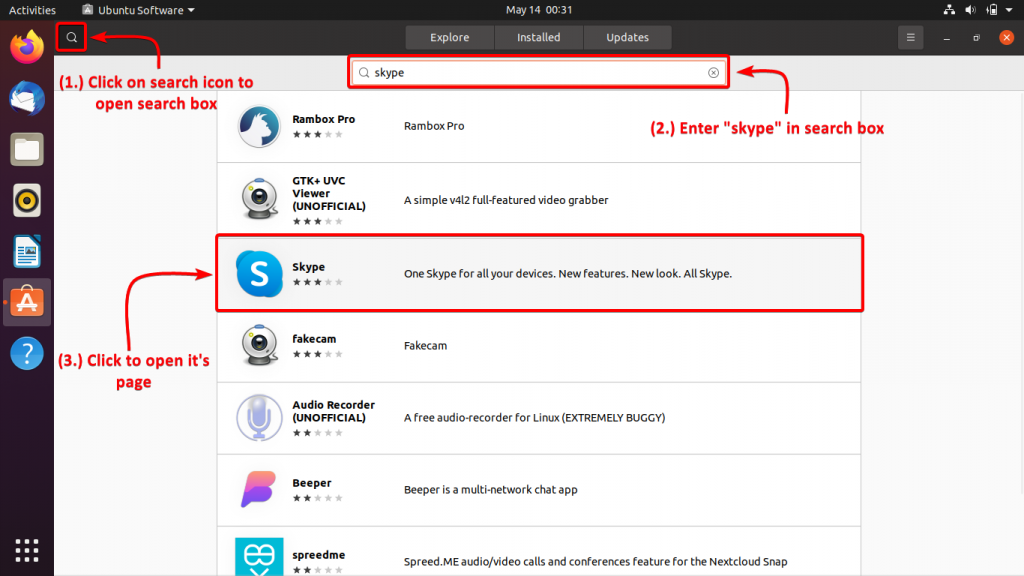
Click on Skype’s icon to open its Ubuntu Software Center page.
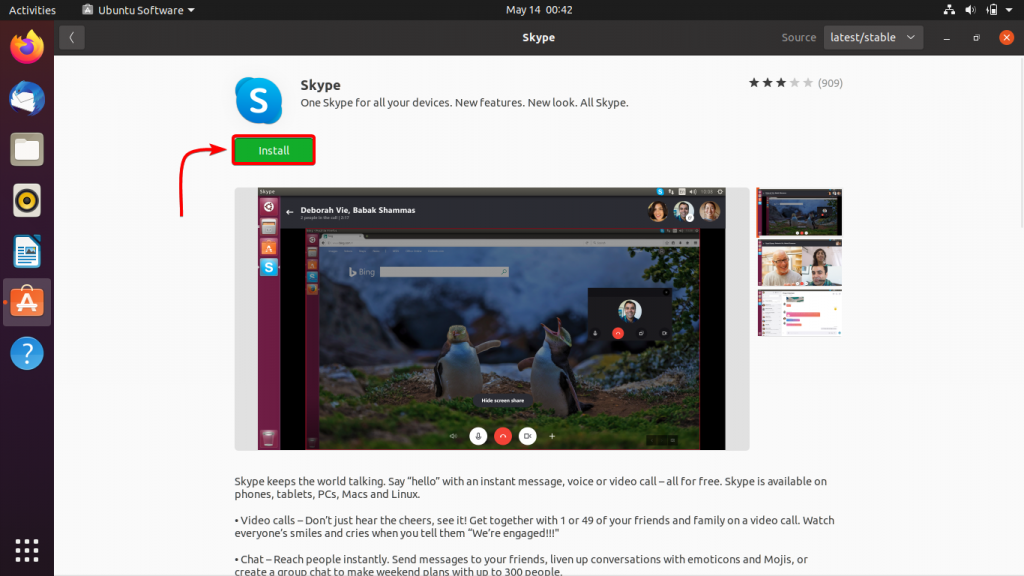
Step 3: Click Install. To install Skype on your machine, click Install to start with the installation procedure.
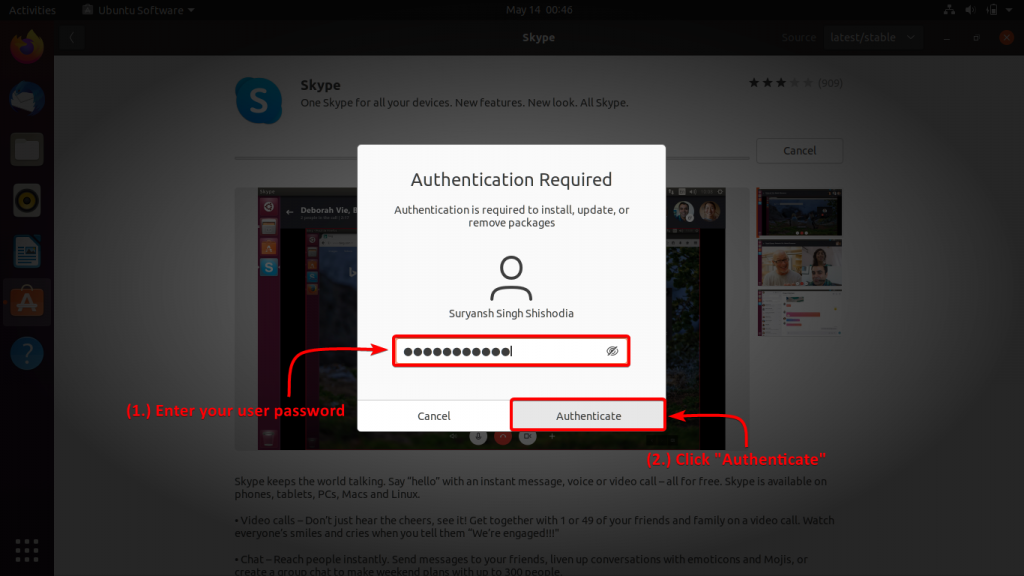
It will require you to authenticate your user to proceed further with the installation. To proceed, enter your user password and click Authenticate.
It may take a while to proceed further with the installation. Once the installation finishes, we can proceed further to launch Skype.
Step 4: Launch Skype from Activities. To launch Skype, go to Activities on the top-left of your screen and search for Skype, then click on Skype’s icon to launch it.
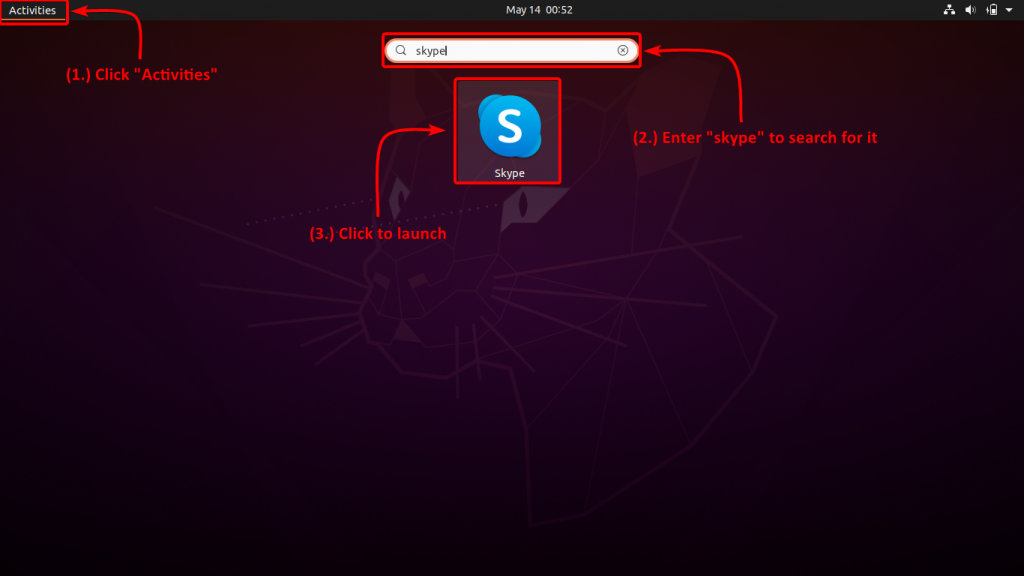
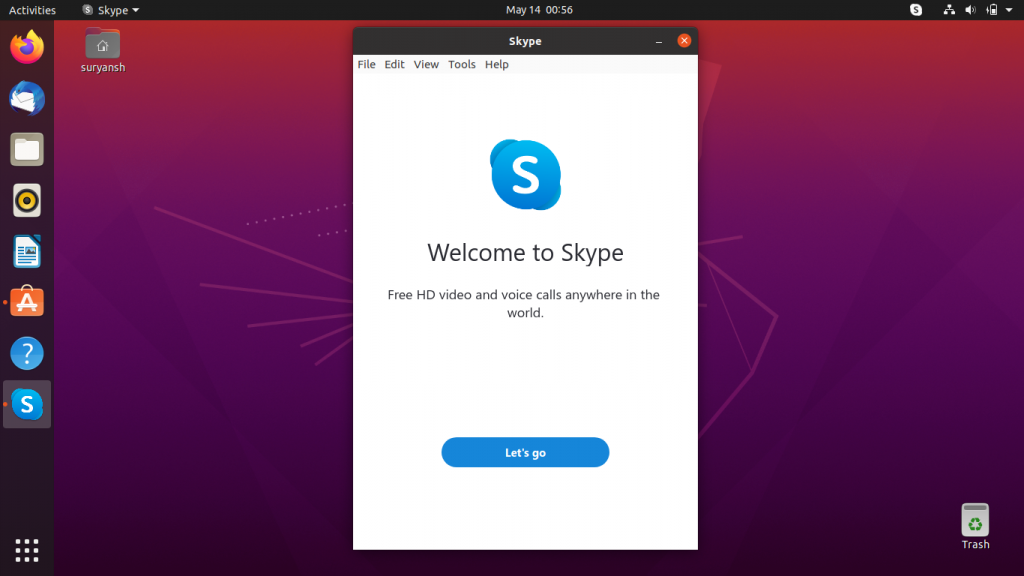
Congratulations! We have successfully installed Skype on Ubuntu!
How to install Skype on Ubuntu using Terminal?
Launch a new terminal session by pressing CTRL + ALT + T. Skype can be installed on Ubuntu in two ways, either by using the deb package or by using snap.
To install through the deb package, download the latest Skype .deb package by using the wget command:
wget https://go.skype.com/skypeforlinux-64.deb
After download, execute the following dpkg command with sudo:
sudo dpkg -i skypeforlinux-64.deb
If it gives you errors because of required dependencies, use the apt command with sudo to install dependencies.
sudo apt-get install -f
Then run the above dpkg command again. Now search for Skype in the Activities on the top-left of your screen, you must be able to see Skype’s icon. Click on it to launch it.
Alternatively, you can also install using the snap daemon. Simply execute the following snap command to install Skype:
sudo snap install skype
After installation, you will be able to search for Skype in Activities on the top-left of your screen. Click on its icon to launch it.
Steps for installing Skype on Fedora
Follow the most comfortable procedure below to install Skype on Fedora.
How to install Skype on Fedora graphically?
As Skype is not available on Fedora’s Software Center, follow the steps below to install Skype on your Fedora machine.
Step 1: Launch Firefox web browser and get rpm package from official Skype website
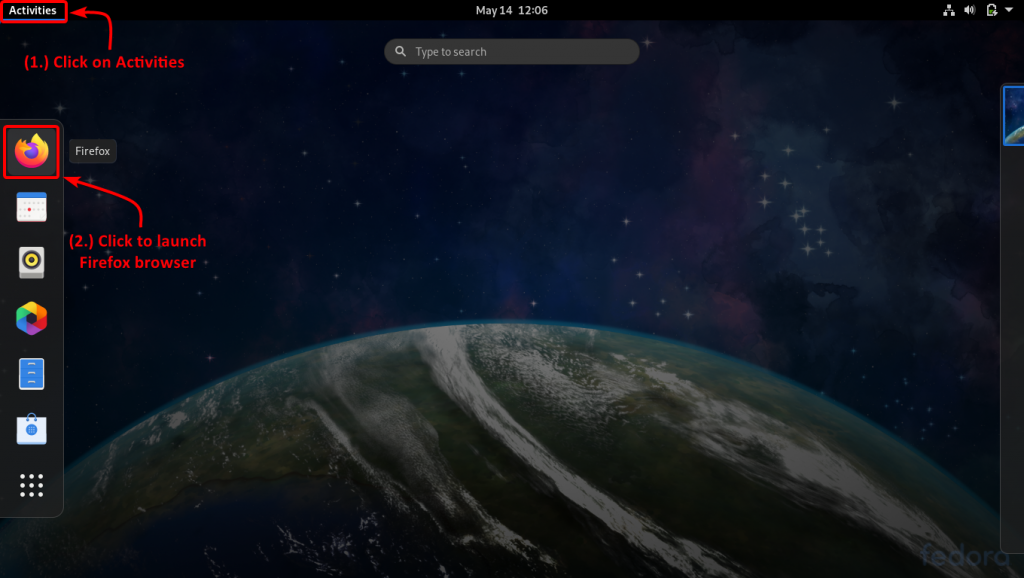
Then visit https://www.skype.com/en/get-skype/ and click “Get Skype for Linux RPM”

If you cannot see “Get Skype for Linux RPM” click on the small downward arrow ![]() and choose from it. Save the file, and proceed to the next step.
and choose from it. Save the file, and proceed to the next step.
Step 2: Click on the file you have just downloaded to launch the RPM installer.
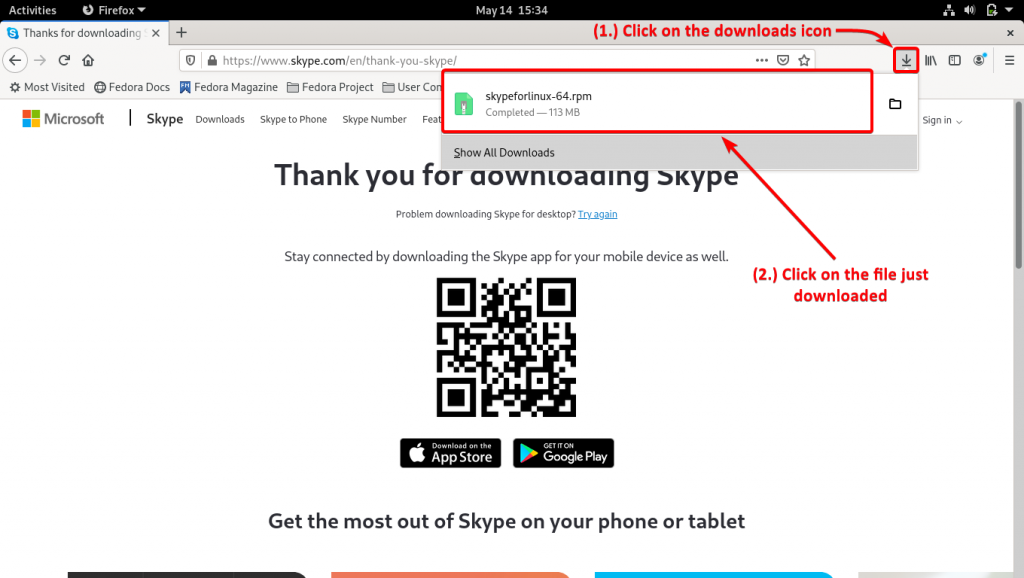
It will launch the package installer window and then click on Install to start with the installation procedure.
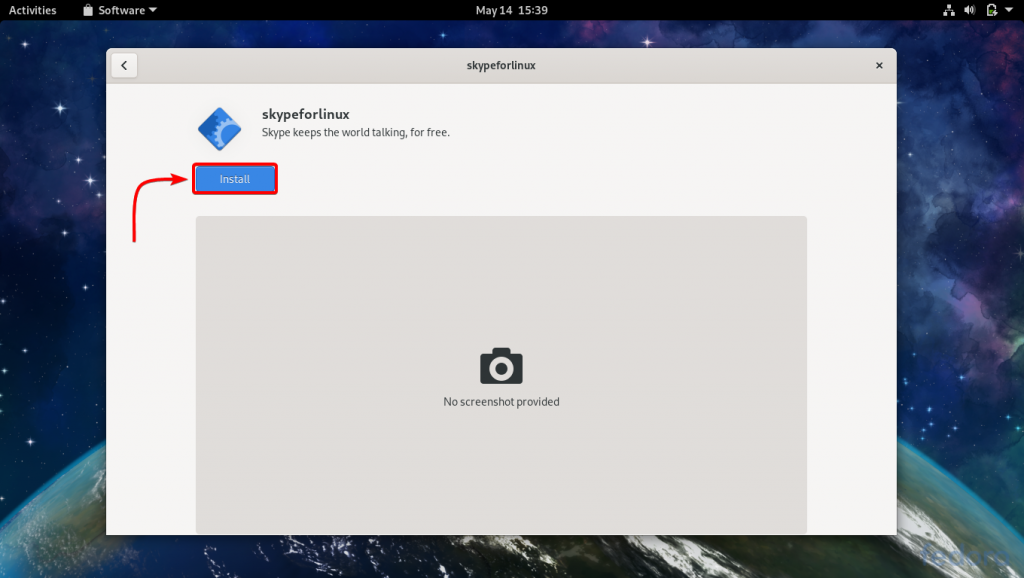
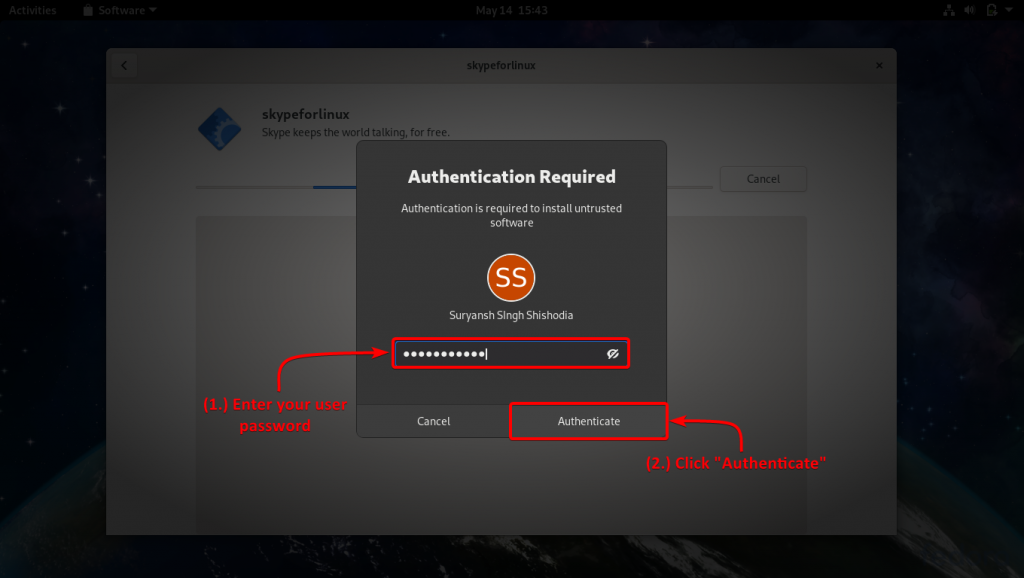
It will require you to authenticate your user to proceed further with the installation. Enter your user password and click Authenticate to proceed further.
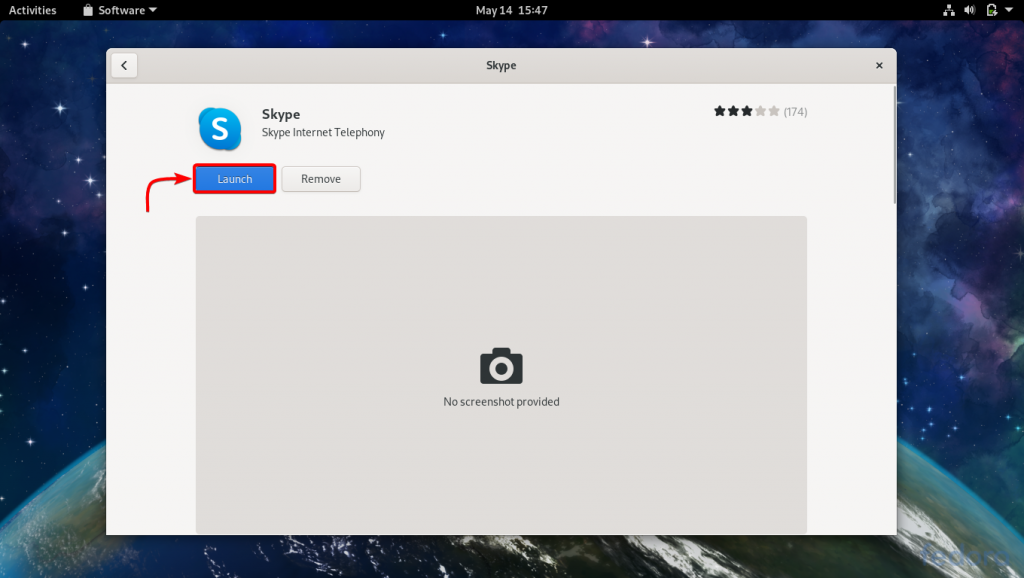
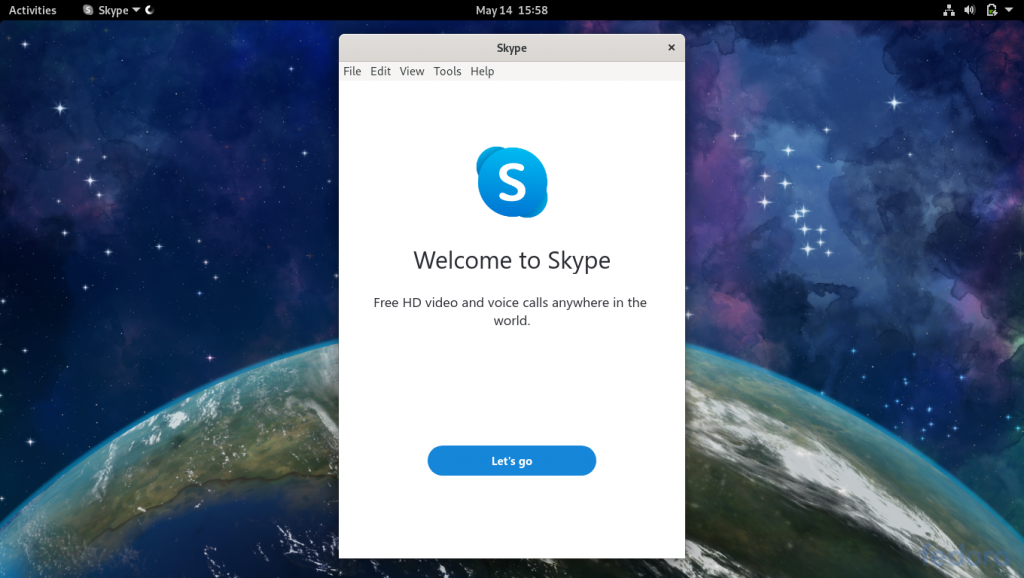
It may take a while for the installation to complete after which you can directly launch Skype by clicking “Launch”
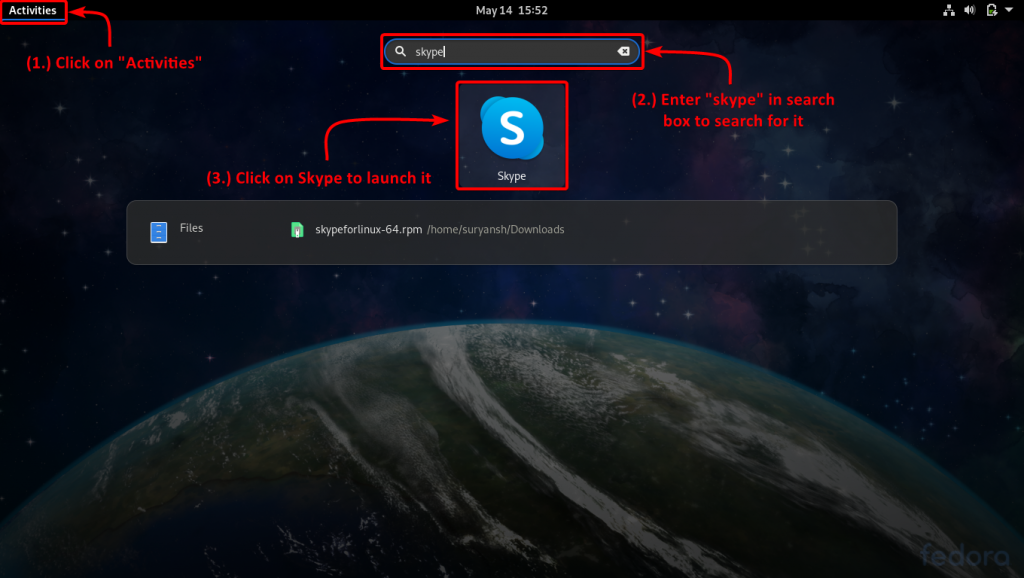
Alternatively, you can launch Skype from Activities on the top-left of your screen by searching for Skype in Activities.
Congratulations! We have successfully installed Skype on Fedora!
How to install Skype on Fedora using Terminal?
Launch a new terminal session from Activities on the top left of your screen. Now, get the official Skype RPM package with the help of the following wget command:
wget https://go.skype.com/skypeforlinux-64.rpm
Once you get the RPM package, now we proceed to install it using the yum command with sudo:
sudo yum install skypeforlinux-64.rpm
Execute the above command in the same directory where you have downloaded the RPM package. After installation, you can launch Skype from Activities on the top left of your screen by searching for it.
Conclusion
It is simple to install Skype on both Ubuntu and Fedora. Follow the steps exactly as mentioned above.
Happy Learning! 🙂


