

GNOME is one of the most popular Desktop environment on Linux based distributions, it is the default DE in many distros such as Ubuntu and Fedora, and therefore it is the Desktop Environment which have been used by most of the Linux users at least once in their Linux journey.
Now, Tiling Window Managers are excellent alternative for desktop environment for the users who prefer to navigate via their Keyboard rather than the mouse. The word ‘Tiling’ itself describes that whenever you open a new window, it automatically adjusts to the screen along with any other open window, this saves you time. And when you set up keyboard shortcuts for every application, the whole process becomes incredibly fast. There are many tiling Window managers such as i3wm, Sway, Hyprland and many more.
Both GNOME and Tiling window Managers seems to be located at the extreme ends of the spectrum, as GNOME is mostly navigated with the help of mouse. However, there is a middle ground. As you might know that GNOME Desktop Environment support extensions which add a lot of features to the desktop. And with the help of an extension named ‘Tiling Shell’ we can achieve this tiling feature (and more) on GNOME.
Features of Tiling Shell
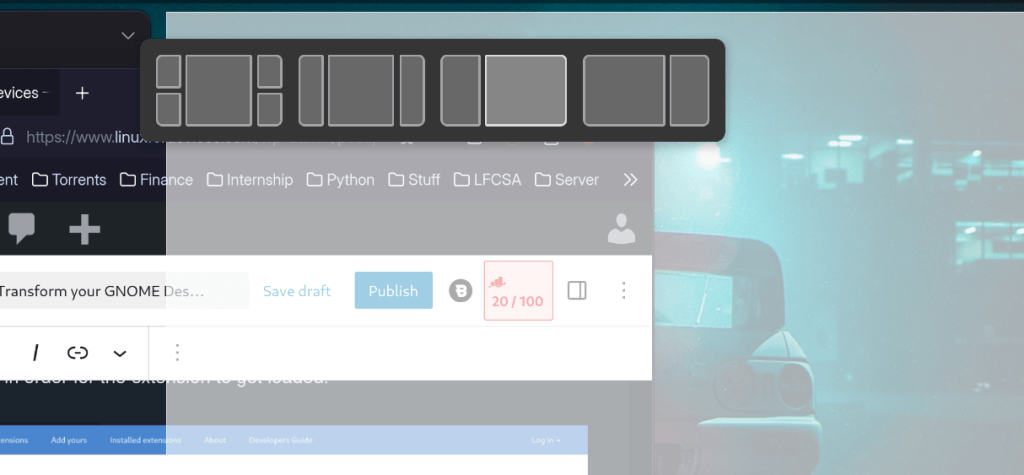
Not only does this extension allow you to ’tile’ new and open windows, you can also edit the layout in which the open windows will maximize. This feature is similar to the ‘Snap Assist’ feature in Windows 11 in which you can hover over the Maximize button, and it shows you a location on the screen where it will be tiled.
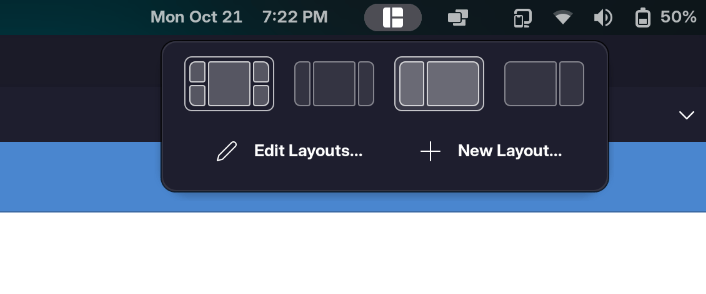
While Windows offers you a fixed layout, you can edit the layout of the maximizing windows using this extension as per your convenience. Yes, the initial set up might feel gruesome, but the end result is really functional. Let’s install this extension on our PC!
Installing Tiling Shell on GNOME
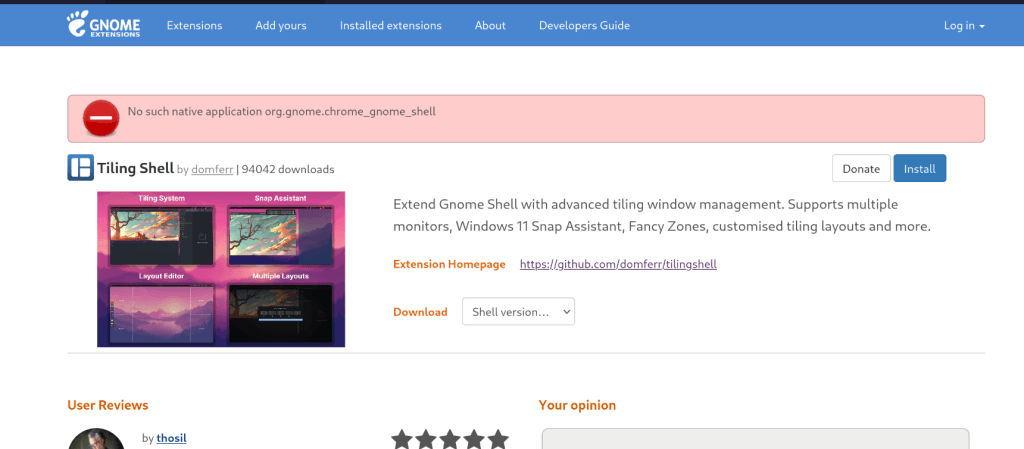
Regardless of your distribution, just install the Chrome GNOME Shell extension on your web browser (Firefox, Librewolf or even Chrome) and then proceed to the official GNOME extensions site to install Tiling Shell on your PC. You can also check out the GNOME Extension Manager Application, which lets you install the extension without having to go through the web browser extension.
From here, just click on the install button and it should be enabled automatically on your PC. If not, just log out and log back in in order for the extension to get loaded.
Once installed, you can just click on any window and then press the Ctrl key on your Keyboard in order to move it to a dedicated ‘zone’ and once you drop the window in that zone, it will be perfectly tiled.
You can also drag the window at the top of your screen and a through a pop-up view, you can adjust that window to any portion of your screen.
We haven’t explored how functional this extension is with the help of the keyboard. We leave that for you to discover (you can even check out their GitHub page to learn the useful shortcuts).
Wrapping Up
Tiling Shell seems to be a really useful tool as I was missing the fancy zones on Linux which was introduced in the new Windows 11 operating system. This extension, however, is not a full replacement for something like Pop-Shell as that extension offers automatic tiling, which I can’t seem to do using Tiling Shell. So, you might want to keep that around if you use that extension.