Wi-Fi is incredibly convenient but comes with inherent security problems that make it riskier than a wired alternative. That’s because anyone can join a WPA-encrypted Wi-Fi network provided they know the password, allowing an attacker direct access to other devices on the network and network traffic in general. Choosing a Wi-Fi password that is difficult to guess is very important, because, with a good password list and a program like Pyrit, even a strong password can be searched and cracked in a matter of minutes.
Pyrit gives us the capability to penetration test and assess the security of our wireless network. It offers efficient accelerated processing of WPA/WPA2-PSK passwords with help of GPUs. Pyrit uses a combination of CPU+GPU to enable even a faster processing. This tool compiles and runs on Linux, FreeBSD, as well as on macOS. In this module, we will see how to install and setup Pyrit on Kali Linux.
Pyrit consists of two parts
- Main module: The main module features the command line-client, the scheduling- and database-code and a basic extension-module that uses the CPU for computation. The main module is required for everyone…
- GPU support (Optional): The extension modules for Nvidia-CUDA and OpenCL may be installed optionally if available and supported by your hardware.
We can choose between OpenCL and CUDA if you have a compatible Nvidia-GPU; you may want to take a look at this page to find out if your hardware supports Nvidia-CUDA.
Installing Pyrit
Step 1: Update your OS
In your Terminal, run the below given command. This will update your Linux distribution:
sudo apt-get update -y

Step 2: Installing dependencies for Pyrit
In the Terminal, run the below command to install dependencies for Pyrit.
sudo apt-get install git python2-dev libssl-dev zlib1g-dev libpcap-dev -y
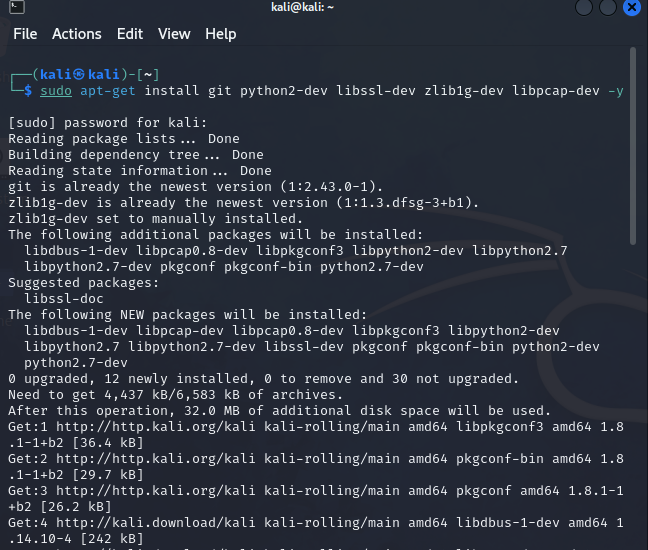
Step 3: Clone the source code from GitHub
Run the below command in Terminal, to clone the source code of this tool.
git clone https://github.com/JPaulMora/Pyrit.git

Step 4: Build Pyrit and install
Simply, enter the cloned directory and build the application using the command listed below:
cd Pyrit/
sudo python2 setup.py build
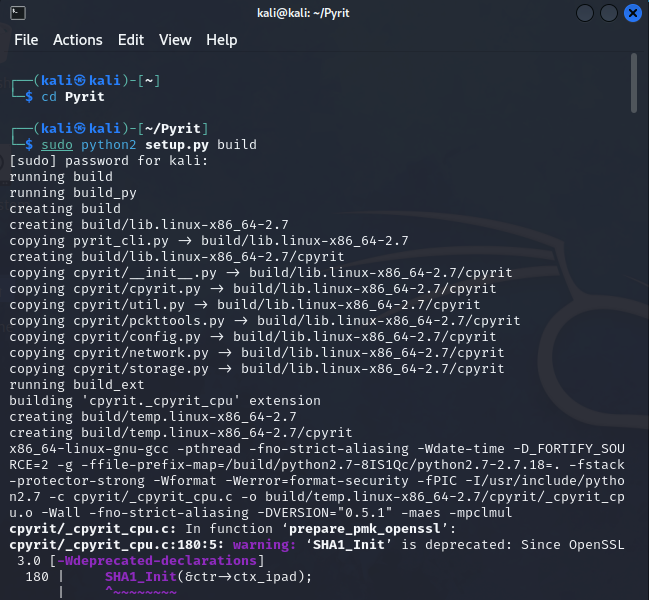
Now, you can simply install Pyrit using the below command:
sudo python2 setup.py install
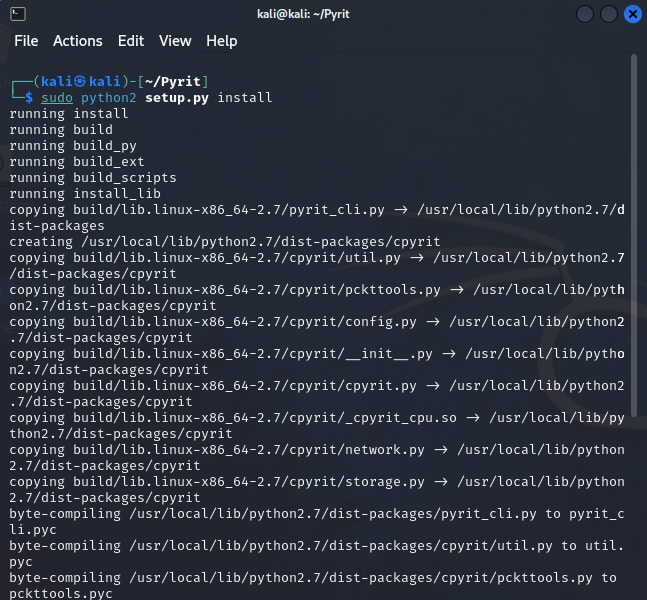
Using Pyrit for Penetration Testing
We can verify that Pyrit has been installed successfully, by running the following command:
pyrit list_cores
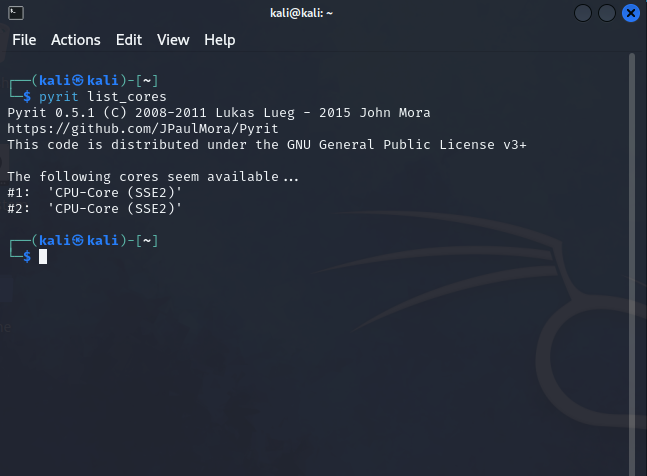
pyrit list-cores commandIf the installation went well, this command should give you information about the CPU cores that Pyrit can use.
The benchmark option computes and displays your system’s cracking speed:
pyrit benchmark
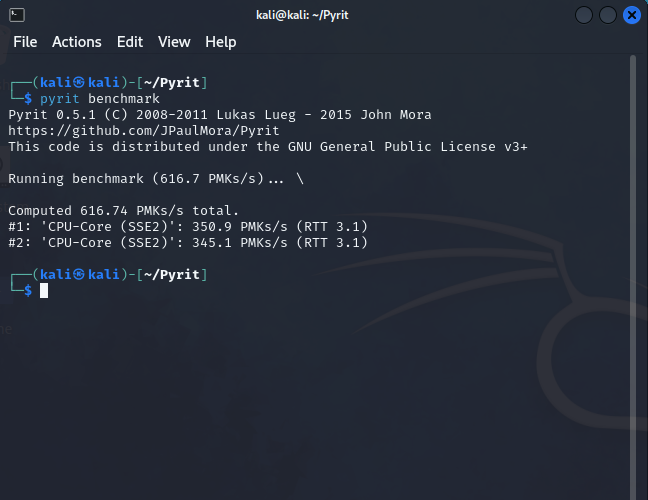
pyrit benchmark commandPyrit also has several features to import multiple password lists into a large database. To prevent duplicates, the import_unique_passwords command can also strip out passwords that appear multiple times in the same file we’re trying to import. After we have importing passwords to the database, we can start cracking them with the attack_batch option.
One helpful tool is the strip command, which strips down long capture files to only include relevant packets. And then there’s the verify option that lets Pyrit confirm results via recomputing.
Conclusion
This article has covered the steps necessary to install Pyrit on Kali Linux. First, we made sure everything was up-to-date, and then we installed all the necessary dependencies. Finally, we used the apt-get command to set up and verify the Pyrit app. We hope you enjoyed learning the Penetration testing tool using this tutorial, and you can also check out other articles on our site for more such content.
Also Read
- How to install and use anonsurf on Kali Linux?
- How To Turn Any Arch Based Distro Into A Hacking Beast?
- Top 5 Best Linux Distributions For Hackers/Pentesters


