Raspberry Pi is a credit card size computer with a single board. The small yet powerful machine is capable of many things and is used for different purposes like game servers, web servers, controllers, home automation, etc. The architecture of Pi is ARM and runs with a Linux operating system like Raspbian, Ubuntu, Arch, etc.
The board can be used as a desktop PC. We can connect input and output devices like mouse, keyboard, monitor, ethernet, etc. Geeks love programming on the board using languages like Python and C++ as it is a low-cost device. Although it can be used as a desktop PC, if you use the Pi as a web server, you may need to connect these I/O devices again and again for maintenance, which consumes more time.
Therefore, today in this article we will learn to operate the Pi remotely by using the SSH approach.
Prerequisites
I will assume that you have installed an operating system on your Pi like Raspbian, Ubuntu, etc. You will need a keyboard, mouse and a monitor only in the beginning to manage services on the Pi. At the end of the article, you will be able to use your Pi remotely with other machines.
I am using Raspbian which is the official OS for Pi. Let’s connect the mouse, keyboard and monitor to the board and boot it up.
SSH Approach
SSH(Secure Socket Shell) is a network protocol which lets you communicate with other computers even in an unsecured network. We will be able to access the board using the terminal interface. Let’s set up SSH on Pi.
First, boot up your Pi –
Before moving further let’s give a full upgrade to the system. Launch the terminal from the panel or press CTRL + ALT + T. Then hit the following command –
sudo apt update && sudo apt full-upgrade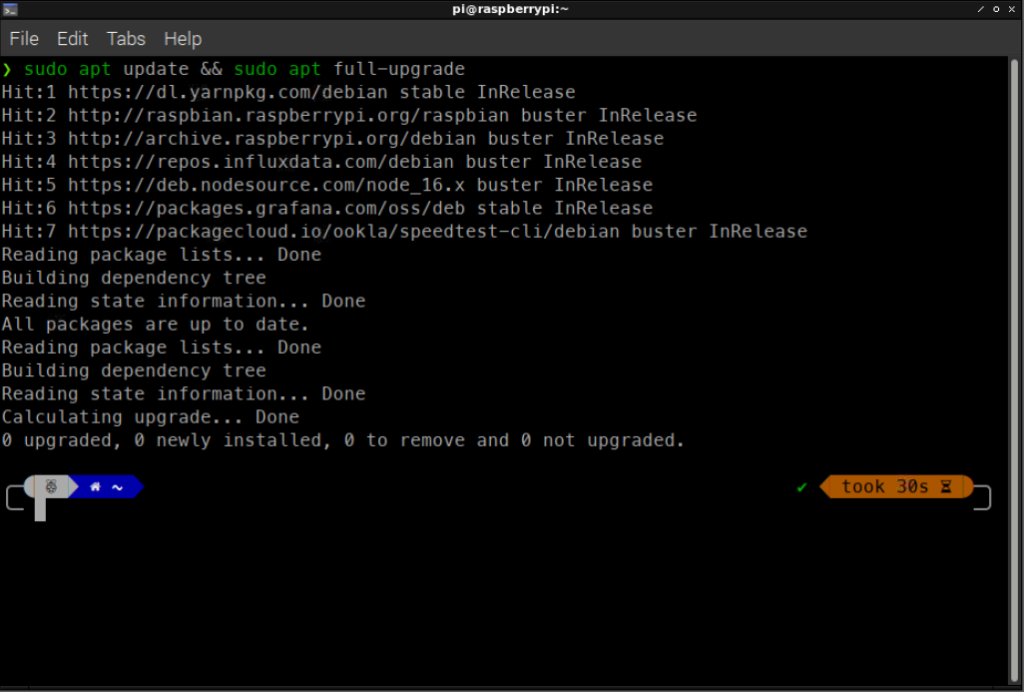
Now, close the terminal and head toward the Menu > Preferences > Pi Configuration. Refer to the below image-
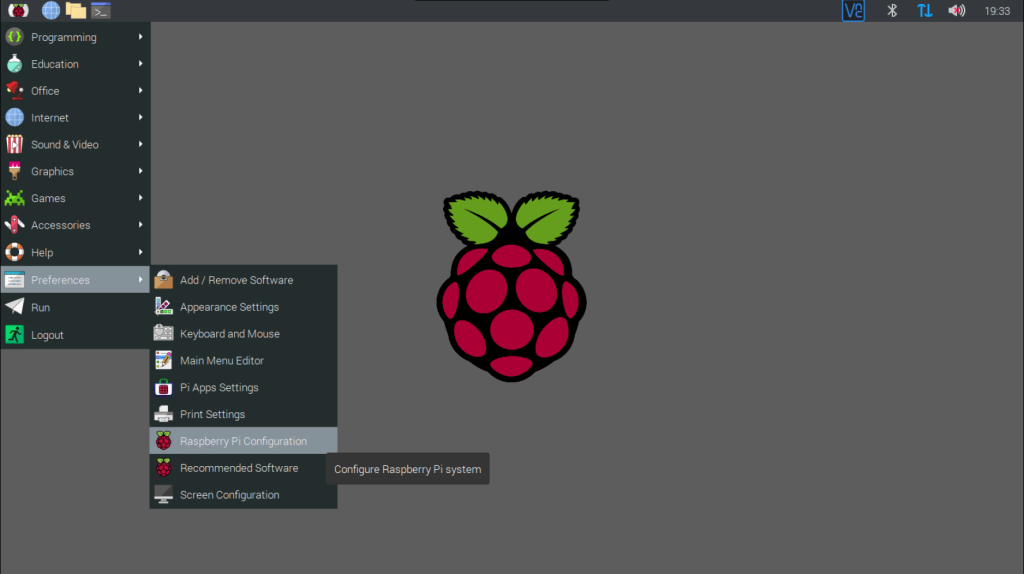
A new window will open. Head to Interfaces tab and enable the SSH service using the radio button.
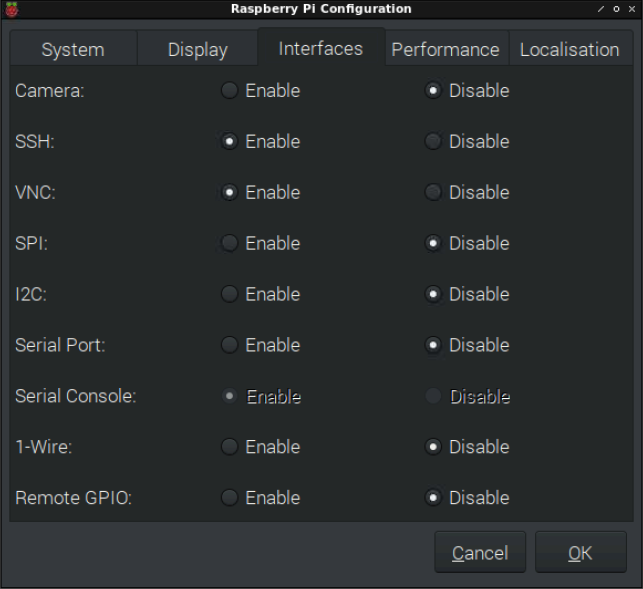
This will make sure that these services start automatically every time you boot your system. Connect to your wifi from the panel or if you have an ethernet cable that’s great just insert the cable into the board. Power off the board and disconnect the mouse, keyboard and monitor. And again power on the board.
Now come to your other machine through which you want to remotely access your Pi. I am using Ubuntu to connect with the Pi. If you are using Windows follow this tutorial to install the required packages.
For Ubuntu users, install with the following –
sudo apt install ssh-clientFurther commands will remain the same for any machine.
Let’s first find the IP address of Pi. Go to your router’s admin panel using http://192.168.0.1/ or you can find your gateway address using ipconfig (Windows) or ifconfig (Linux and Mac) commands.
Head to connected devices or bandwidth control section(depends on the router to router). And see the hostname of your Pi board and copy that IP address.
Refer to the below image –
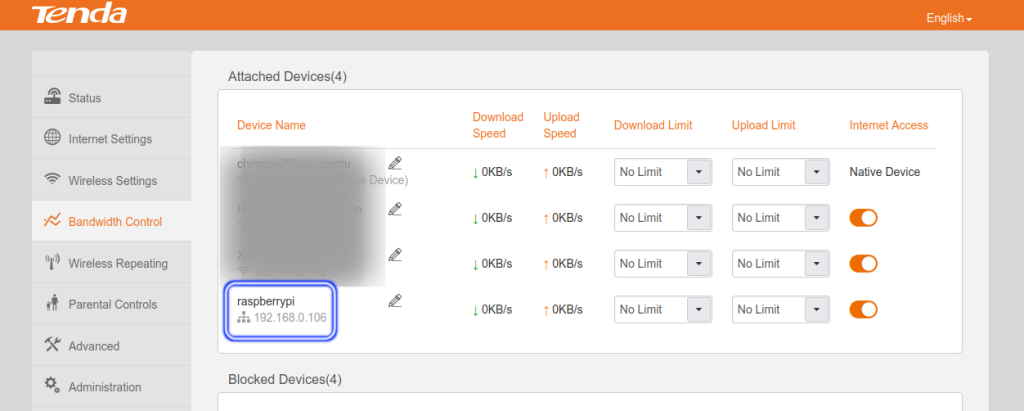
Now, launch a terminal application and hit the following command (Replace the IP address with your copied IP address):
ssh pi@192.168.0.106where pi is the username of your Pi board.
It will ask to save the fingerprint just type yes and hit enter –
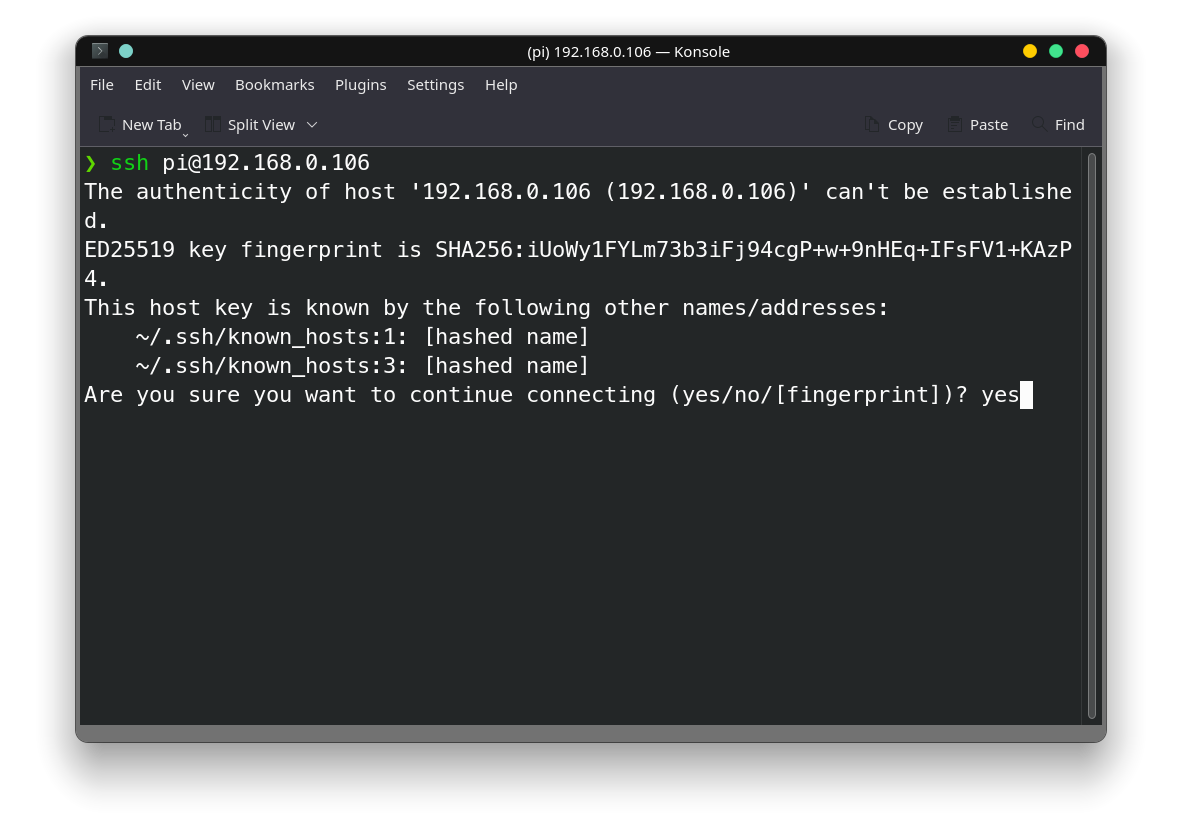
When prompted for a password type the password you use to login into your Pi and hit enter –
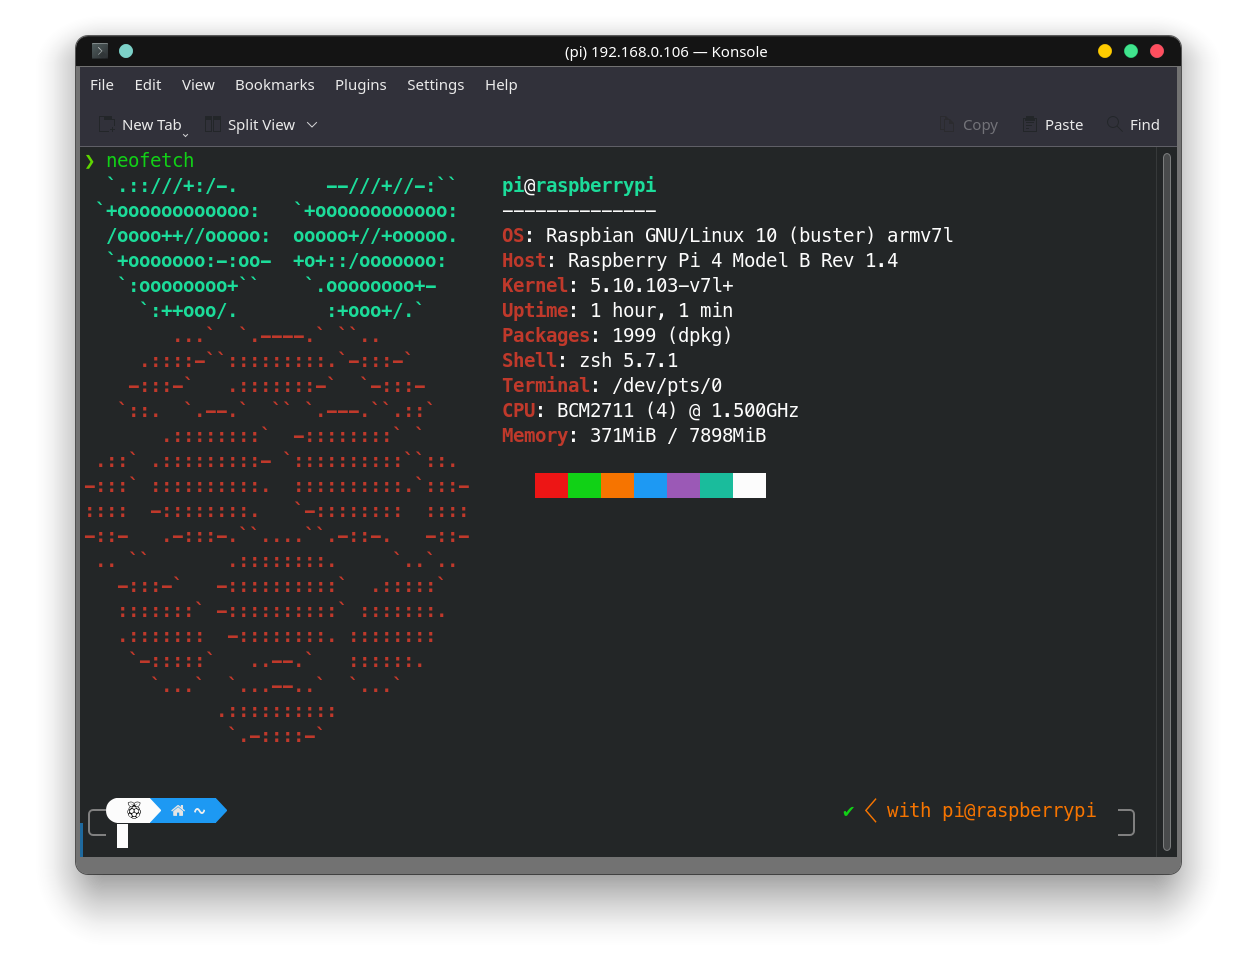
As you can see I am inside my Pi with the terminal interface. Now run commands you use to run on the board.
You can also GUI applications by passing a -Y parameter when connecting to Pi.
ssh pi@192.168.0.106 -Y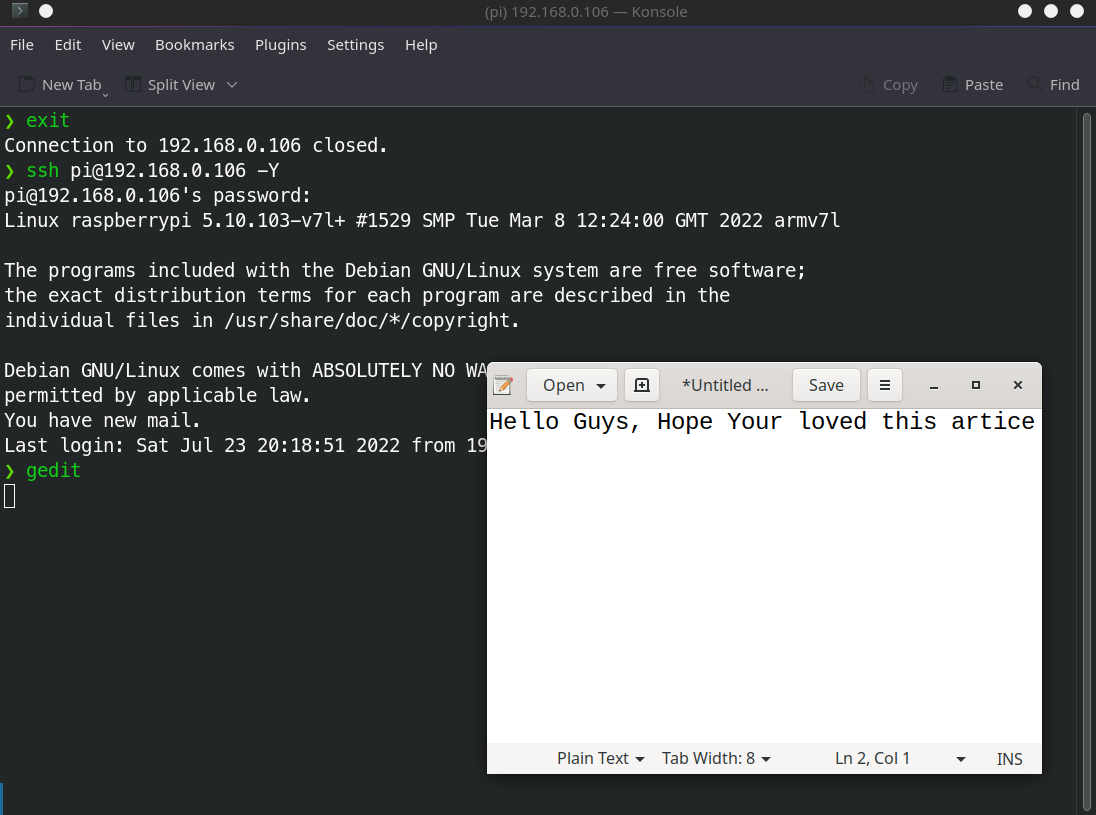
See how I am able to run gedit – a text editor on the Pi even with a terminal interface.
Summary
Using this approach will save your time and space on your desk. From now on access remotely by just powering on the Pi board.
Further Reading
- Top 10 Amazing Raspberry Pi Projects 2022
- How To Install NOOBs and Raspbian on Your Raspberry Pi
- Installing Ubuntu MATE on Raspberry Pi 4
