
Streaming an HEVC (x265) rip from a Jellyfin server on a Raspberry Pi is a fast way to peg the CPU and stutter playback, since HEVC needs far more horsepower to decode than H.264 does without a dedicated chip.
The fix is to convert HEVC to H.264 with ffmpeg, since H.264 (x264) plays back on far weaker hardware. This walks through installing ffmpeg, running the actual encode, picking sane crf and preset values, and speeding the whole job up with hardware acceleration.
Why convert HEVC to H.264 in the first place
HEVC is smaller but costs more to play back
HEVC (H.265) squeezes video into roughly half the file size of H.264 at the same visual quality, which is why phones and newer TV rips ship in HEVC by default now. The trade-off shows up the moment something has to play the file back. A modern phone or TV has a dedicated HEVC decoder chip, but a lot of older hardware, budget streaming boxes, browsers and single-board computers like the Raspberry Pi don’t.
That gap is what breaks streaming from a home server
Jellyfin, Plex and similar servers transcode on the fly when a client can’t play the source format, and on a Pi that transcode step is often the real bottleneck. Converting the file to H.264 once means any client built in the last 15 years can direct play it, with no transcoding needed at all.
Installing ffmpeg on Linux
This process is straightforward as the application is available in the official repositories of all the Linux distributions. However, if you find using the Terminal a little scary, then don’t worry, it will take just a couple of commands.
In Debian and Ubuntu-based distributions
Make sure that you have the universe repository enabled in Ubuntu Linux, and then you can easily install ffmpeg using the following command :
sudo add-apt-repository universe
sudo apt update
sudo apt install ffmpeg
However, because of the 2-year 6-month release cycle of Debian and Ubuntu respectively, and the distributions which branch off from both the distributions, you might get an older version of the application.
Current FFmpeg is 9.0.1 “Lei”, released in August 2026 with native VVC (H.266) support and more Vulkan-accelerated filters, and no stable Debian or Ubuntu release ships anything close to that yet through its default repositories.
The advice used to be to add ppa:jonathonf/ffmpeg-4 for a newer build, but that PPA is stuck on the old 4.x branch, only publishes for Ubuntu 16.04 and 18.04, and fails outright on any newer release with a missing Release file error. A five-year-old, broken PPA isn’t the fix it used to be, so skip it.
For a genuinely current build on Debian or Ubuntu, two options work better:
# Static build, no repository needed
curl -O https://johnvansickle.com/ffmpeg/releases/ffmpeg-release-amd64-static.tar.xz
tar xf ffmpeg-release-amd64-static.tar.xz
# Or via snap, which tracks upstream releases much more closely than distro packages
sudo snap install ffmpeg
Third-party PPAs for the newest FFmpeg version do exist too, but check who maintains one and how recently before trusting it on a machine that matters, since not all of them are well tested.
On Fedora Workstation
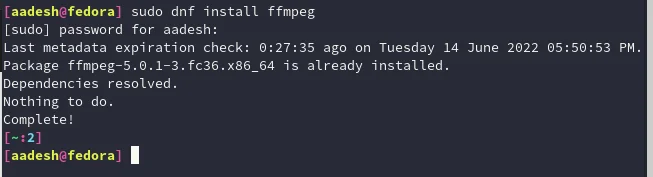
Just type the following command in the terminal :
sudo dnf install ffmpeg
On Arch Linux and Arch-based distributions
There are 3 versions of ffmpeg available for Arch Linux, they are ffmpeg, ffmpeg-git and ffmpeg-full. Out of which the first one can be installed using the pacman package manager and the rest are available using an AUR helper such as yay or paru.
I’ll recommend you to install the official version unless you know what you’re doing. Install it by typing the following commands in the terminal:
sudo pacman -S ffmpeg
Running the HEVC to H.264 conversion command
Let’s assume you have a video named Videox256.mkv in a directory, now you will have to navigate in the directory using cd command then type the following command :
ffmpeg -ss 00:00:00 -i "Videox265.mkv" -t 00:00:50 -map 0 -c copy -c:v libx264 -crf 18 "OutputVideox264.mkv"
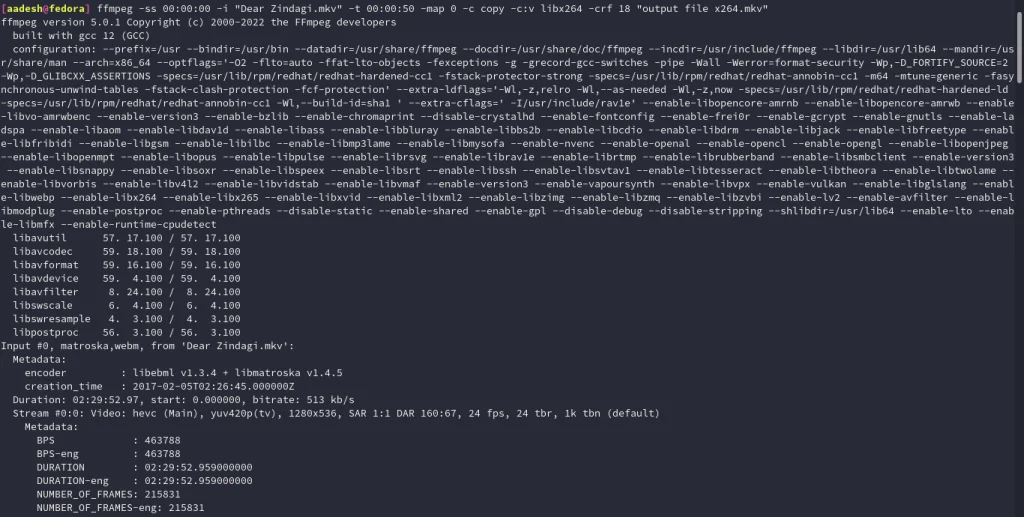
In the above command, -map0 selects all the streams from the input file, -c copy copies all the streams which are selected and then -c:v libx264 finally encodes the video in x264 format. 00:00:00 and 00:00:50 defines the beginning and end of the output file from the original video.
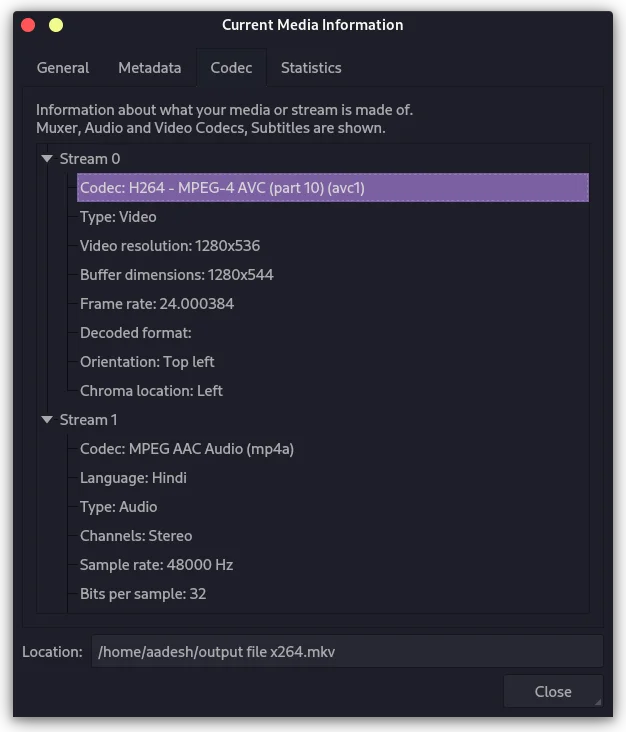
Please note that this could be a time and resource-consuming process and only proceed with it if you have mid to high hardware specifications (mainly GPU).
What crf and preset actually control
The command above sets -crf 18 and encodes with libx264. Here’s what each one actually controls.
crf: the quality dial
crf stands for constant rate factor, and it’s the main quality dial for x264 and x265 encodes. The scale runs from 0 to 51, where 0 is lossless and 51 is barely watchable. Lower numbers mean better quality and bigger files. In practice, values between 17 and 23 look visually identical to the source for most content, and 18, the value the command above uses, sits on the safe, high-quality end of that range. If file size matters more than pixel-perfect quality, bumping crf up to 22-24 usually cuts the file size a fair bit with a loss most people won’t notice on a TV or phone screen.
preset: the speed dial
preset controls encoding speed, not quality. Slower presets (slow, slower, veryslow) spend more CPU time finding better ways to compress each frame, so they produce a smaller file at the same crf value. Faster presets (fast, faster, veryfast, ultrafast) finish sooner but leave some compression efficiency on the table. The command above doesn’t set a preset at all, so ffmpeg falls back to medium. For a one-off conversion medium is a fine default. For batch jobs across a lot of files, dropping to fast or veryfast often saves hours of encoding time for a small, usually unnoticeable, increase in file size.
Why the command only re-encodes the video stream
-c copy in the example command copies every stream (audio, subtitles, chapters) from the source without touching it, and -c:v libx264 then overrides just the video stream to re-encode it. This is why the command runs faster than a full re-encode of everything, it’s only spending CPU time on the video stream, not the audio.
Speeding up the conversion with hardware acceleration
Software encoding with libx264 uses the CPU for every frame, which is why the original command above warns that this process is resource-heavy. If the machine has a GPU, ffmpeg can hand the encoding work to it instead, usually 5-10 times faster, at the cost of a slightly larger file for the same visual quality compared to a slow libx264 encode.
Which flag to use depends on the hardware:
On a machine with an NVIDIA GPU, swap libx264 for h264_nvenc:
ffmpeg -i "Videox265.mkv" -c:v h264_nvenc -preset p5 -cq 22 -c:a copy "OutputVideox264.mkv"
On Intel or AMD GPUs on Linux, VAAPI does the same job:
ffmpeg -hwaccel vaapi -hwaccel_output_format vaapi -i "Videox265.mkv" -c:v h264_vaapi -qp 22 -c:a copy "OutputVideox264.mkv"
On a Mac, VideoToolbox handles it through Apple’s media engine:
ffmpeg -i "Videox265.mkv" -c:v h264_videotoolbox -b:v 6M -c:a copy "OutputVideox264.mkv"
A Raspberry Pi running Jellyfin is usually the one machine in this chain without a GPU worth using for encoding. Its VideoCore GPU handles playback decode fine but isn’t built for this kind of encode job. The practical move is to do the HEVC to H.264 conversion once on a desktop or laptop with a real GPU, then copy the finished H.264 file over to the Pi, rather than running libx264 on the Pi itself.
FFmpeg’s hardware acceleration support keeps moving too. The FFmpeg team shipped version 9.0 “Lei” in August 2026, now at the 9.0.1 maintenance update, with a heavier shift toward GPU-based processing: more Vulkan-accelerated filters, Apple ProRes RAW support through VideoToolbox, and native support for VVC (H.266), the successor to HEVC. None of that changes the commands above, but it’s a sign that hardware-accelerated conversion keeps getting less of a compromise over time, not more.
Converting a whole folder of HEVC files at once
Converting one file with the command above is fine, but a Jellyfin or Plex library usually has dozens or hundreds of HEVC files sitting in one folder. Instead of running the command by hand for each one, a short loop handles the whole folder:
for f in *.mkv; do
  ffmpeg -i "$f" -map 0 -c copy -c:v libx264 -crf 20 -preset fast "converted_${f}"
done
This loops over every .mkv file in the current directory, runs the same conversion covered above and prefixes each output with converted_ so the source files stay untouched until you’ve checked the results. Swap crf 20 and preset fast for whatever values fit your quality and time budget from the section above.
One thing worth checking before a batch job like this: run ffprobe on a couple of files first to confirm they actually contain HEVC video. Media libraries built up over years often mix x265 rips with older x264 or even MPEG-4 files, and re-encoding an already-compatible file wastes time and quality for nothing.
ffprobe -v error -select_streams v:0 -show_entries stream=codec_name -of csv=p=0 "Videox265.mkv"
This prints the video codec name for the file, hevc for HEVC content, so the batch job can be filtered down to only the files that actually need converting.
Common mistakes when converting HEVC to H.264
A few mistakes come up often enough with this exact conversion that they’re worth calling out directly.
Putting -ss after -i instead of before it
Placing -ss before the input, as the command earlier in this article does with -ss 00:00:00 placed before -i, is fast because ffmpeg can jump straight to that point in the file. Putting -ss after -i still works but forces a slower, frame-by-frame scan through the file to get there, which matters a lot on a long video.
Mixing -c copy with a video filter
Adding a filter like scale or crop alongside the HEVC to H.264 conversion stops -c copy from working on the video stream. Filters need to work on frames that have already been unpacked, and -c copy never unpacks anything, so the two options contradict each other. Drop the video from -c copy and let -c:v libx264 handle it, since that’s already re-encoding the video stream anyway.
Forgetting the audio codec isn’t always compatible with the new container
-c copy keeps the original audio untouched, but some audio codecs, DTS or certain PCM formats among them, aren’t supported inside every container. If ffmpeg complains about an unsupported codec in the output container, either switch the audio to -c:a aac (a small re-encode) or change the output container to one that does support the original audio codec, like MKV.
Assuming every H.264 file plays everywhere
H.264 has far wider hardware decoder support than HEVC, but it isn’t universal. Old software players and some browsers still expect the Baseline or Main profile rather than the High profile with the more advanced settings libx264 defaults to. If a converted file won’t play somewhere H.264 usually does, adding -profile:v main to the encode command is the first thing worth trying.
Key takeaways
- HEVC halves file size versus H.264 but needs far more CPU or a hardware decoder to play back.
- crf 17-23 gives visually lossless output, higher values shrink the file more.
- preset trades encode speed for compression efficiency, not visual quality.
- Hardware encoders like NVENC, VAAPI and VideoToolbox cut encode time dramatically.
-c copyon the video stream and video filters can’t be combined.- Seek with
-ssbefore-ifor fast, keyframe-based trimming. - A short bash loop converts a whole folder without repeating the command by hand.
- Check a file’s codec with ffprobe before re-encoding it needlessly.
Frequently asked questions
What’s the difference between HEVC and H.264 for streaming?
HEVC compresses video to roughly half the size of H.264 at equal quality, but needs a dedicated decoder chip or a lot more CPU power to play back smoothly.
What crf value should I use to convert HEVC to H.264?
Values between 17 and 23 look visually identical to most source video. 18 is a safe default, and 22-24 trades quality for a smaller file.
Can I convert HEVC to H.264 without a GPU?
Yes, libx264 handles the whole job on the CPU alone. It’s slower than hardware encoding, but it produces smaller files at the same visual quality.
Why won’t my converted H.264 file play on an older device?
Some older players only support the Baseline or Main H.264 profile. Adding -profile:v main to the ffmpeg command usually fixes playback on hardware that rejects the default High profile.
Does converting HEVC to H.264 lose quality?
Re-encoding always loses some quality since it’s a lossy format, but at crf 18-20 the difference is invisible on a TV or phone screen in normal viewing.
Which hardware encoder should I use for HEVC to H.264 conversion?
Use h264_nvenc for NVIDIA GPUs, h264_vaapi for Intel or AMD on Linux and h264_videotoolbox on a Mac. Each trades a slightly larger file for a much faster encode.
Conclusion
Converting HEVC to H.264 with ffmpeg comes down to one command and a handful of settings worth knowing rather than copying blind. Start with the crf and preset values that fit the hardware, add GPU acceleration where it’s available, and the whole job gets a lot less painful on a media server that used to choke on x265.