While trying to access a webpage, one may experience the error “A network change was detected” in their web browser. This is a fairly common error that prevents you from accessing the internet on your system. This error is often accompanied by a “your connection was interrupted” error message.
This article will guide you through some possible fixes for this issue.
Why this error occurs?
As the error message suggests, this issue primarily occurs when your system detects a change in the actual network configuration. But if you haven’t made any changes in the network configuration, this error may also occur due to multiple factors such as:
- VPN (Virtual Private Network)
- Proxy servers
- Active process interfering with your network
- IPv6 with privacy extension enabled
- Malfunctioning network devices
How to fix the error?
There is a possibility that the error occurring on your system is a non-persistent one. So we will advise you to follow these simple methods first:
- Reboot your PC
- Turn off your modem/router and turn it back on after 2 minutes
- Unplug your network adapters (e.g. USB WiFi adapters or ethernet cable) and replug them.
If the issue is still not resolved, try the following:
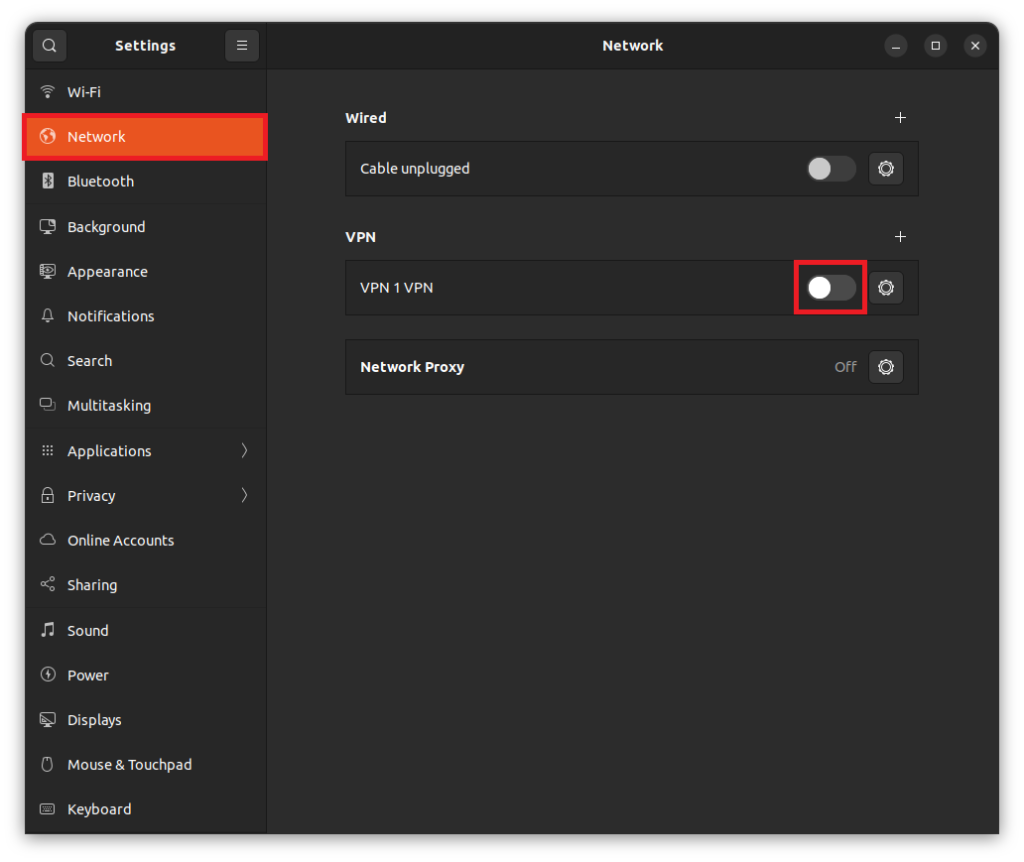
1. Turn off the VPN
There can be times when the VPN doesn’t work as intended and it ends up causing errors.
To turn off the VPN, open the Settings and find the option under the Network category.

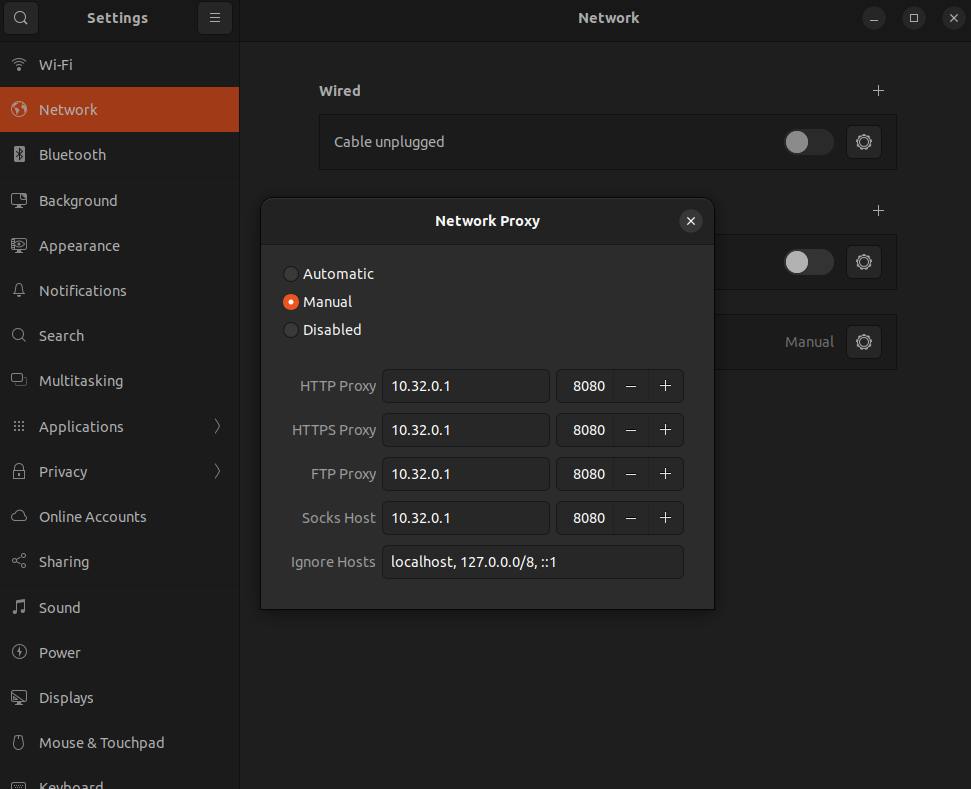
2. Check the proxy configuration
Proxy servers are usually set up for internet access in an organization such as offices or universities. You can find the proxy settings just below the VPN option we saw in the above method.
If you are on a personal or home network, you may try disabling the Network Proxy.
Otherwise, you should confirm whether the proxy server address and port number are correctly configured.

3. Disable IPv6 on your system using GUI
According to many users experiencing the same issue, (source: Ask Ubuntu) this error can be fixed by permanently disabling IPv6 as a whole or just the IPv6 privacy extensions.
IPv6 is the acronym for Internet Protocol version 6 and it was developed as an upgrade over the widely popular IPv4. IPv6 is being used a very few systems as of now, hence it is safe to disable it.
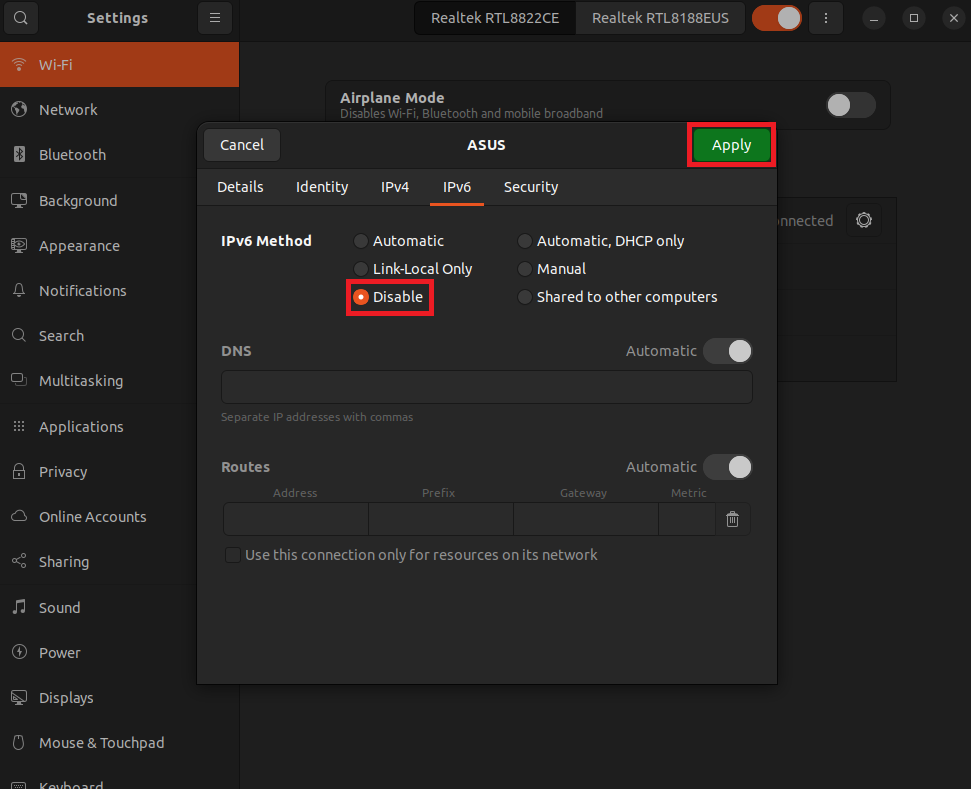
1. Open Settings and go to Network (if you are using a cable) or Wi-Fi (if you are using a wireless connection)
2. Click on the small gear icon to open settings for the particular network device
3. Go to the IPv6 tab and click on the Disable radio button and apply the changes.

4. Disable IPv6 on your system using terminal
To check if IPv6 is enabled on your system, enter the following code:
ip a | grep inet6
It will produce an output like this:
inet6 ::1/128 scope host
inet6 fe80::b6e9:f253:d999:c86e/64 scope link noprefixroute
inet6 fe80::c03d:e44:23f9:1083/64 scope link noprefixroute
If IPv6 is disabled, it will not produce any output.
To disable IPv6, run the following commands one by one:
sudo sysctl -w net.ipv6.conf.all.disable_ipv6=1
sudo sysctl -w net.ipv6.conf.default.disable_ipv6=1
Reboot your system and check if the problem is resolved or not.
To re-enable it, enter the following commands:
sudo sysctl -w net.ipv6.conf.all.disable_ipv6=0
sudo sysctl -w net.ipv6.conf.default.disable_ipv6=0
Also read: How to disable IPv6 in Ubuntu?
5. Update your system
Updating the packages on your system can also help as most updates come with security and bug fixes. To update your system, you can use the following commands:
sudo apt update
sudo apt upgrade
Summary
In this article, we went through some causes of the annoying error “A network change was detected” and some methods to solve the problem causing the error. This error is generally a minor one which can be fixed with the methods described above, but in some rare cases, it can also be caused by hardware issues or problems on the ISP side. We would suggest you contact the ISP if the problem persists.
