
The right-click Format option Windows puts on a USB drive has no Linux equivalent. Formatting a USB drive on Linux means naming a device node such as /dev/sdb1 and getting that name right, since the command that rewrites it asks for no confirmation and has no undo. Read the device table first, choose the filesystem by what the stick has to plug into, and Disks, GParted, or a terminal command will each finish the job.
What Formatting a USB Drive Actually Changes
A format writes a fresh filesystem over the start of the drive, with a new boot sector, empty allocation tables, and a new label and serial number. The files that were there are left unreferenced rather than overwritten, so a recovery tool can sometimes still find them and a format is not a secure erase.
What outlives the format is the filesystem itself, so settle that choice first. FAT32 stops a single file at 4 GiB, exFAT describes file sizes in 64 bits, and NTFS trades cross-platform write support for Linux permissions.
| Format | Largest single file | Windows | macOS | Linux | Formatter package |
|---|---|---|---|---|---|
| FAT32 | 4 GiB | read and write | read and write | read and write | dosfstools |
| exFAT | 2^64-1 bytes | read and write | read and write | read and write | exfatprogs |
| NTFS | 2^64-1 bytes | read and write | read only | read and write | ntfs-3g |
| ext4 | 16 TiB | no | no | read and write | e2fsprogs |
Microsoft’s file system comparison puts the FAT32 limit at 4 GiB and exFAT at 2^64-1 bytes, which is the source I compared the three formats against. The ceiling belongs to the format rather than the drive.
That ceiling is also why a 64 GB stick refuses a 5 GB disk image until you reformat it as exFAT. A stick that holds more than one partition is worth knowing about before you start, because the format command takes one partition at a time.
The introduction to partitions and filesystems covers how those regions sit inside the disk.
What You Need Before You Start
You need the stick, an account that can run sudo, and the helper package behind the filesystem you picked. Disks and GParted are front ends, so they call those same helpers, and a missing package is one reason a format option sits greyed out in the menu.
One command installs all three formatters on Debian and Ubuntu, and a current desktop install usually carries them already:
sudo apt install dosfstools exfatprogs ntfs-3g
I checked which package supplies each formatter with dpkg-query, because a missing package is what removes a filesystem from a menu without explanation.
Two decisions belong in this step rather than halfway through the procedure. Pick the filesystem from the table above, since changing your mind later means formatting a second time. Confirm you have everything you need off the stick, because the next section ends with the old contents unreachable.
If the free space on the drive is part of the decision, the df command guide covers the used and available columns before you commit.
How to Format a USB Drive on Linux
All three methods reach the same helpers, and they differ in how much of the device naming they hide from you. The graphical tools show the drive by its size and model, and the terminal makes you read the table yourself before anything is written.
Whichever one you pick, the drive has to be unmounted first and everything on it will be gone.
Method 1: GNOME Disks
Disks ships with Ubuntu and most GNOME desktops. I pick it when the stick only needs a new filesystem and a name, because the whole job fits in one dialog.
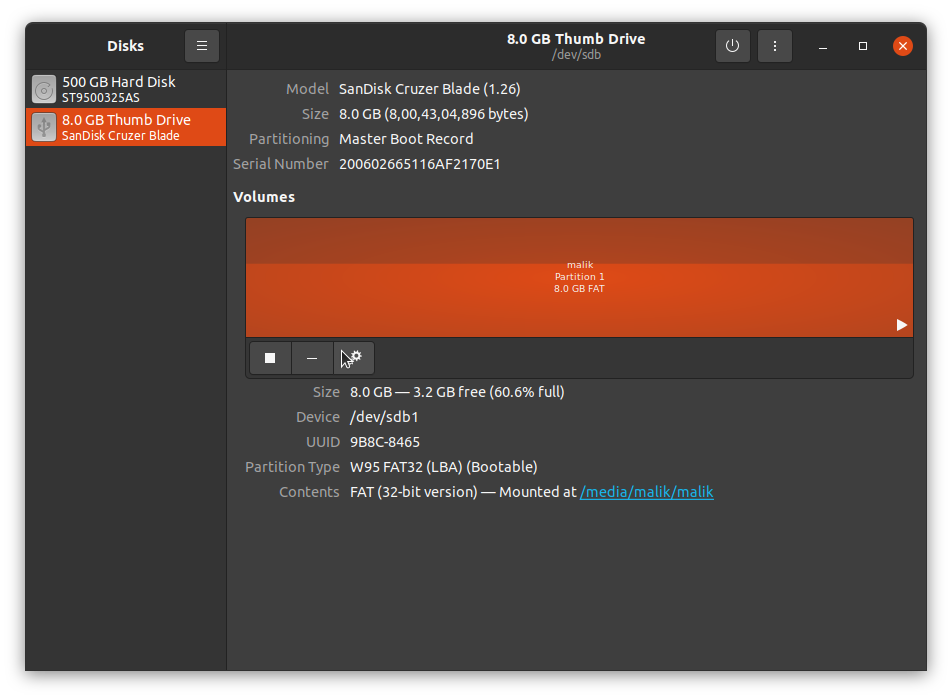
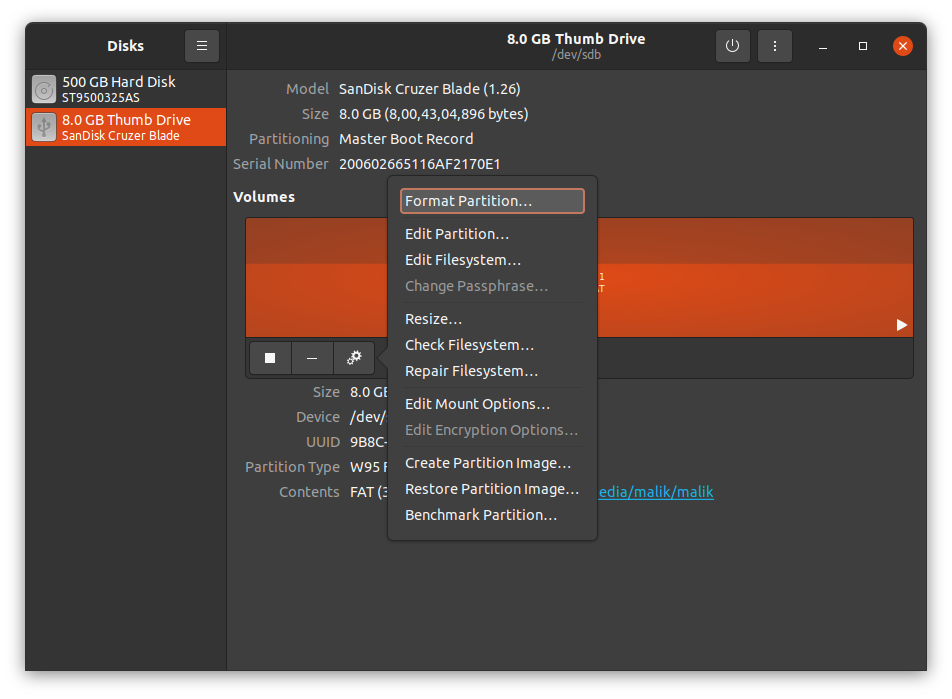
Open Disks from the Activities overview, select the drive in the column on the left, then use the menu button under the Volumes section and choose Format Partition.
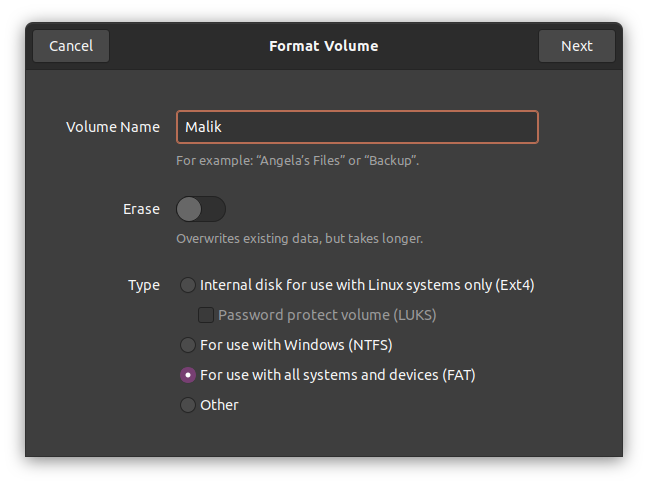
Name the volume, choose the type, and confirm. The name field becomes the label, and the type list only offers the filesystems whose helper package is installed.
A stick with two partitions formats only the one you selected, and the other keeps its filesystem. Reach for GParted instead when the partition table itself needs to change, since Disks works inside the table it finds.
Method 2: GParted
GParted creates and deletes partitions as well as formatting them, which makes it the tool for a stick whose current layout is part of the problem. The roundup of Linux partitioning tools puts it next to the alternatives.
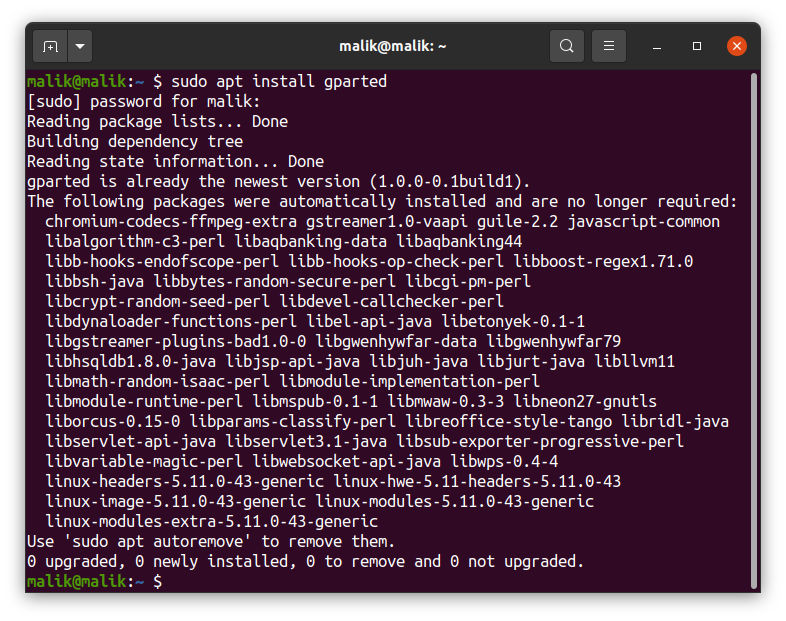
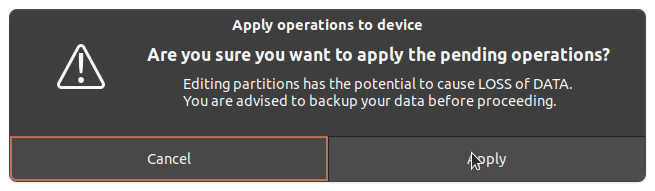
Install it with apt, then run it with sudo gparted. Inside the window, choose the drive from the drop-down in the top right, right-click the partition, pick Format to and then the filesystem, and press the green tick to apply.
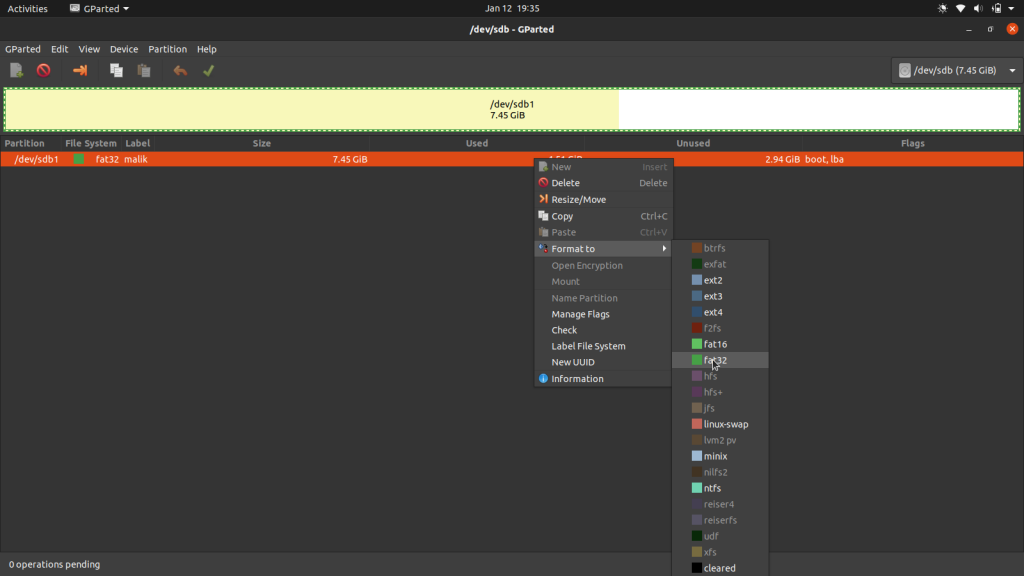
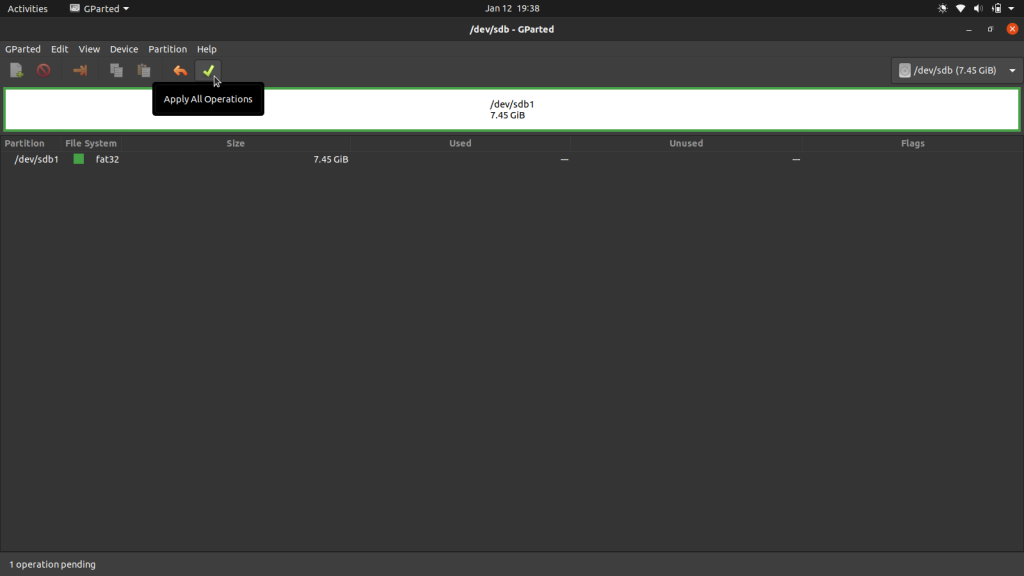
Operations queue up rather than running immediately, so a delete and a format on the same stick can be lined up and applied together.
For a partition table rebuild rather than a format, the disk partitioning guide walks through writing a new one.
Method 3: The Terminal
The terminal is the path I reach for, because each command shows you the exact device node it is about to write to. Start with the packages, so you know which formatters are present:
dpkg-query -W -f='${Package} ${Version}\n' dosfstools exfatprogs ntfs-3g
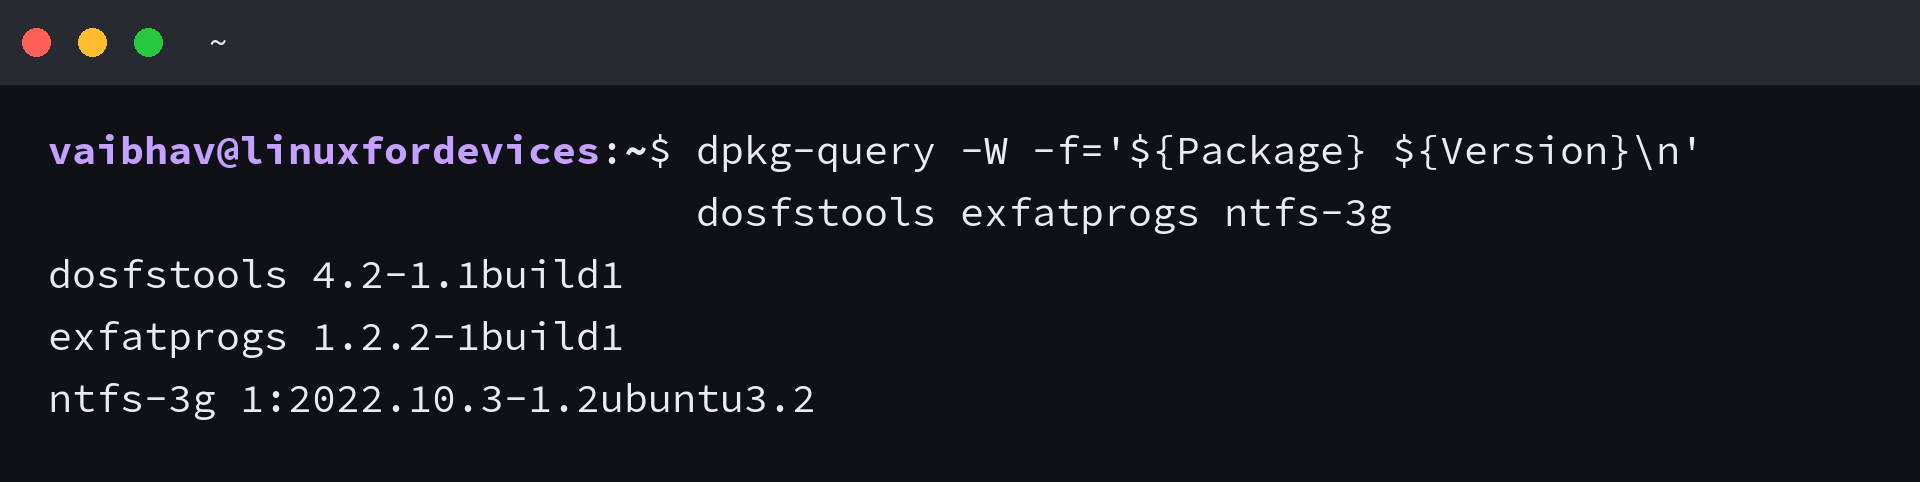
Then read the block device table. The -e 7 flag hides the loop devices that snap packages create, which leaves the disks you actually own:
lsblk -e 7 -o NAME,SIZE,TYPE,TRAN,MODEL,MOUNTPOINTS
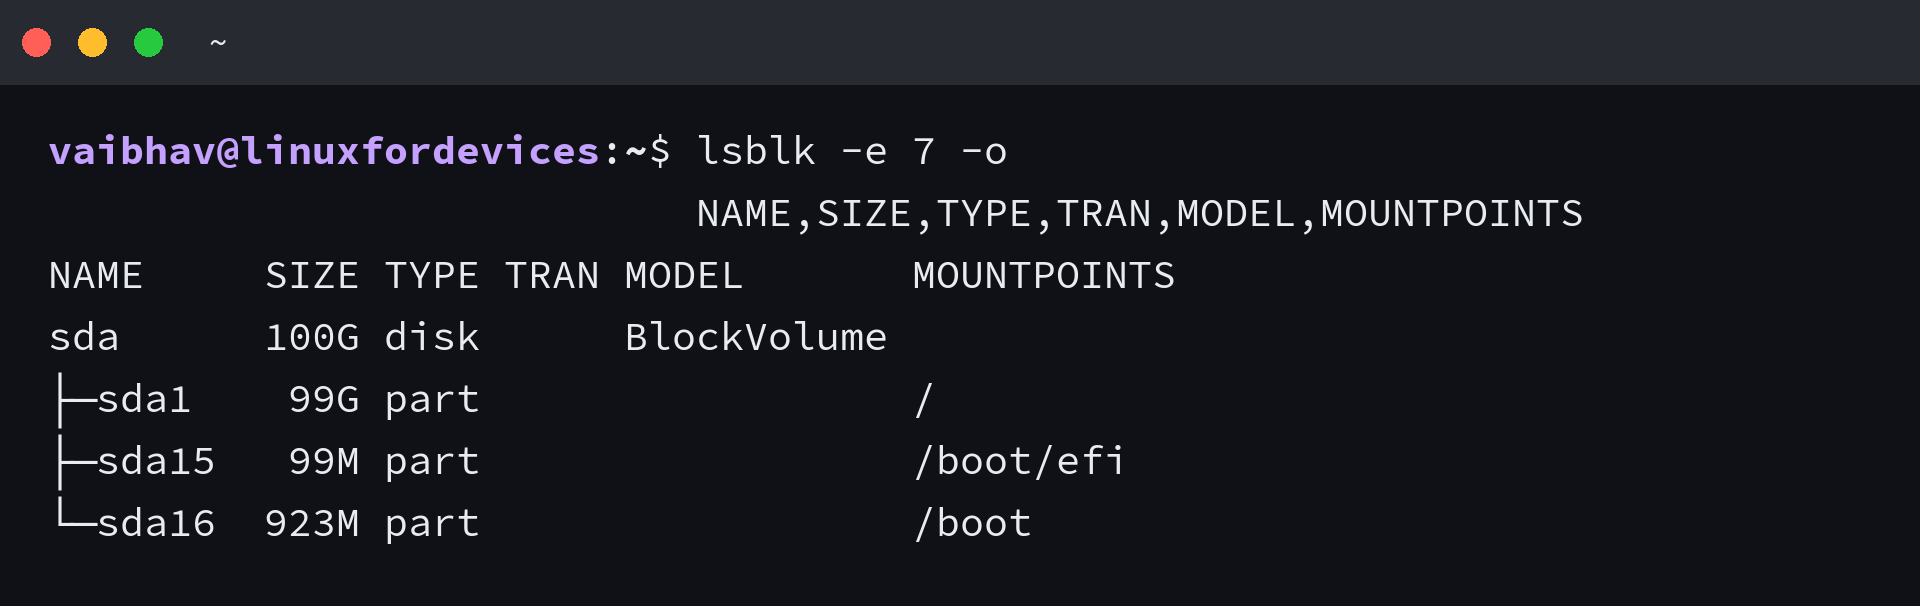
Match the drive by size and model rather than by the letters, and check the TRAN column, because a USB stick reports usb there and an internal disk does not. The lsblk and blkid guide reads that table across every disk on a machine.
I checked the transport column on every entry rather than trusting the device name, since it is the one field that separates a stick from the disk holding your system.
The df command is the second opinion, since it lists the mounted filesystems with their size and free space. A stick that is already mounted appears there with its capacity.
df -h
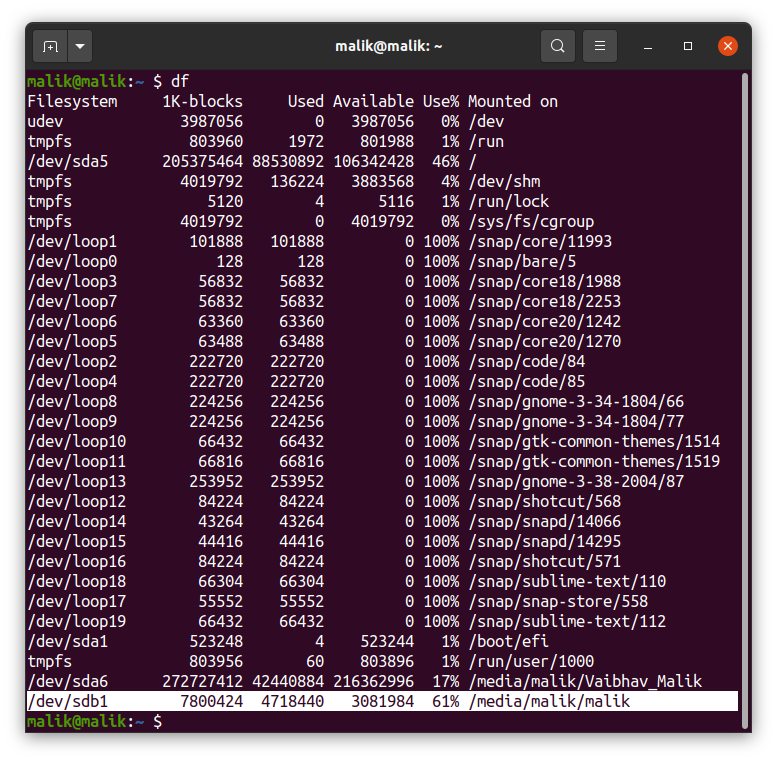
Read what is already on the partition before you overwrite it, so a wrong guess costs you nothing:
sudo file -s /dev/sdb1
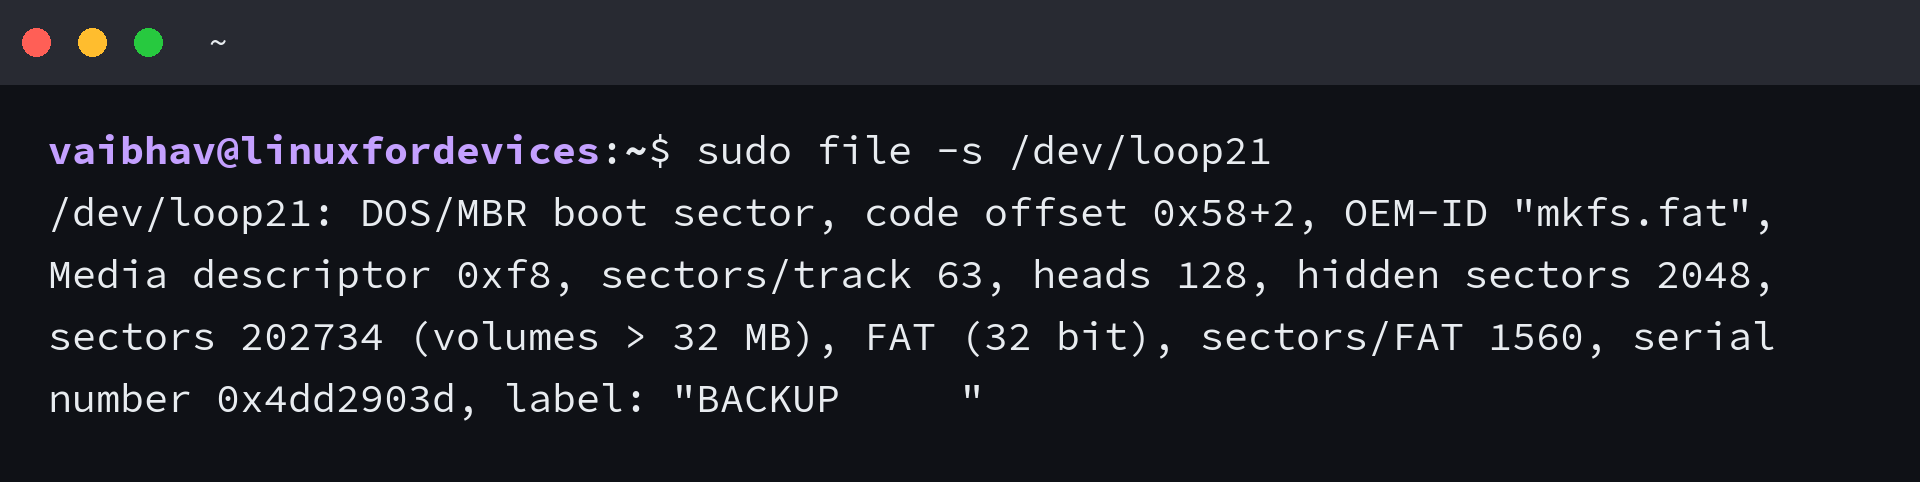
That output names the FAT variant and the volume label. I read both fields out of that line before unmounting anything, since they tell you the drive is the one you meant.
Unmount it first, because a mounted filesystem is in use and the write fails with a busy error until it is released:
sudo umount /dev/sdb1
Now format the partition with the helper for the filesystem you chose. The -F 32 flag is required for FAT32, because the default FAT size on a current install is not 32, and the -n flag sets the label in the same step:
sudo mkfs.vfat -F 32 -n BACKUP /dev/sdb1
I set that label in the same command with -n, which saves a second pass once the filesystem exists. exFAT and NTFS take -L for the label instead, which is the one flag difference worth remembering:
sudo mkfs.exfat -L BACKUP /dev/sdb1
sudo mkfs.ntfs -L BACKUP /dev/sdb1
Check the result rather than assuming it. fsck.vfat reads the volume back and reports what it found, and -n keeps the check read-only:
sudo fsck.vfat -n /dev/sdb1

I ran that check against a labelled FAT32 volume and it came back with 12 files across 12,965 of 199,582 clusters, which is the readable proof that the boot sector, the label, and the allocation tables all landed.
What Goes Wrong and How to Fix It
A format that will not finish usually fails in one of four ways, and each has a different repair.
The format option is greyed out, or the write fails with a busy error
A filesystem that is mounted is in use, so the kernel refuses to open the device for overwriting and the command returns a busy error. A graphical tool shows the same condition as a disabled format entry rather than an error.

Unmount the drive first, either from the eject button in the file manager or with umount on the command line, then retry. I ran the same write against a mounted volume and the error came back in exactly that shape: probing initialization failed, device or resource busy.
The stick never appears in the device table
When lsblk does not list the drive after a replug, the kernel did not enumerate it and no format command will help.
Try another port, avoid an unpowered hub, and swap the cable before suspecting the stick. An entry that appears with no size usually means the controller is failing, and the kernel log then carries read errors for it.
A large file will not copy onto the stick
FAT32 stops a single file at 4 GiB, so a disk image, an ISO, or a long video above that size refuses to copy.
The refusal points at the file rather than the filesystem. Reformat as exFAT when the stick has to carry anything larger, because Windows, macOS, and Linux all read and write it.
A quick format replaces the boot sector, while the previous label and serial number can survive elsewhere on the volume. An old filesystem or an old drive name reappearing in the device list comes from there.
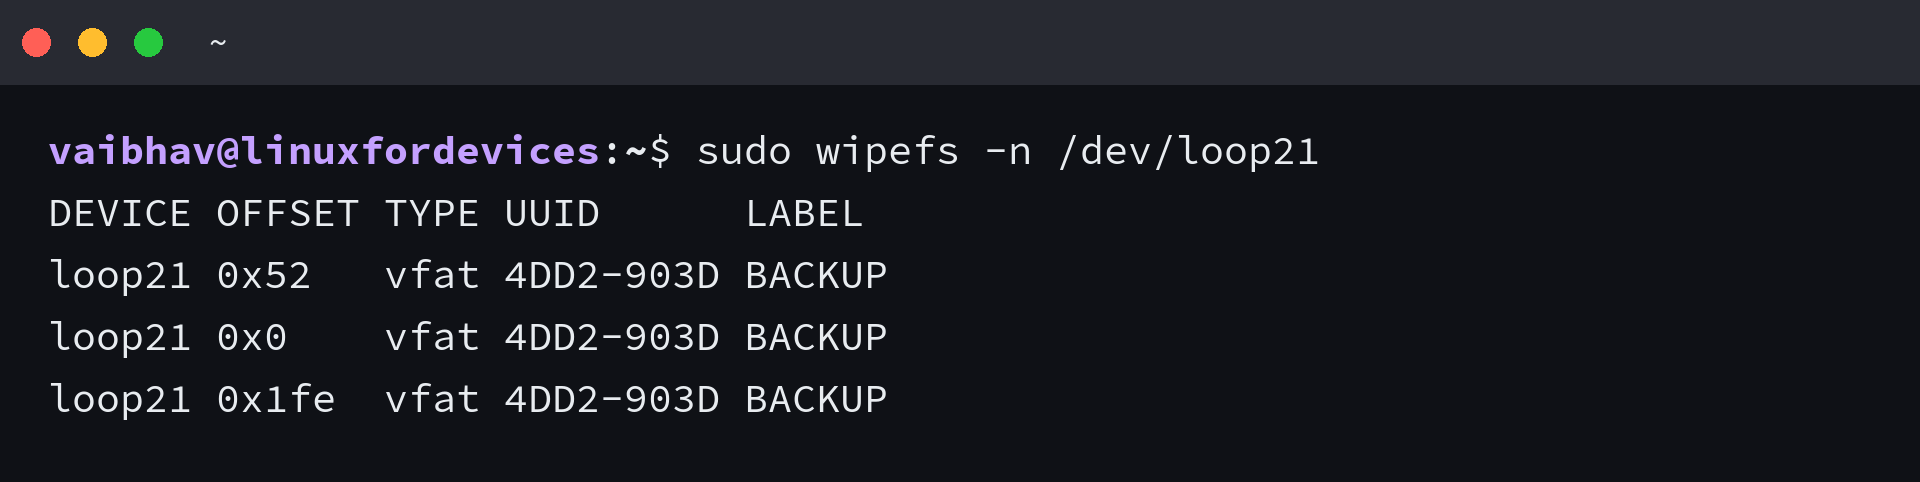
The guide to reading a filesystem without mounting it reads those same signatures one drive at a time, which is how a stale name shows up early. Wipe them with wipefs before you format again.
The stick mounts read-only
A read-only stick is usually a write-protect switch or a filesystem the kernel mounted after it found errors. My own habit is to check the switch first, then the mount options, and to reach for the dd command when the damage sits on the volume itself.
What You Have Now
The stick carries the filesystem you chose, with the label you set. I read the device table before every write I ran here, because the node is reassigned between replugs.
That identification step is the habit worth keeping, since it is the only check between a typo and the wrong disk. A finished format leaves behind a label, a serial number, and empty allocation tables.
- lsblk lists the drive with a plausible size and model, and reports usb in the TRAN column
- file -s returns a filesystem you expected to overwrite, and not one you needed
- the drive is unmounted before the format runs, so the write does not fail on a busy device
- fsck.vfat reads the new filesystem back with the file and cluster counts
The mounting guide takes it from here, or the bootable USB walkthrough if the stick is headed for an installer.
Frequently Asked Questions
How do I format a USB drive on Linux?
Open the Disks application for a graphical format, use GParted when the partition layout also needs to change, or unmount the drive and run mkfs.vfat, mkfs.exfat, or mkfs.ntfs from a terminal.
Which filesystem should I use for a USB drive?
FAT32 when every device has to read the stick and no single file goes above 4 GiB, exFAT when the files are larger than that, and NTFS when the stick has to hold Linux permissions.
Why is the FAT32 option greyed out in GParted or Disks?
Those tools call a helper package for each filesystem, so a missing dosfstools or exfatprogs greys out the entry. A partition that is still mounted also blocks the format until it is unmounted.
How do I know which device node my USB drive is?
Read the table from lsblk and match the entry by size, model, and the usb transport in the TRAN column, then confirm it with file -s or blkid before writing anything to it.
Can I format a USB drive that still has data on it?
Yes, and the files become unreachable as soon as the new tables are written. Copy anything you need off the stick first, because a format is not a secure erase.
Why does the stick keep its old name after formatting?
A quick format replaces the boot sector and the allocation tables, while the previous label and serial number can survive at other offsets. Wipe those signatures with wipefs before formatting when a stale name returns.