Have you ever struggled with taking screenshots in Linux? I know I certainly have. As I write quiet a lot of articles, I often need to edit some of my screenshots and GNOME’s default Screenshot application is not the best. Here is where FlameShot shines through! Flameshot is a very powerful open-source screenshot application that also comes with a ton of editing possibilities as well as copy to clipboard feature. So, let’s check it out.
Installing Flameshot on Linux
To install Flameshot in Linux run the following apt command in your terminal:
sudo apt install flameshot
If, however, you are not running Debian take a look at the following page. Here you will find installation guidance for your system.
The best thing is FlameShot comes with a lot of configuration that can be done very easily as it is very accessible. We have seen this kind of efforst made in screenshot apps in the Android spectrum but never on the PC. This makes FlameShot very unique.
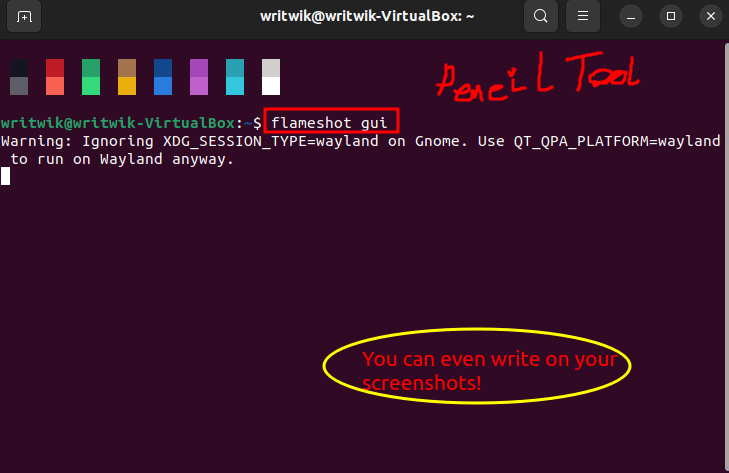
For example, see the below screenshot that has been taken using FlameShot:
Features and Usage of Flameshot
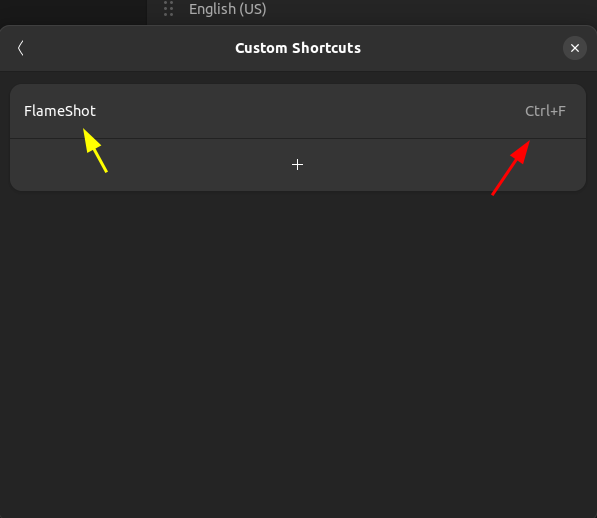
The first thing you will need to do is to setup a custom keyboard shortcut for launching flameshot. To do this on an Ubuntu machine navigate to Settings -> Keyboard -> Keyboard Shortcuts -> Custom Shortcuts and finally set up a key combination (say Ctrl + F) and give the command:
flameshot gui
Next run the following command to know more about FlameShot:
flameshot --help
FlameShot has in total 5 commands out of which 4 are modes for taking screenshots and the 5th one is to launch the configuration file. First let us go through the screenshot modes.
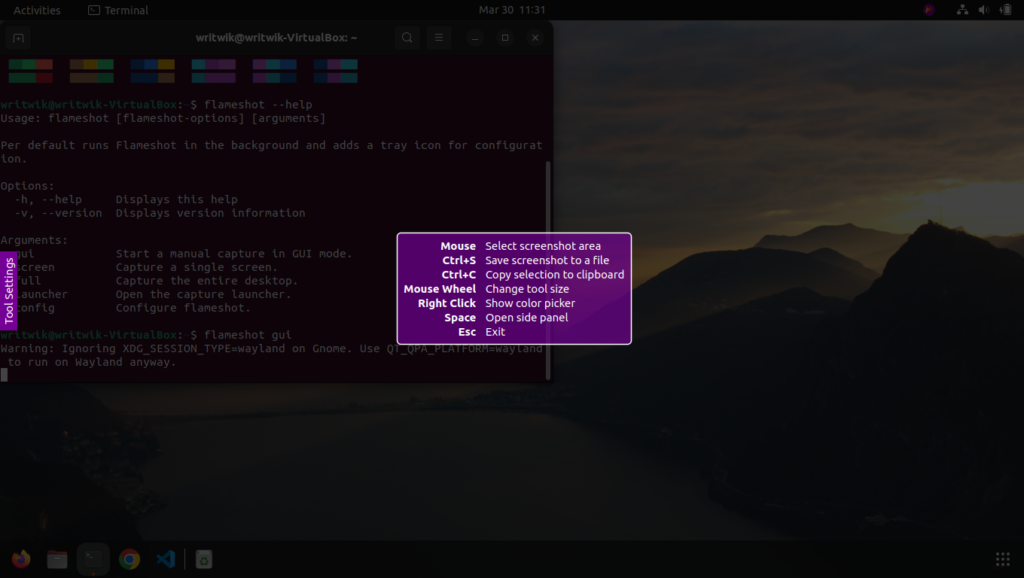
The first mode is the gui mode and it is the best mode according to me (that is why I keybind it to this specific command). In the GUI Mode a screen comes up for you to select the area for the screenshot and oftentimes that is all we need.
We don’t always require taking the whole screen or both the monitors (if you are using multiple monitors like me).
And after you select an area the perimeter is surrounded by applets like the below figure to help you edit the screenshot then and there. This is a very powerful integration as it allows for the editing right then. This way we will not forget to edit the file later on.
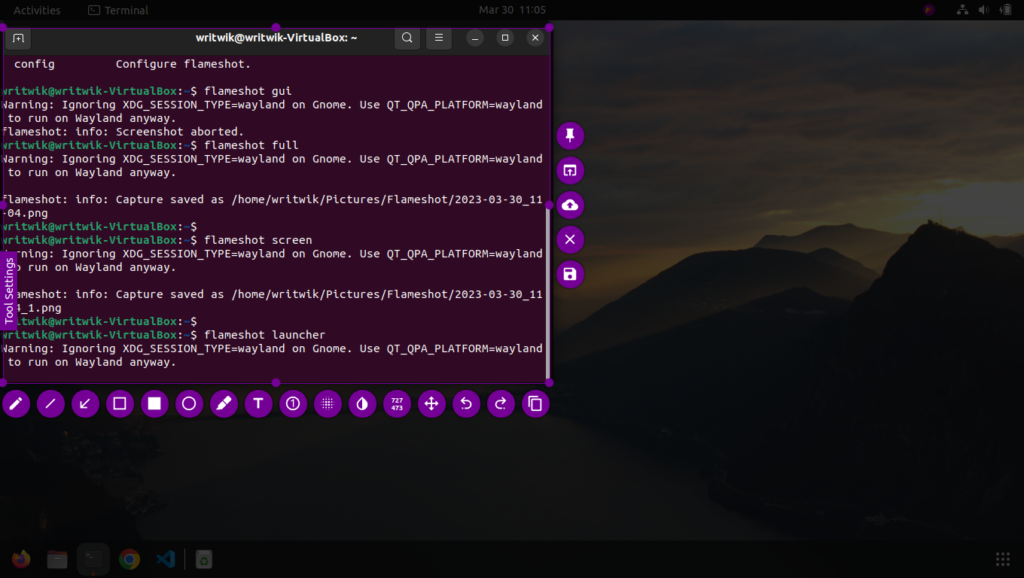
First we have the pencil tool to write anything we like and/or doodle away. Next we have the line tool to underline certain lines or to just make straight lines in the screenshot.
Then we have the arrow tool which is extremely helpful if we want our viewers to focus on something in the screen. Then we have the box tool to draw a square around something in the screen.
Similarly, we have a filled box tool to remove something from the screen, and also we have a circle tool as well. Next we have the highlighter tool and the Text input tool.
Then we also have an autoincrementing counter bubble if we want to give certain instructions in the Screenshot. Have a look at the figure below:
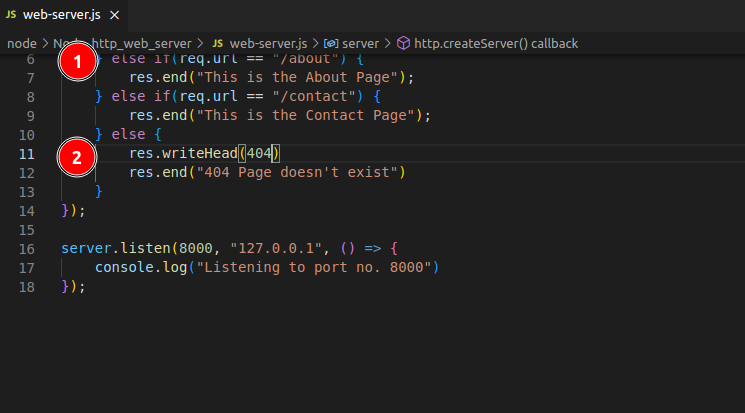
Next we have the pixelate brush to hide sensitive information in the screenshot. Then we have the inversion brush to invert the colors of the screenshot! Next we also have the undo redo buttons for easy access and with so many features these are a must have.
After you take a screenshot, you can directly use the clipboard functionality to quickly upload it to your word file or to somewhere else. Or you can save the file in a folder somewhere. Also, if you want you can go through the configurations and set up a custom format for the automatic filename modification.
I am sticking with the default %F_%H-%M format where, %F is the full date, %H is the hour and %M is the minute the screenshot was taken.
Wrapping Up: Flameshot for Efficient Screenshot Management
Flameshot’s extensive customizations and features make it an indispensable tool for professionals frequently working with screenshots. Discover its full potential and elevate your productivity. How will you integrate Flameshot into your workflow?

