Hi, there readers! In this article, we’ll be taking a look into KDE’s open-source painting program Krita. First we’ll look into the installation process and then take it for a spin! We’ll end this article with a few tips and tricks for your animation journey ahead. So, let’s get started!
Getting Started with Krita’s Installation and Setup
Depending on your OS you’ll have different instructions. In this article we’ll be going through the installation procedure for Ubuntu/Debian-based OSs, if you’re on Windows or Mac, follow this link to find the official installation instructions.
First things first let’s get a quick update and upgrade. Open up your terminal and give the following command:
sudo apt update
Once it is finished give it an upgrade:
sudo apt upgrade
Now we’ll be able to install the latest version of Krita, use the following command to install krita on your system:
sudo apt install krita
Our installation, at the time of writing this article, it only took 223 MB of storage, and a few seconds to install and the version of Krita available to Ubuntu users is 5.0.2. You can also install Krita from the Ubuntu Software app, just go ahead and search for it, and it should show up.
How to Create a Krita Document
If you now open up Krita, you will get a welcome screen with useful links to connect with the Krita community and to open your most recent documents on the left. You can click on “Open File” to open any existing projects or you can create a new project by clicking on the “New File” button.
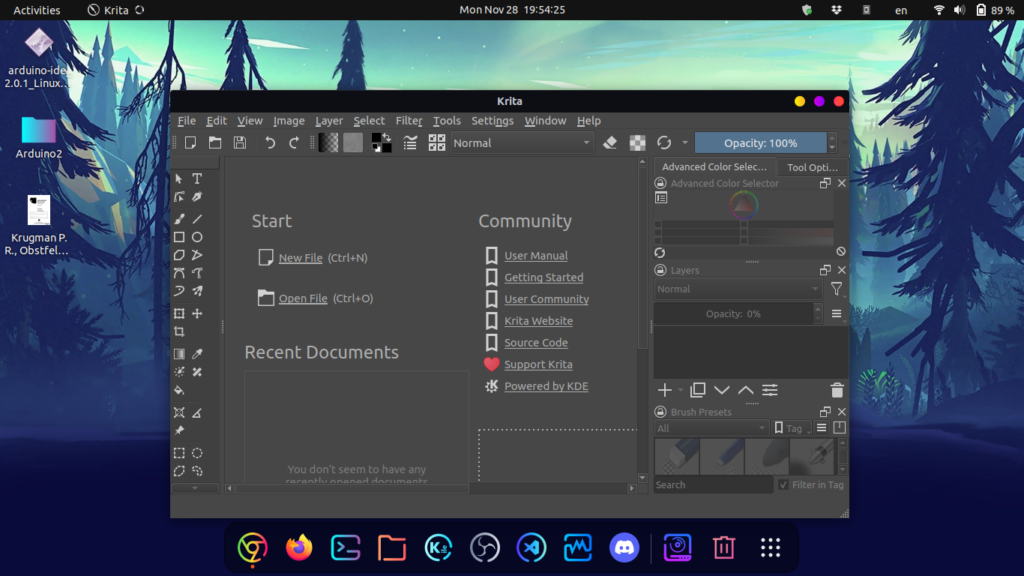
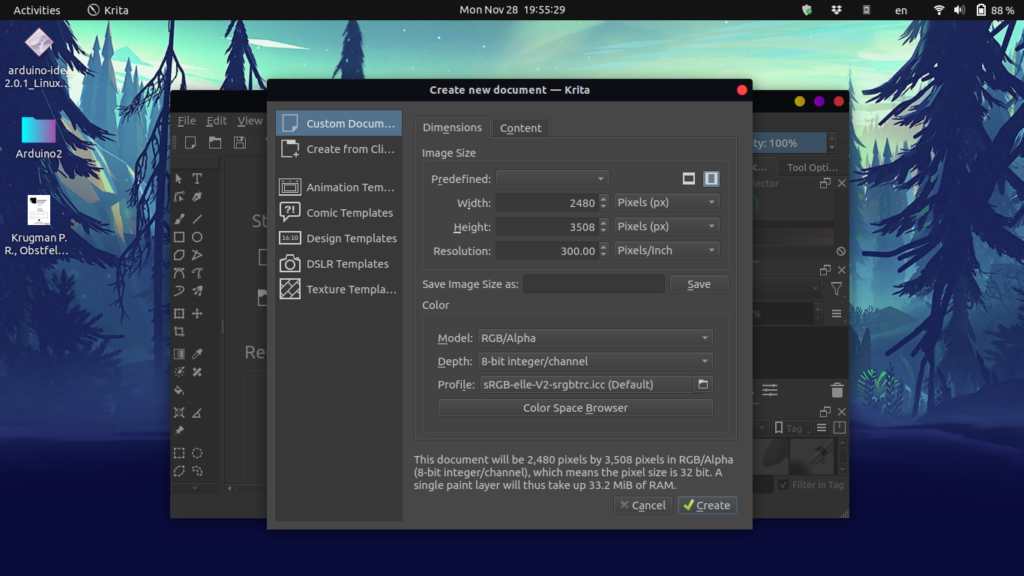
You can also pick any ready template from the left or select “Custom Document” to set a custom orientation., width, height, and quality resolution. At the bottom, you can set the color code and many advanced options.
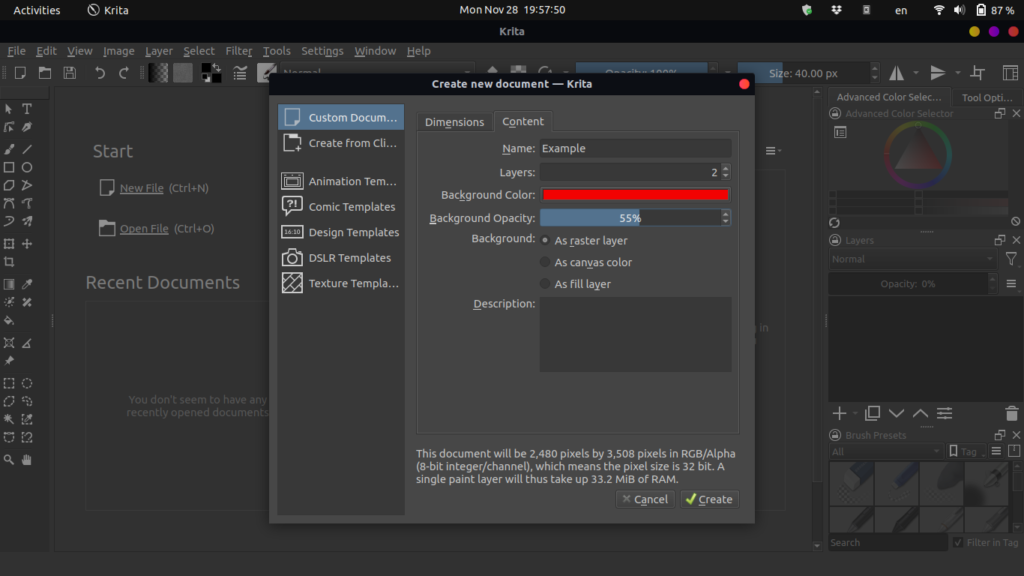
Switch to the “Content” tab to apply a proper background color and transparency level. As you click on “create”, the new document opens on the main workspace under its own tab on top.
Exploring Krita’s Workspace and Customization Options
Around the canvas, you get the main toolbar on the top, several panels or dockers on both sides, and the status bar at the bottom. On the upper right corner click on workspaces and choose your favorite template, or you can even use the options under the “Settings” tab to hide/show other panels, and change the color theme or the overall style.
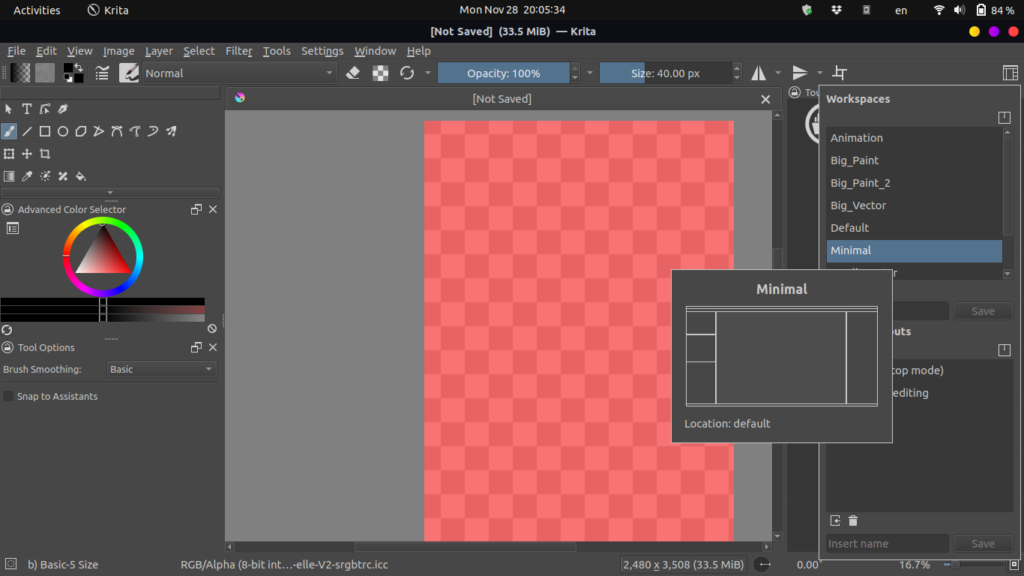
The document canvas is the place where you work on your drawing. You can zoom in and out with your mouse wheel and hold down the spacebar to pan around.
Understanding the Basics of a Krita Document
Let’s understand the basic structure of a Krita document. The document as a whole is the result of several layers and each layer is the result of your work in different sectors that are stacked on top of each other. You can see all of the layers on the right panel in a separate docker.
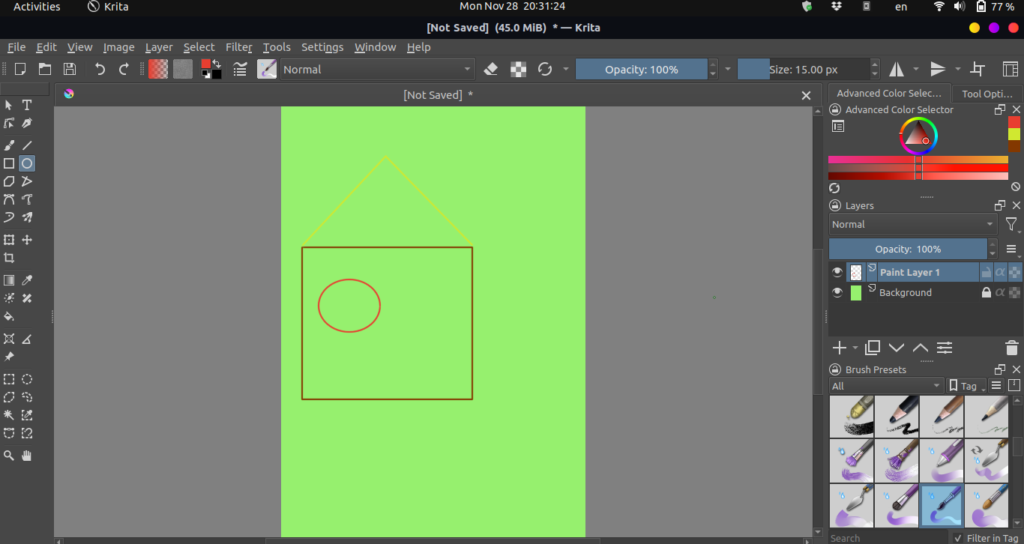
A new document created has, by default, a background layer and a paint layer. You can add and delete layers using the “+” and the “-” keys. You can also toggle the visibility of all the layers individually, this makes working on a single layer easy.
Wrapping Up: Tips and Tricks for Krita Animation
Wrapping up, Krita is a great open-source painting program that offers a range of features and tools for creating amazing digital artwork. With its intuitive workspace and customization options, it makes it easy for beginners to get to grips with the software. Once you understand the basics of a Krita document and layer structure, you can start creating your own animation. For more advanced tips and tricks, be sure to check out the official Krita documentation and tutorials online. With Krita and a bit of practice, you can create amazing artwork and animations in no time!
