Windows Subsystem for Linux or WSL is a neat little tool through which you can install and run a Linux distribution without having to dual boot or use a Virtual Machine on your system. You can run both command line and GUI applications on your Windows machine natively.
Also read: How to get started with Windows Subsystem for Linux (WSL)?
WSL2 offers various distribution choices for installation as well, such as Ubuntu, Debian, Kali, and SUSE. Once launched, you can see that we miss out on a lot of features on this PowerShell-like command prompt when compared to any Linux Terminal application, such as theming, tabs, custom fonts, and so on.
In this article, we will take a look at the Windows terminal application, which offers a lot of features just like any other Linux Terminal application, and it is 100% recommended if you are using any Linux distribution using the WSL2 feature.
Features of Windows terminal
Some of its features are:
- You can customize the theming of the Terminal (Both Windows and Linux).
- Transparency effects.
- You can tab different instances of Terminal instead of opening a new window.
- You can also use custom fonts for your Terminal.
- Fully customizable keyboard shortcuts.
- Default launch options (PowerShell, Command Prompt, Linux, and Azure shell)
Installing Windows Terminal
You can simply install this application simply from the Microsoft Store, and it is the recommended method as well, but note that Microsoft Store requires you to log in with your email ID, so you can also try this method which requires you to install this application using the winget command. Just search and open PowerShell from the start menu and make sure that you have winget tool installed:
winget

It is already pre-installed on Windows 10 1809 or newer versions of Windows so, you can just type the following command to install the Windows terminal:
winget install --id=Microsoft.WindowsTerminal -e
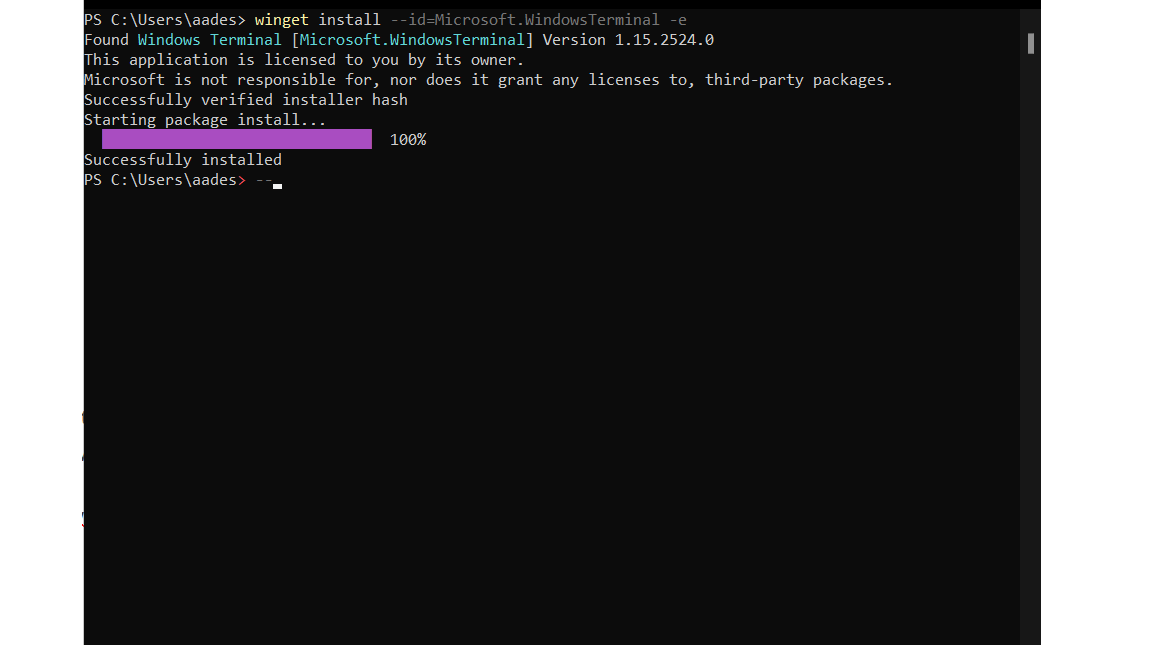
Customizing the Terminal
Search ‘Terminal’ from the start menu and launch it, and from the dropdown menu just beside the ‘new tab’ button, you can open this application’s settings.
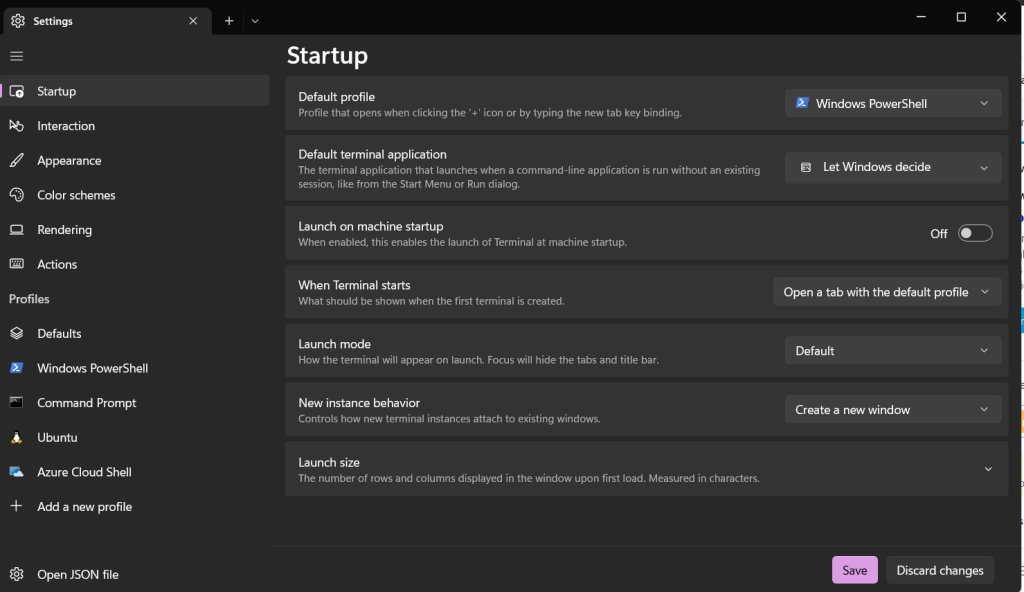
Now, you can set this application as the default Terminal for windows from the Startup > Default Terminal application > Windows Terminal. If you are going to use your Linux instance regularly, then you should set the Default profile to your Linux installation (for example, Debian). Do not forget to hit the save button after you change every setting.
Now, go to the Ubuntu (or the distribution which you have installed) profile, and let’s start customizing the Linux Terminal.
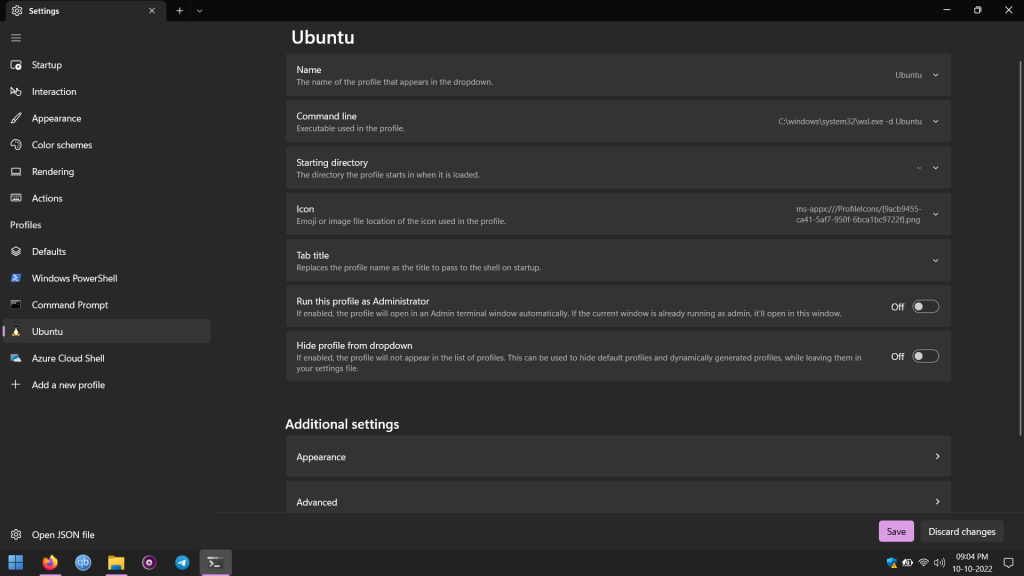
As you can see, you can customize the starting directory, run as administrator by default and change its icon as well from here. If you click on the ‘Appearance’ button, you can see that there are even more options available for you to customize the look and feel of the Terminal such as theme, fonts, transparency, and padding.
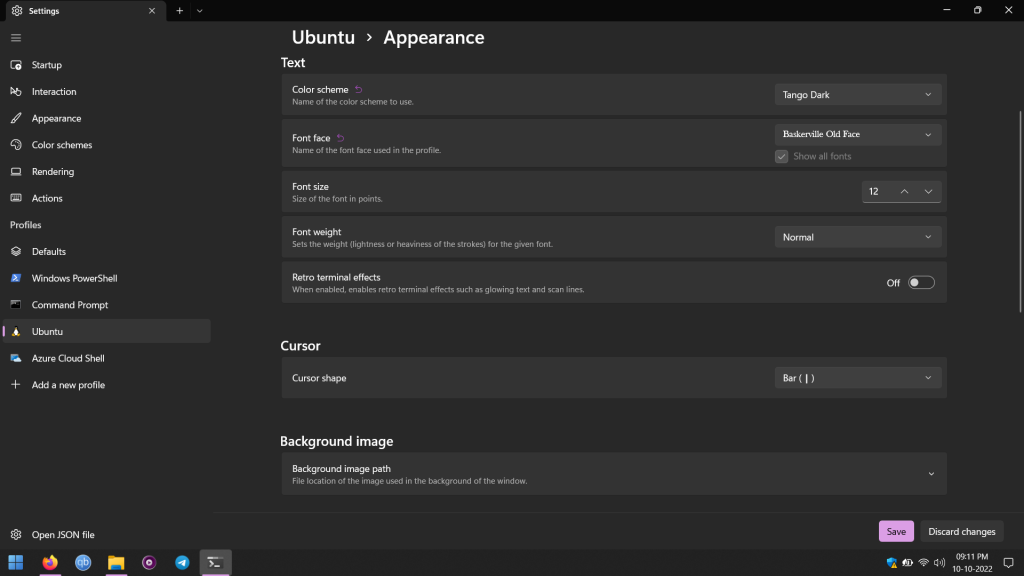
As you can see in the image below, I have customized my Terminal to look like this:
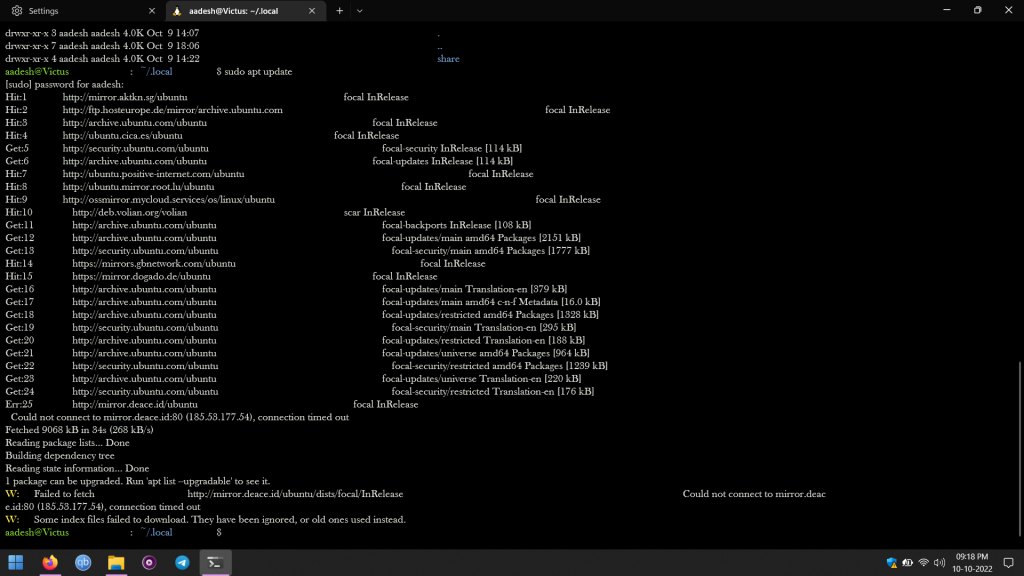
There are a few minute settings such as history size, notifications, and Terminal which you can customize from Ubuntu > Advanced.
Summary
Note that WSL cannot provide you with the complete Linux experience on Windows, especially if you are looking for a complete desktop experience, I recommend you to try Beginner friendly distributions such as Linux Mint, Ubuntu, or Pop!_OS at least which you can fire up in a Virtual Machine.
Still, WSL is a small step in the direction of making Linux more accessible to the general public, and I hope Microsoft funds more projects like this so that people can learn the power of Linux Terminal, this Windows terminal is just another development in that direction.
References
Official Windows Terminal GitHub page
