In this article we’ll teach you how to install Zoom on Linux. Let’s get started on the steps to install Zoom on all the major distributions of Linux.
Steps for Installing Zoom on Ubuntu
Zoom can be installed through Software Center and as well as through Terminal on Ubuntu. We have covered both the procedures below.
Installing Zoom on Ubuntu Linux with the Software Center
Zoom is available in Ubuntu’s Software Center, which makes it easy to install zoom on Ubuntu.
Follow the steps below to install zoom on your Ubuntu machine.
Step 1: Launch Ubuntu Software Center
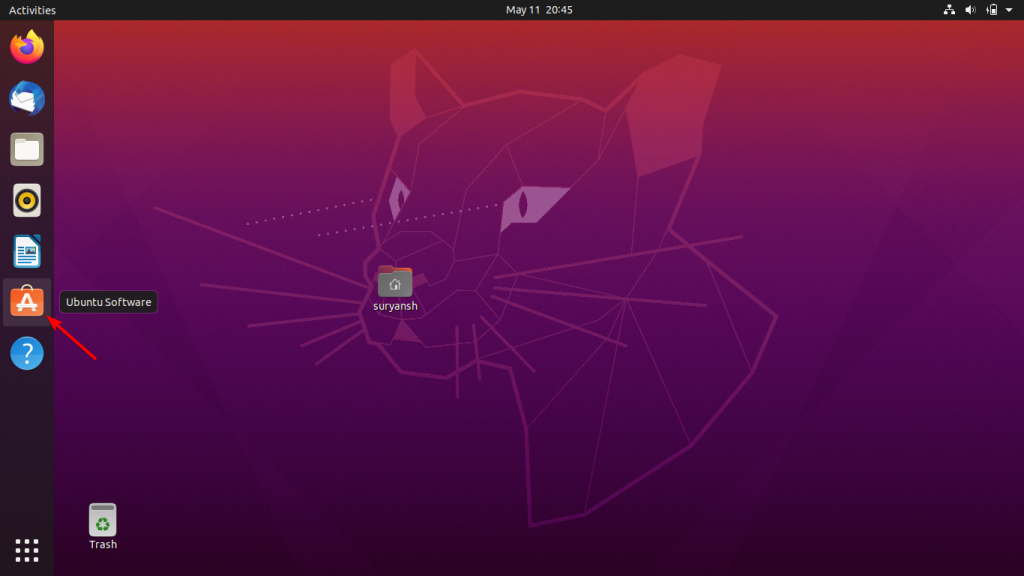
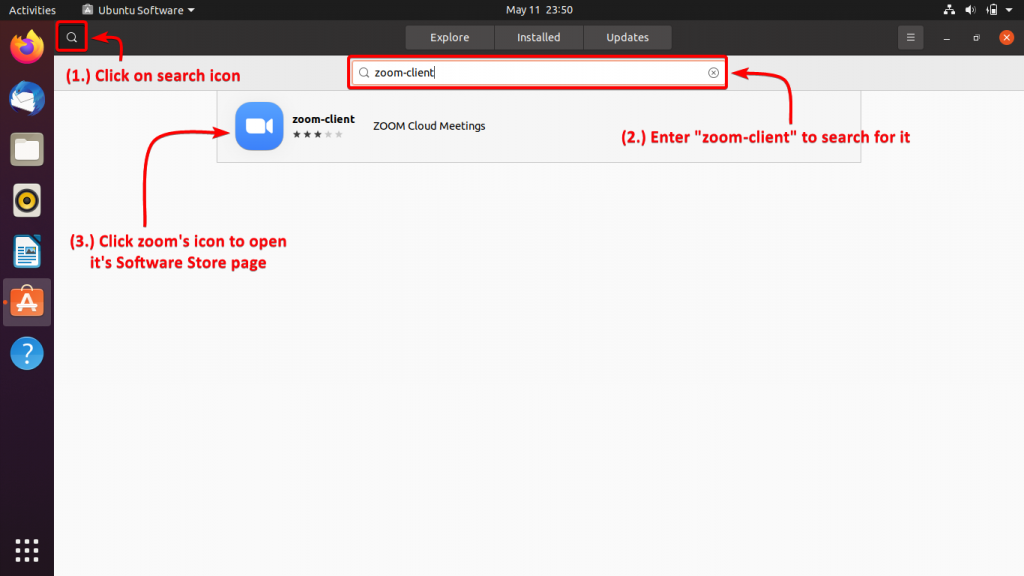
Step 2: Click on the search icon to open the search box and then type in zoom-client in the search box, then press Enter key to search for zoom in Ubuntu Software Center.
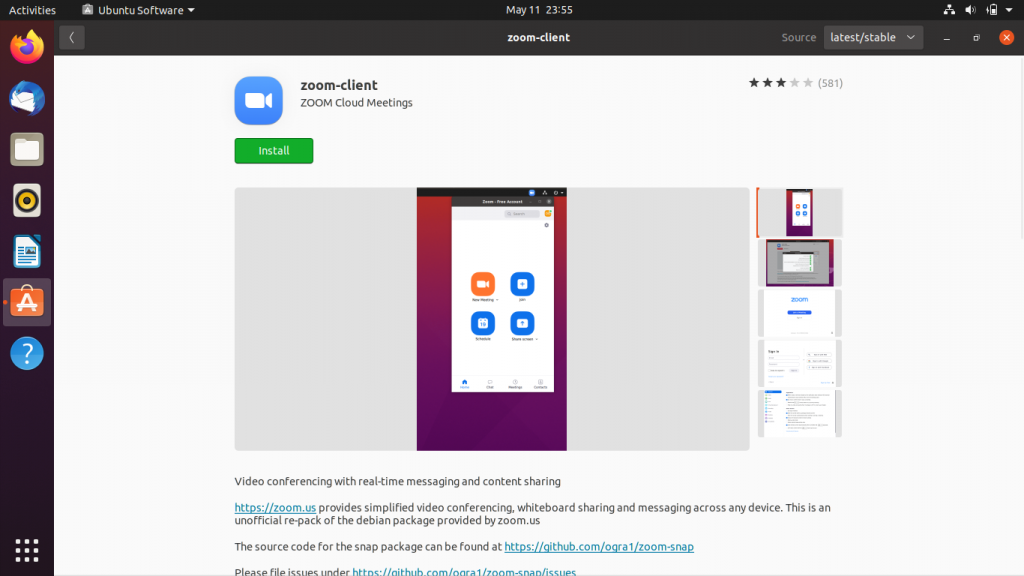
Step 3: Click Install to install zoom
You’ll be required to enter your user password to proceed further with the installation.
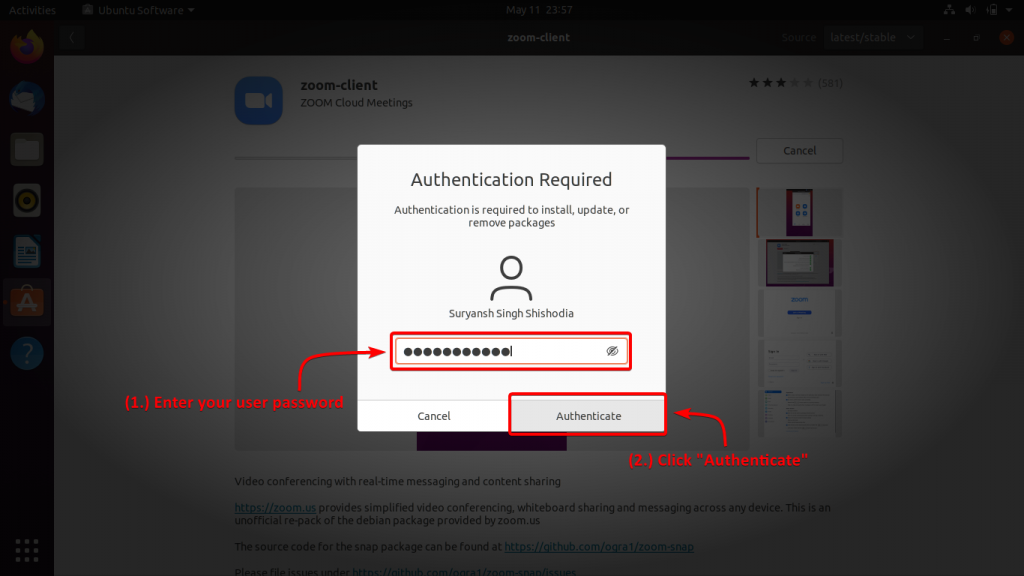
Enter your user password to proceed further with the installation.
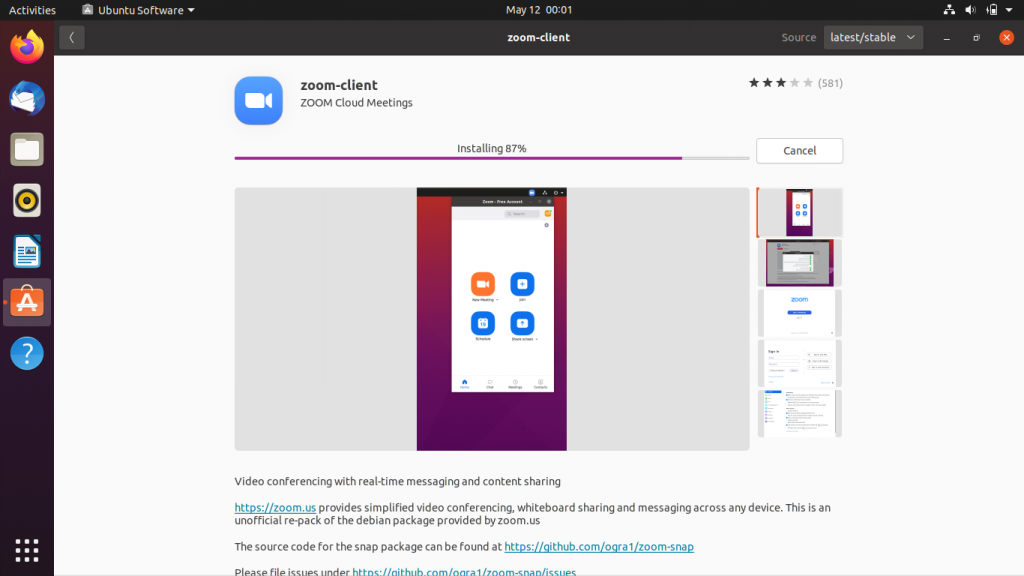
Once the installation completes, we can proceed further to launch it.
Step 4: Launch zoom from Activities
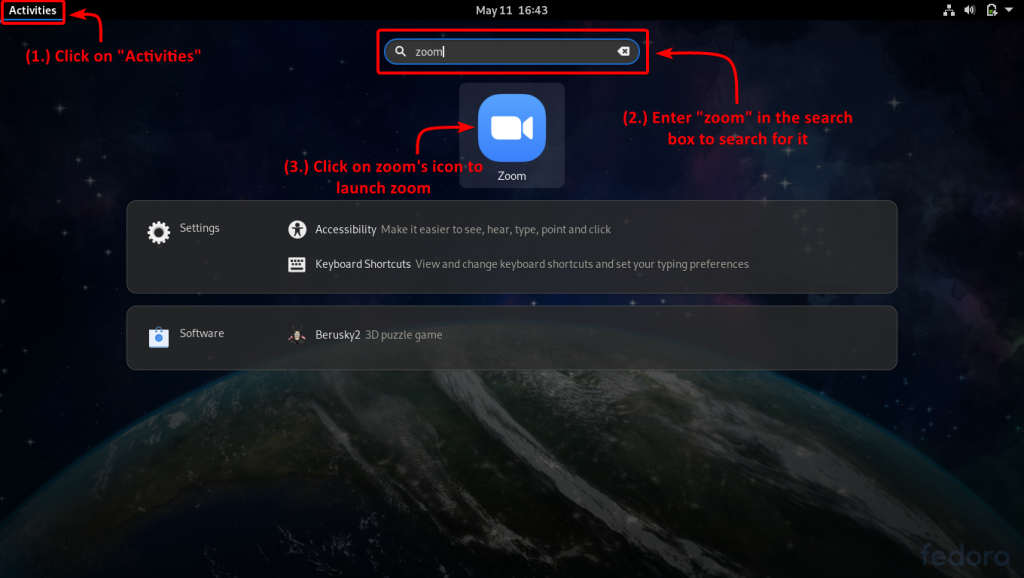
To launch zoom, click Activities on the top-left of your screen and search for zoom and then click on its icon to launch the zoom client.
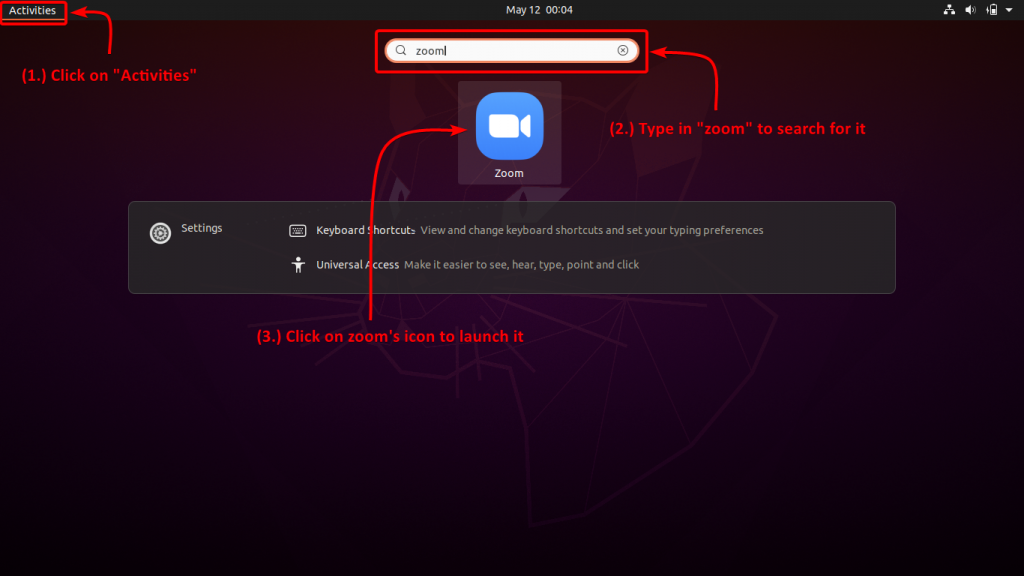
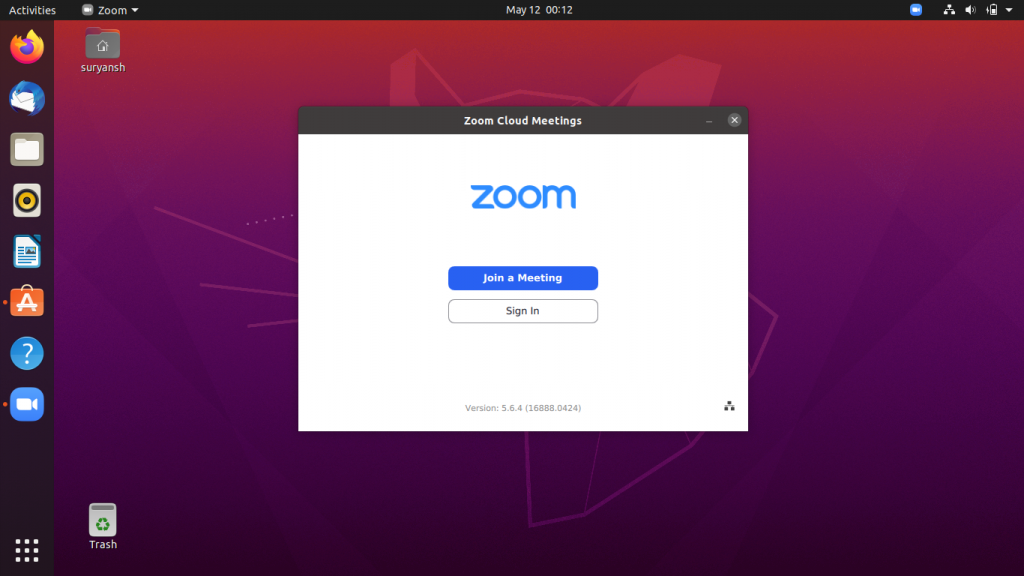
Congratulations! We have successfully installed zoom!
How to install zoom on Ubuntu using the Terminal?
To open a new terminal session press Ctrl+Alt+T or search for the terminal in Activities. Now execute the following wget command to download the zoom .deb package:
wget https://zoom.us/client/latest/zoom_amd64.deb
Then execute the dpkg command with sudo:
sudo dpkg -i zoom_amd64.deb
It will then give you a list of required dependencies, now execute the apt command with sudo to install them:
sudo apt -f install
Which will then download and install all the required dependencies. To install zoom, again execute:
sudo dpkg -i zoom_amd64.deb
It should have installed zoom for you.
Now to launch zoom, search for zoom in Activities which is on the top-left of your screen.
Congratulations! We have successfully installed zoom!
Steps for installing Zoom on Fedora
Zoom is not available in Fedora’s Software Center. To install zoom visit zoom’s official download page and download the official .rpm package.
How to install zoom on Fedora using Desktop (Graphically)?
Step 1: Launch Firefox browser and visit https://zoom.us/download?os=linux
To download the .rpm package, visit https://zoom.us/download?os=linux and choose Fedora as Linux Type and 64 bit as OS Architecture.
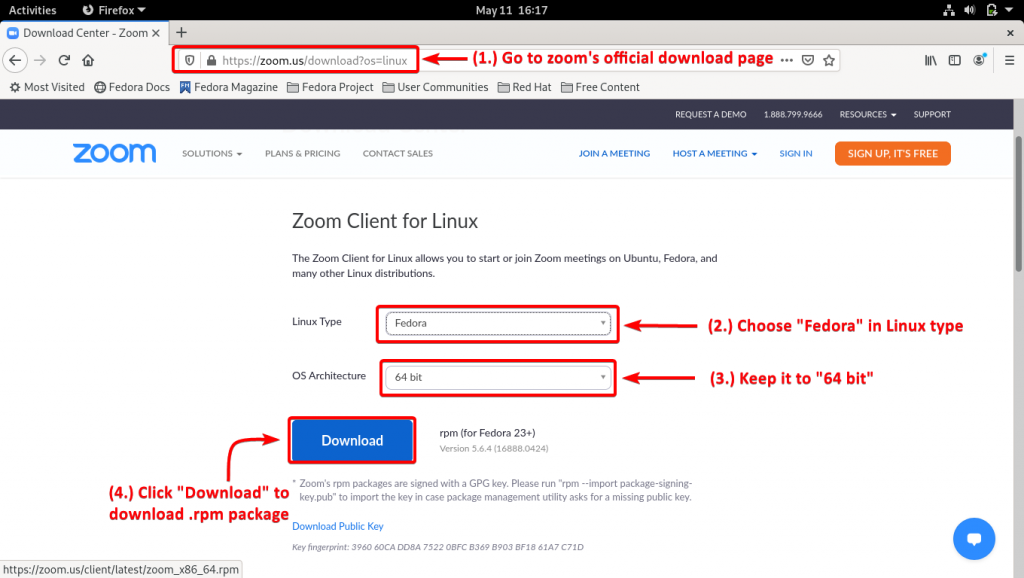
Click download to get the rpm package.
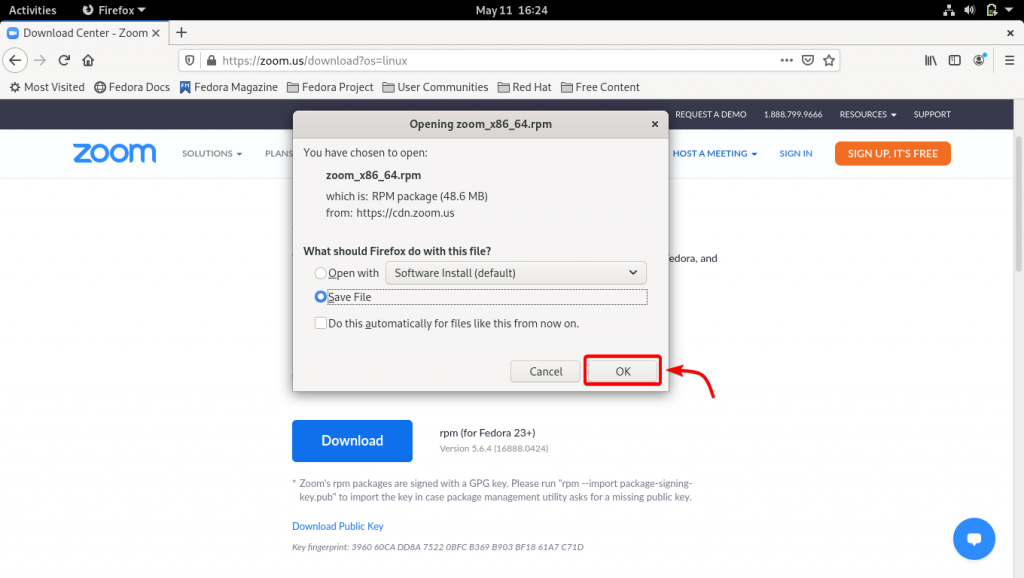
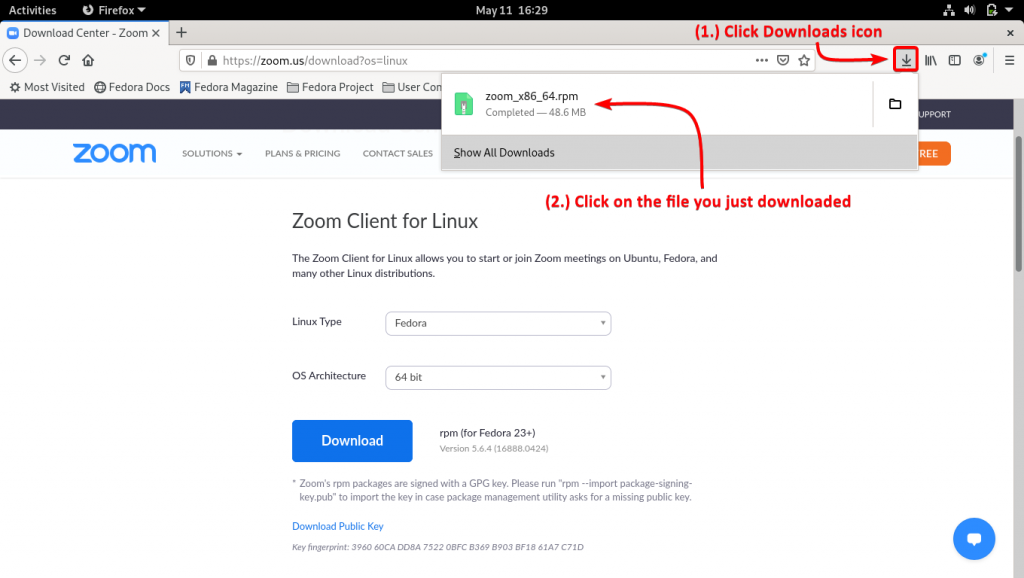
Step 2: Click on the file you have just downloaded
Go to Firefox downloads, and click on the file you have just downloaded to launch the rpm package installer to install zoom.
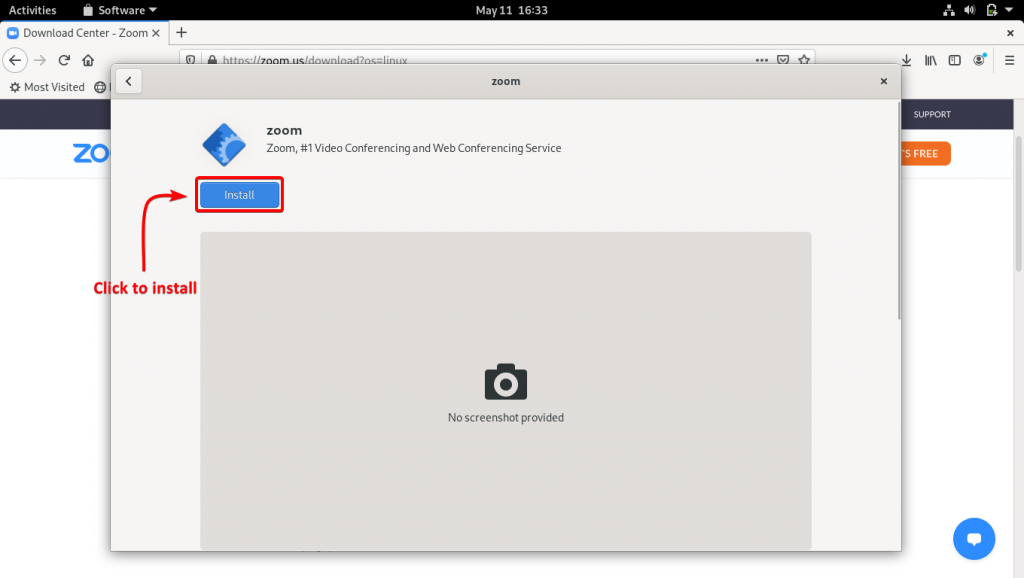
Step 3: Click Install to install zoom
The package installer window will launch click Install to install zoom.
It will require you to authenticate your user to proceed with the installation.
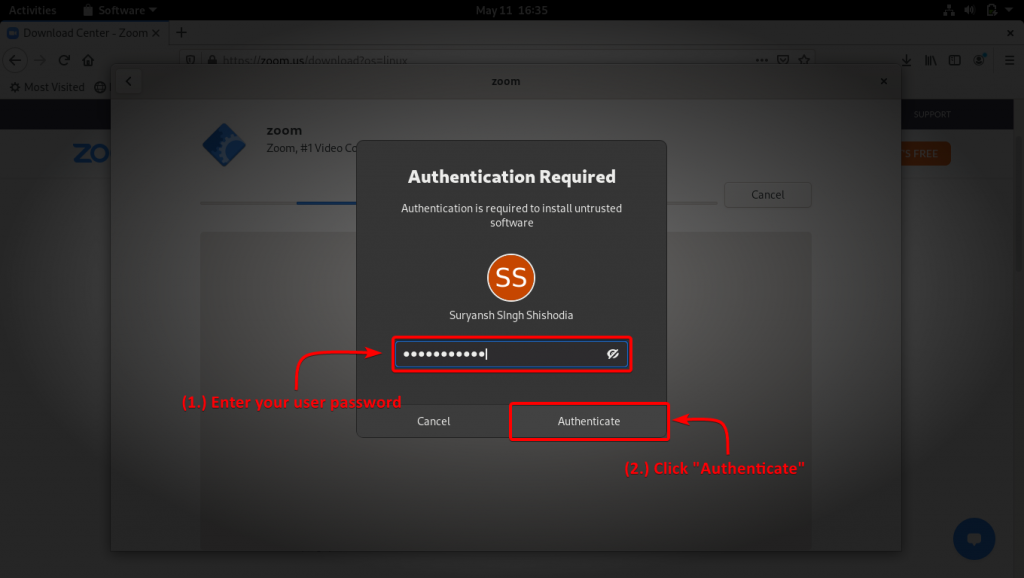
Enter your user password, and click Authenticate to proceed further with the installation.
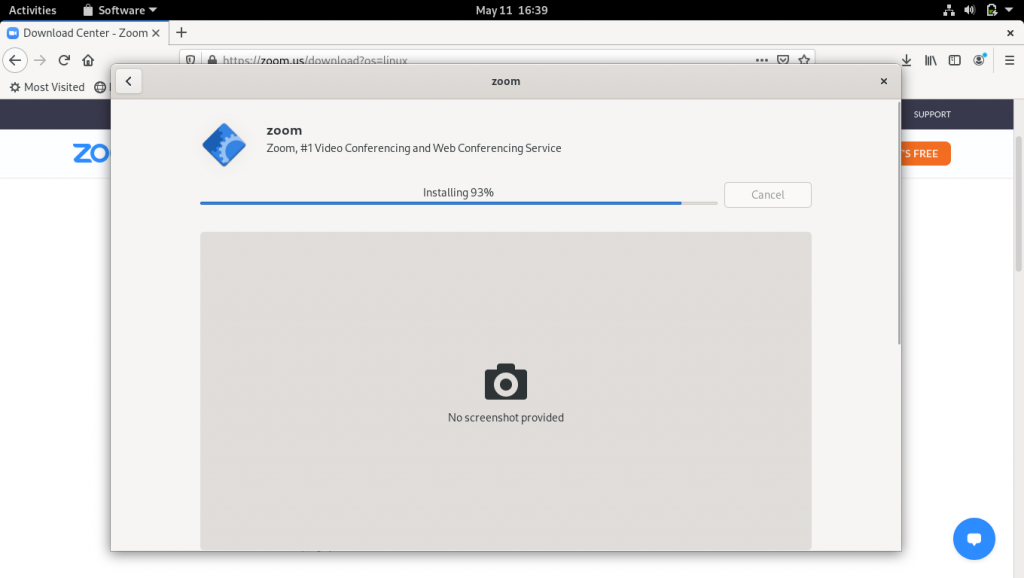
Step 4: Launch zoom
After successful completion of the installation, you can directly launch the zoom by clicking Launch,
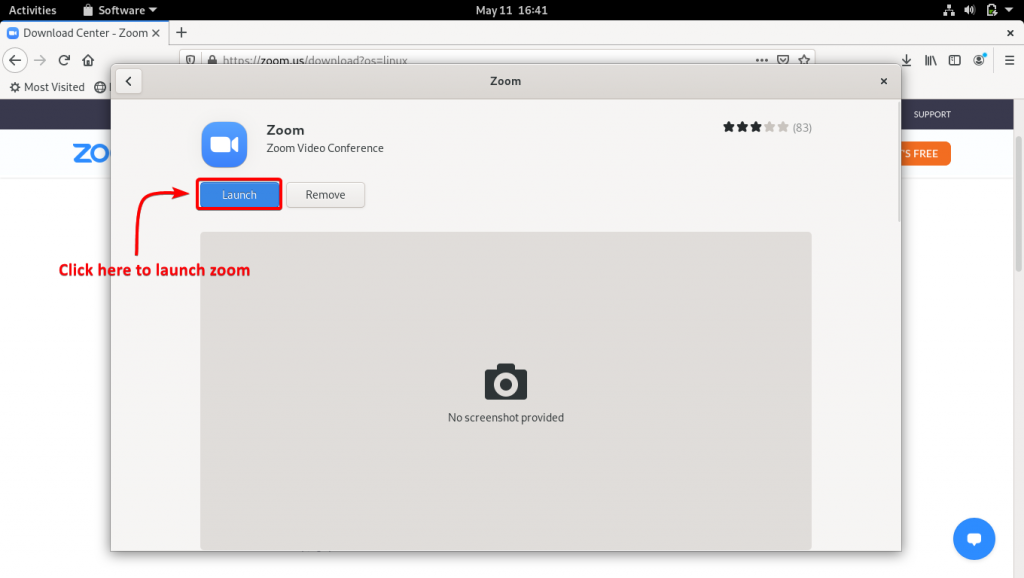
Alternatively, you can launch zoom from Activities which is on the top-left of your screen.
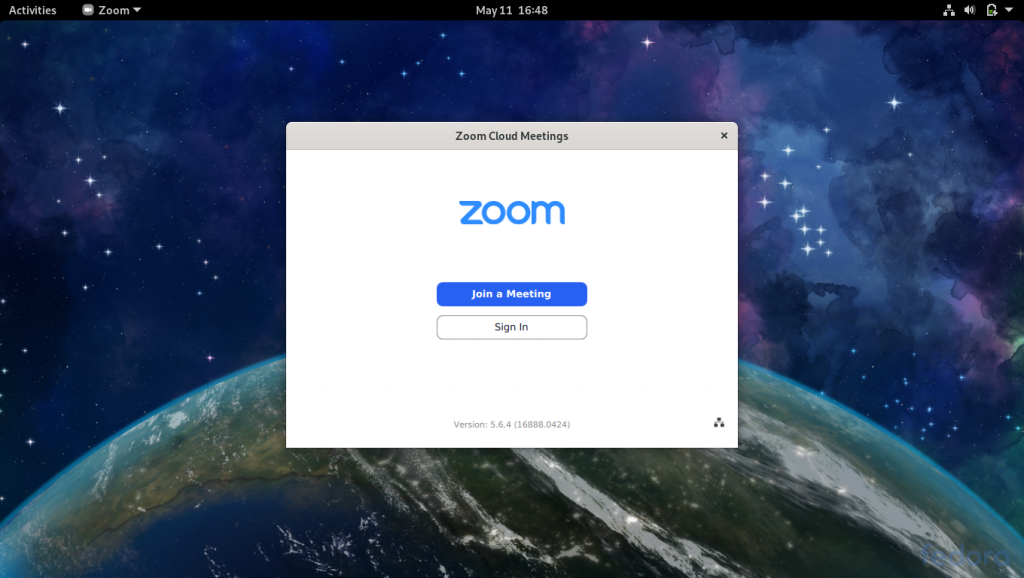
Congratulations! We have successfully installed zoom!
How to install Zoom on Fedora using Terminal?
Launch a new terminal session from Activities which is on the top-left of your screen.
Now execute the wget command to download zoom .rpm package:
wget https://zoom.us/client/latest/zoom_x86_64.rpm
Now to install zoom, execute the yum command with the sudo command:
sudo yum install zoom_x86_64.rpm
It should have successfully installed zoom now.
Now click on Activities on the top-left of your screen, and search for zoom in it. You must be able to see the zoom icon click on it to launch zoom.
Conclusion
It is easy to install zoom on both Ubuntu and Fedora. Just follow the steps exactly as mentioned above.
We hope you found the article helpful. Happy learning! 🙂


