If you are using a dual-boot setup on your PC while using Linux as well as Windows, on different drive or partitions, then it might be necessary for you to set up auto mount the Windows partition on boot in case you need to access data on that partition or drive, because Linux operating systems don’t mount it by default.
Well, In this tutorial we will learn how to manually mount the Windows drive/partition on your Linux system as well as set up auto-mount on every reboot so that you won’t have to go through the hassle again and again.
Check your Kernel version
Since Windows uses the NTFS file system unlike Linux which uses Ext4 or BTRFS, you will need additional drivers on Linux distributions in order to support NTFS. Now, these drivers are already built into the Linux kernel versions 5.15 and above, and you don’t need to install anything if you are using the required kernel versions. To check which kernel is being used by your PC, you can type the following command in your Terminal:
uname -r
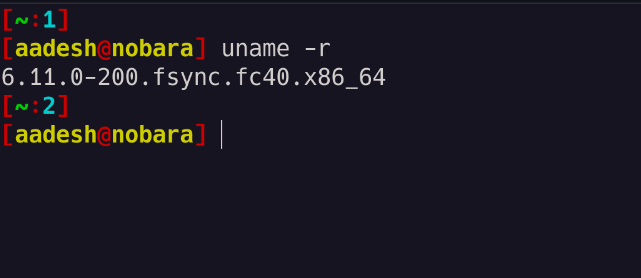
If your Linux kernel version is less than 5.15, then you can either choose to update your system, or simply install the ntfs-3g driver by typing the following commands:
# On Debian and Ubuntu based distributions:
sudo apt install ntfs-3g

# On CentOS or Red Hat Linux:
sudo dnf install ntfs-3g

# For Manjaro or Arch Linux based distributions:
sudo pacman -S ntfs-3g
Since my Nobara PC uses the 6.11 kernel, I don’t have to install anything, and We can proceed to the next section, which is setting up the auto-mount.
Recognizing the Drive
First of all, you should recognize the drive or partition you are going to mount from the command line. This can be done by understanding the size of the Windows partition or drive from the GUI and matching it with the command line output of the parted or lsblk command.
sudo partel -l
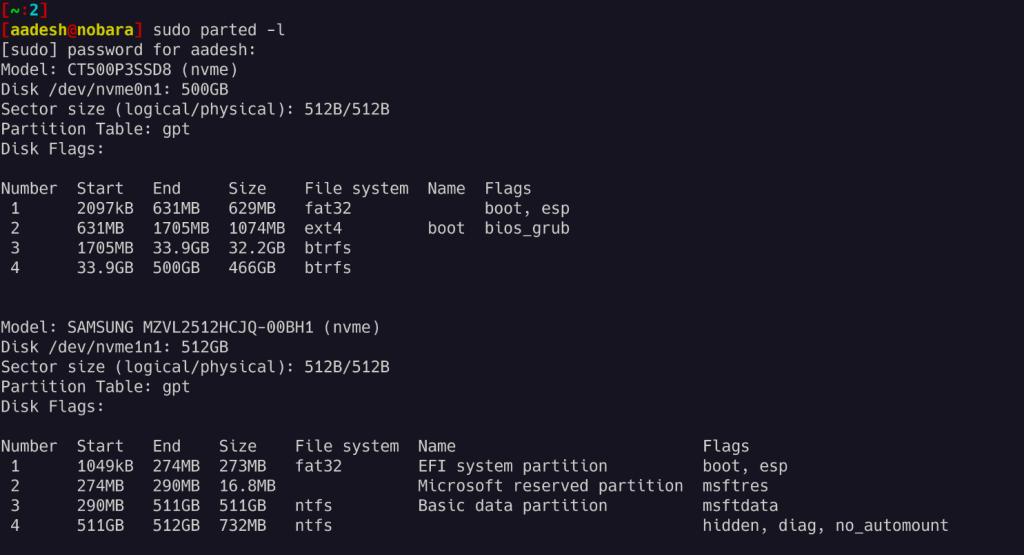
As you can see, I have two NVMe SSDs attached to my PC and my windows drive is located on the second NVME drive which is mounted at /dev/nvme1n1, if you have a hard drive then it should look something like /dev/sda or /dev/sdb.
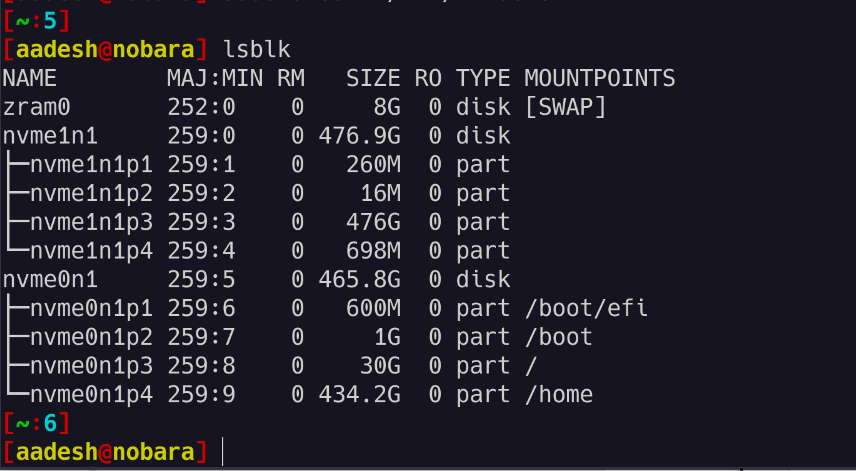
Now, you should notice in the screenshot that my data partition is listed in the 3rd position and is 511GB in size, so my partition’s name is actually /dev/nvme1n1. If you are using a hard drive then it should be something like /dev/sda1 or /dev/sdb1 etc. You can verify the partitions using the lsblk command:
lsblk
Mounting the NTFS partition
Once you have recognized the partition, we can begin setting up a mount point in a directory where the drive will be mounted. Normally, the drives are mounted in the /mnt directory, so we’ll make the mounting directory there. Type the following command:
sudo mkdir /mnt/Windows

Once the directory is created, you can mount it by typing:
sudo mount /WINDOWS_PARTITIONS /MOUNT_POINT
For example, for my /dev/nvmen1p3, I have to type:
sudo mount /dev/nvmen1p3 /mnt/Windows

As you can see that I got an error because I didn’t shut down Windows properly (because fast boot is enabled from Windows), but I can mount the drive with read-only permission if I want to with the -ro flag like this:
sudo mount -o ro /dev/nvme1n1p3 /mnt/Windows
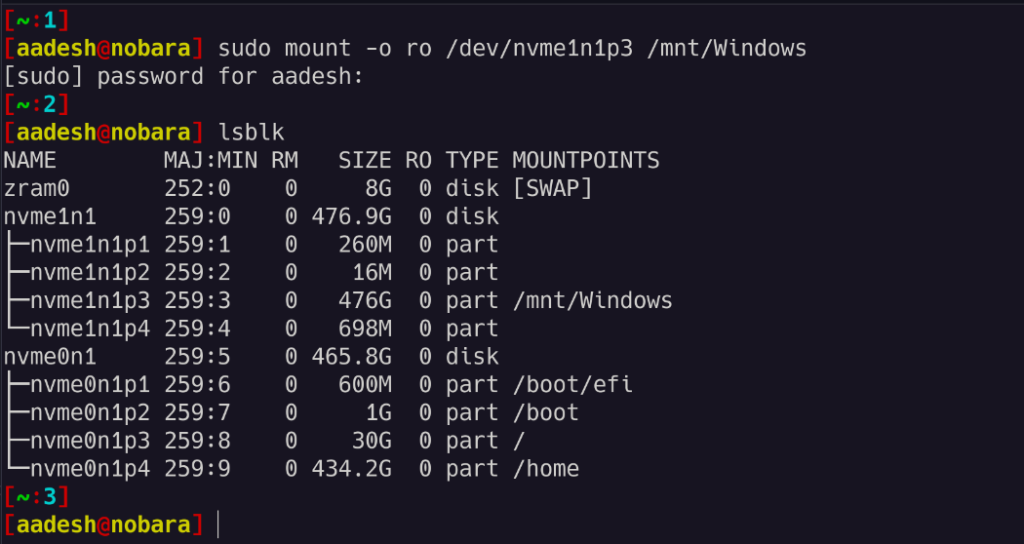
That’s it, you can now access your data from the Windows NTFS partition directly from your Linux PC without having to reboot.
Summary
In this tutorial, we learned how to mount and access a Windows NTFS partition on Linux in both read-only mode and with read and write access. Note that to gain write access, you need to disable Fast Boot from Windows settings so that it shuts down every time you press the power button instead of hibernating (which is the default in Windows 10 and 11).
We also learned about the NTFS-3G driver and its significance for different Linux kernel versions.
