Spotify is one of the most popular music streaming platform in the whole world. It is cross-platform, meaning all the major platforms like Android, iOS, Windows, macOS and even the smaller platform like Linux based operating systems are supported by its developers. However, this cross-platform compatibility on PC operating systems like Windows and Linux is a result of the developers using tools like Electron in the application.
Now, Electron based applications are just running a web page inside a web browser and behaves as an application to the PC it’s running on. This extra ‘overhead’ for the web browser results in a bloated application, which results in slow performance when compared to the native application.
However, many developers have created a Terminal based tool for Spotify so that you don’t have to deal with the bloated application anymore. Yes, I know that a Terminal application might not be for everyone and in that case, you can use Spicetify which is another great app for Spotify. In this tutorial, we will discuss the Spotify-TUI tool on Linux, which will let us stream songs directly in our Terminal.
Installing Spotify-TUI
The simplest way to install this terminal application on Arch Linux and its derivative distributions such as Manjaro or Endeavour OS is via an AUR helper app like yay or Paru. Just type the following command in your Terminal window:
yay -S spotify-tui
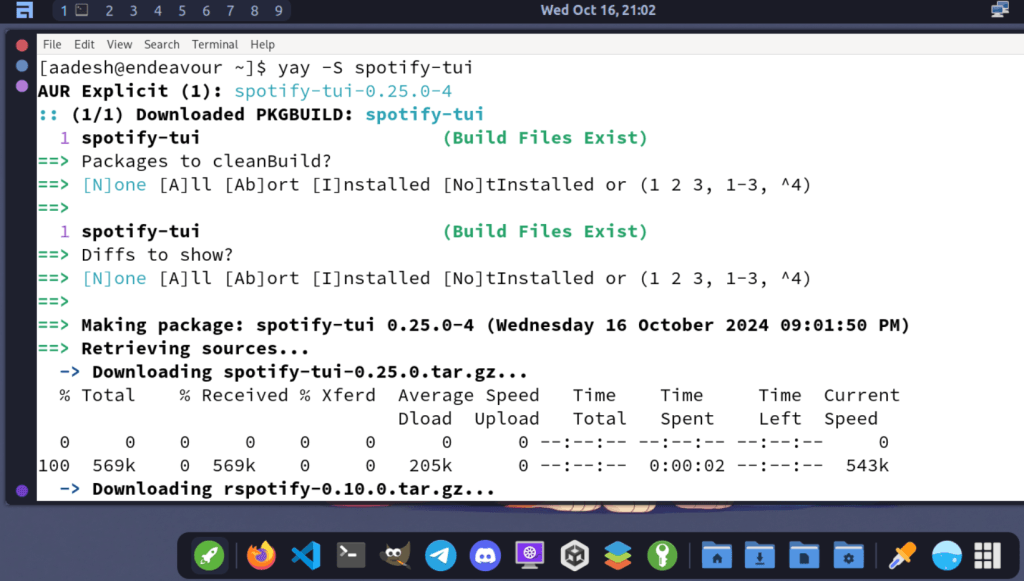
If, however, you are using any Debian based distribution such as Ubuntu or Linux Mint, you will have to use the snap version of this application:
snap install spt
You can also install Spotify-TUI on Fedora or CentOS by adding a COPR repository using this one single command:
sudo dnf copr enable atim/spotify-tui -y && sudo dnf install spotify-tui
You can also install it on Nix OS using this command:
nix-env -iA nixpkgs.spotify-tui
Once installed, we can begin setting up the tool for streaming Music with our account.
Configuring Spotify-TUI
In order for the terminal tool to get access to the Spotify database, you will have to create an app from the Spotify dashboard and connect it to the Terminal tool. Go to the dashboard and click on the ‘Create App’ button.
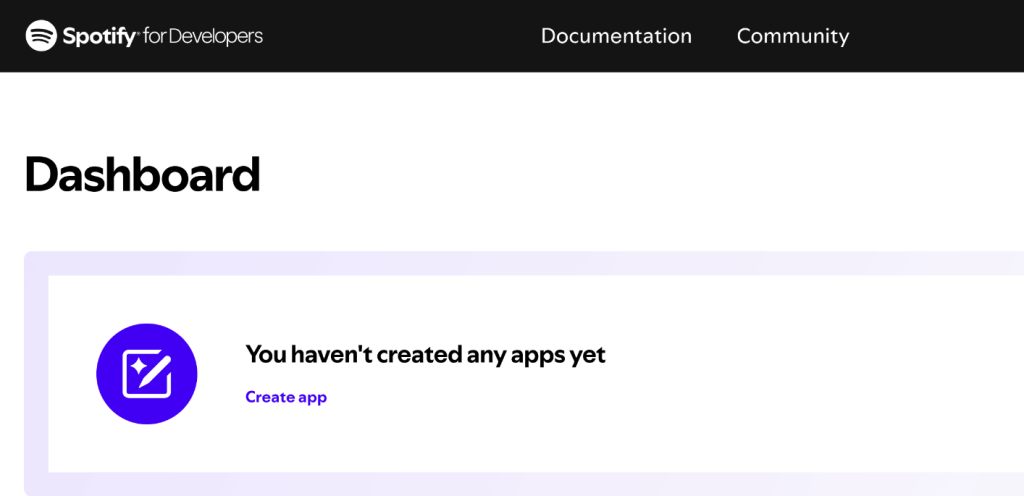
This window will appear when you have logged in to your Spotify account. On the new Window, make sure to name the app and provide description and check all the relevant boxes. Just make sure that in the ‘Redirect URLs’ section, you enter the following address: http://localhost:8888/callback
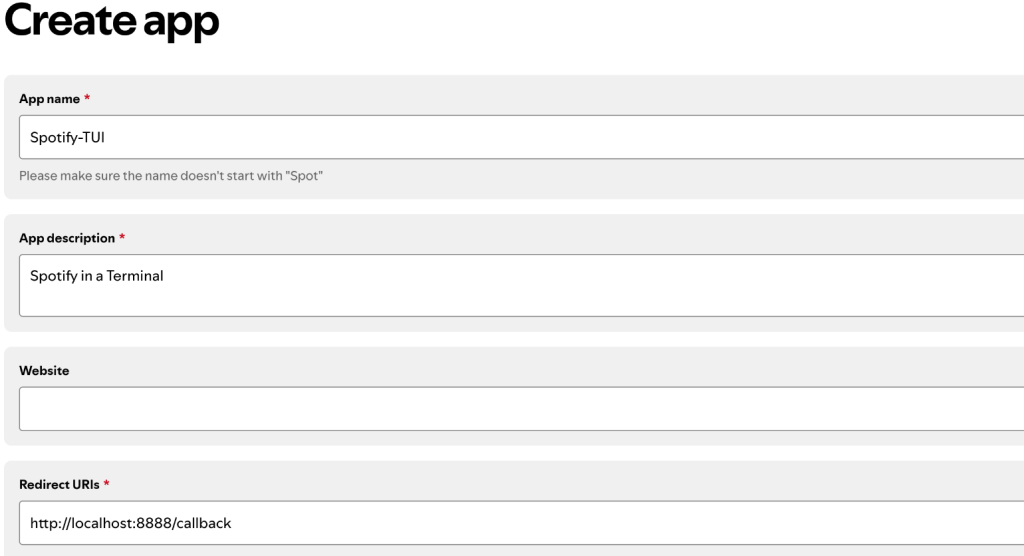
Finally, create the app, and once it is created, open the settings from the top right so that you can see your Client_ID and Client_Secret. We need both of them to stream Music.
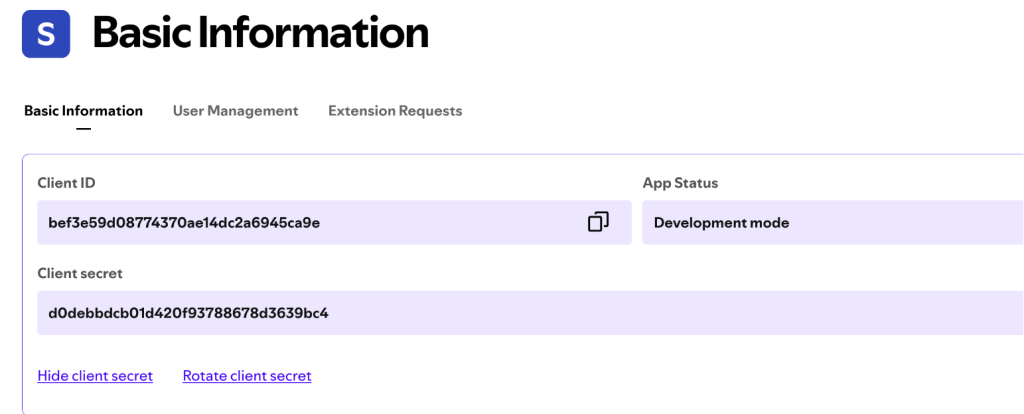
Keep this page open and, in your Terminal window, run the spt command.
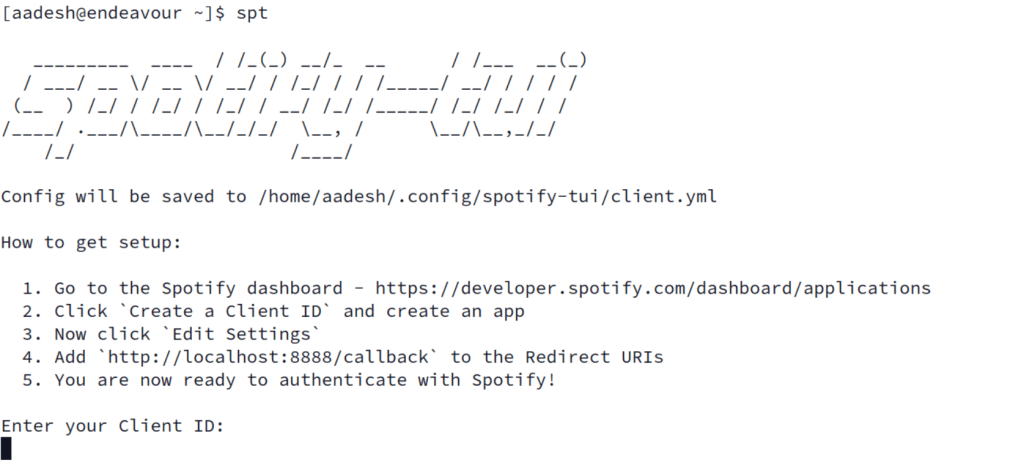
As you can see, the first run of this command will ask you for the Client ID and Client Secret, just paste them from the site and then press enter. Finally, you wil be redirected to the spotify site in order to authenticate the Terminal app.
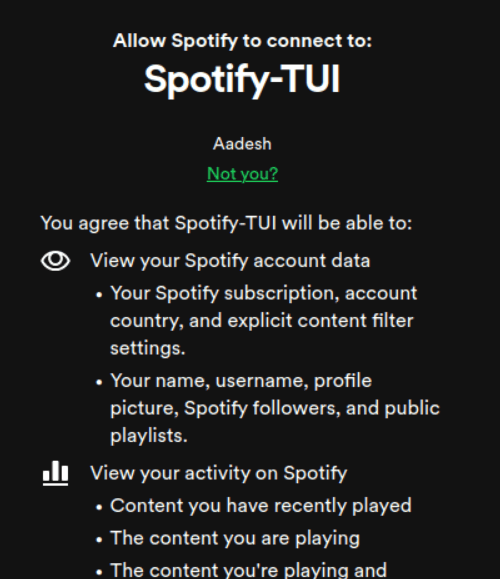
Once authorized, you will now be able to play music using the SPT command in the Terminal. You can check out the usage of this command in more detail on their GitHub page.
Wrapping Up
Spotify-TUI tool even has a lot of level of customization, and you can make it look really cool according to your desktop or window manager theme. It is extremely lightweight when compared to the application which Spotify offers officially for the Linux based distributions. Let me know what did you think of this command line tool and whether you would use this instead of the official app. If you want to use your local library for streaming instead of the streaming service, you can check out Navidrome as well.
