In this tutorial, we’ll take a look at how we can install Go on Ubuntu/Debian. Golang is an open-source programming language that makes it easy to build fast and scalable applications while being easy and intuitive to write.
Steps to Install Go on Ubuntu/Debian
To install Go on Ubuntu we can use the longsleep/golang-backports PPA and get the latest package from the external repository.
Let’s add this repository to the system’s sources list so that we can update this package automatically if we update our system using apt.
sudo add-apt-repository ppa:longsleep/golang-backports
As of the time of writing (22/03/2020), the latest available version of Go is 1.14. So these steps will install Go 1.14.
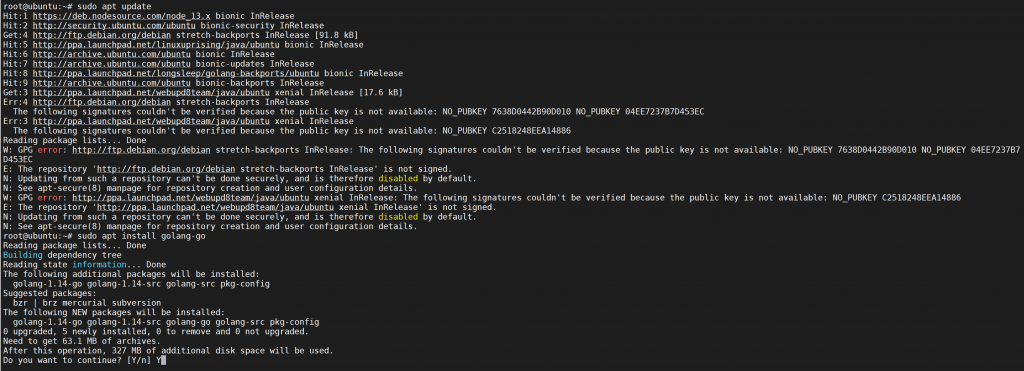
Now that we’ve added this repository, let’s update our system first and then install the package using apt, so that it can install the relevant Go package binaries.
Since this is a part of the apt repositories now, the binaries will be automatically added to the system PATH, so there’s no need to do any further configuration!
sudo apt update
sudo apt install golang-go
Now, after following relevant prompts, you will have successfully installed the latest version of Go!

To verify that you’ve successfully installed Go, you can check the version of Go using:
go version
The corresponding version that you installed (1.14 for me) must show up on your terminal screen. You’re now ready to get started!

Install an older version of Golang
However, if you want to install an older version, you can use the ppa:/gophers/archive PPA and add this repository instead.
You can then install your desired Go version using apt.
sudo apt-add-repository ppa:/gophers/archive
sudo apt-update
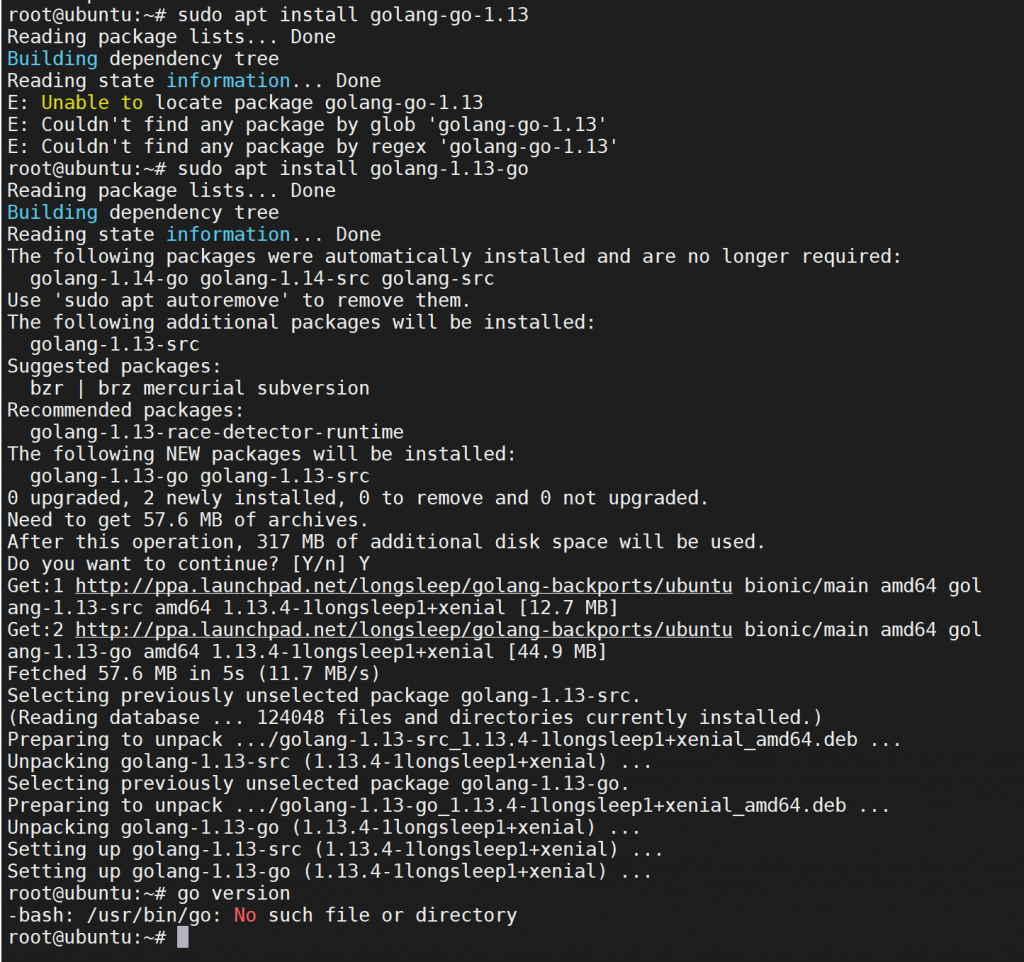
After this, you can install Go on Ubuntu by specifying the desired version. For example, if you want to install Golang version 1.13, simply type:
sudo apt install golang-1.13-go
After going through relevant prompts, you’ll have successfully installed Golang version 1.13!

Adding the Go binary to the PATH variable
As you can see in the screenshot above, this method of installation will not add the binaries to your system PATH, so if you run go version, the system will not recognize the command.
We need to add the binaries, located at usr/lib/go-1.13/bin.
NOTE: Depending on the version of Go that you installed, you need to add the directory /usr/lib/go-x.xx/bin, where x.xx is your Go version.
We must add this directory to the system PATH variable.
To do that, simply go to your terminal profile file and add this line (For bash users, it is usually at ~/.bashrc, and for zsh users, it’s located at ~/.zshrc)
export PATH=$PATH:/usr/lib/go-1.13/bin

Again, change the version depending on your use-case. After this, source your profile file, so that it applies to your current terminal session.
# For bash users, type:
source ~/.bashrc
# And for zsh users, type:
source ~/.zshrc
Now, to ensure that you’ve added it correctly, check the version using:
go version
Your desired Golang version must appear on the terminal prompt.

That’s it! We now have the required version of Go on our Ubuntu system.
Testing a Go Language Hello World program
Let’s write a simple “Hello World” program, and test it on our Go compiler.
Make a new file, and call it helloWorld.go.
touch helloWorld.go
Now, copy and paste the below code using your favorite text editor.
package main
import "fmt"

func main() {
    fmt.Println("Hello  World!");
}
Build the file using:
go build helloWorld.go
Now, run the binary using:
go run helloWorld.go
Output:
Hello World!

We’ve successfully compiled and ran our Hello World program! This means that we’ve installed Go successfully! Hooray!
Conclusion
In this tutorial, we learned how we could install Go on Ubuntu from external repositories, in just a few simple steps!
