TeX Live is a free cross-platform typesetting computer program for the TeX typesetting system designed and written by Donald Knuth to typeset attractive and consistent documents. LaTeX is a macro-package based on TeX written by Leslie Lamport to simplify TeX, especially for scientific or technical articles, papers, books, and more.
Texmaker is a free modern LaTeX editor featuring various tools to write documents with LaTeX.
In this tutorial, we will learn how to install TeX Live and Texmaker.
How to install TeX Live on Ubuntu?
To install TeX Live on Ubuntu, we can make use of Ubuntu’s default package manager. Follow the steps given below to install TeX Live on Ubuntu.
STEP 1: Launch a terminal session
To launch a new terminal session press CTRL+ALT+T or search for the terminal in Activities and click on its icon to launch it.

Search for the Terminal in Activities and click on its icon to launch a new terminal session.

STEP 2: Install TeX Live using ‘apt’ package manager
Before we install TeX Live to update the apt packages index, enter the following apt command with sudo:
sudo apt update
Now to install TeX Live (a texlive-full package which is around 5,828 MB) enter the following command in the terminal:
sudo apt install texlive-full -y
or, for a more basic installation of TeX Live which takes a lot lesser space in storage (texlive package is installed which is around 260 MB) enter the following command:
sudo apt install texlive -y
Then enter your sudo password in the terminal. The installation may take a while to complete. You’ll have Tex Live installed on your system upon completion of this operation.

Once we have TeX Live installed, we can now proceed to install Texmaker.
How to install Texmaker on Ubuntu?
Texmaker can be also installed using the apt package manager on Ubuntu. Follow the steps given below to install Texmaker on Ubuntu.
STEP 1: Launch a terminal session
Just like we did while installing TeX Live above, to launch a new terminal session press CTRL+ALT+T or search for the terminal in Activities and click on its icon to launch it.
STEP 2: Install Texmaker using ‘apt’ package manager
To make sure your apt package index is up-to-date, enter the following apt command with sudo:
sudo apt update
Now to install Texmaker, enter the following command in the terminal:
sudo apt install texmaker -y

Then enter your sudo password in the terminal. The installation may take a while to complete. You’ll have Texmaker installed on your system upon completion of this operation.
How to create your first TeX document?
Now that we have Tex Live and Texmaker installed, we can now proceed to create TeX documents. To create TeX documents, follow the steps given below.
STEP 1: Launch Texmaker
To launch Texmaker, click Activities on the top-left of your screen, and search for Texmaker.

Now search for Texmaker in Activities and click its icon the launch it.

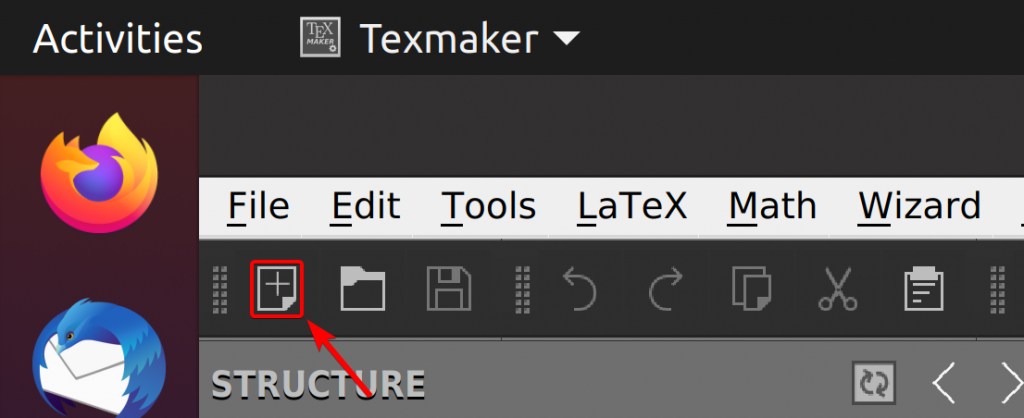
STEP 2: Create a new document
To create a new TeX document, click on the icon shown in the picture below.

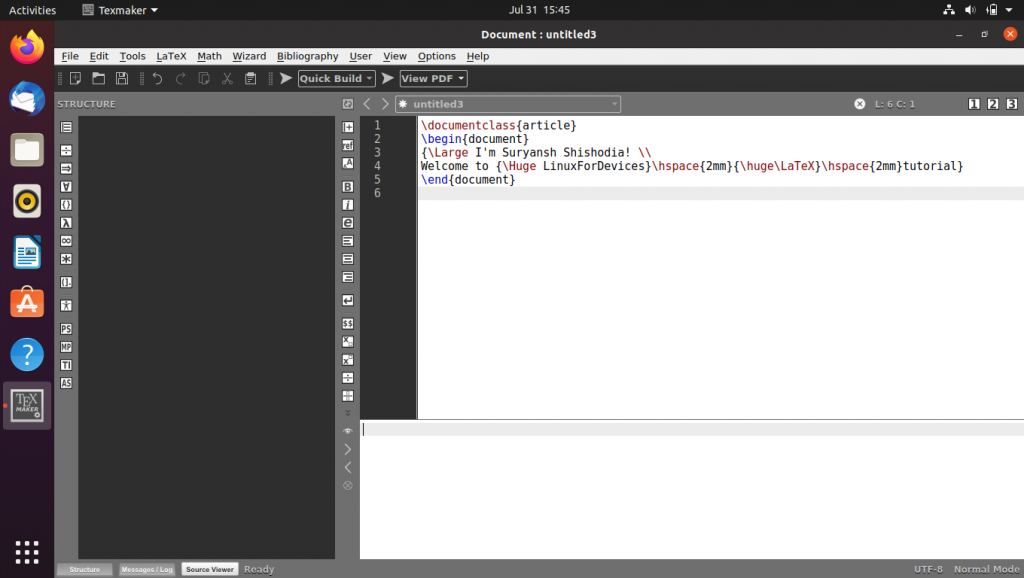
STEP 3: Write down the code for your document
After creating a new document, now you can write the code for the document.

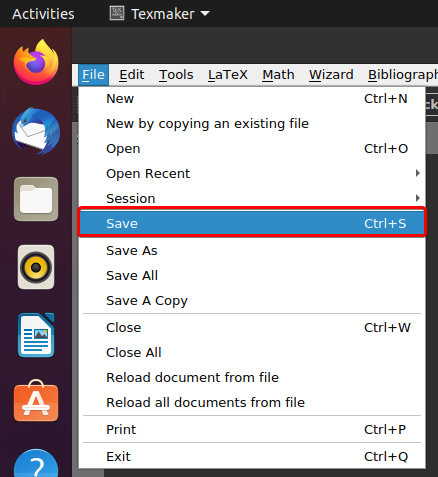
STEP 4: Save the TeX file for your document
Now to save the TeX file, go to File > Save and enter the name for your TeX file.

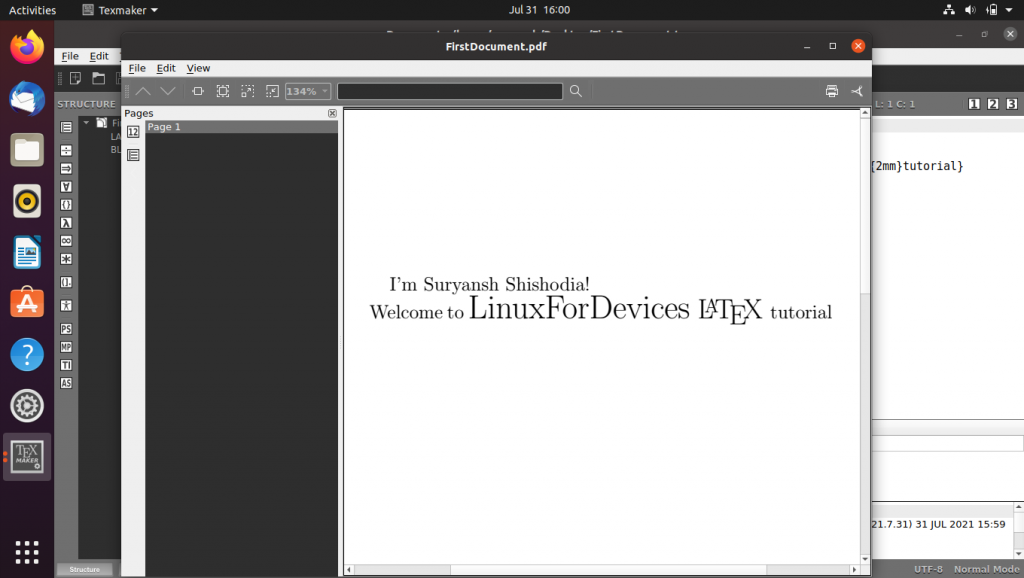
STEP 5: Compile the document
Click on the Run icon to Quick Build the document. The PDF file will be stored in the same directory as the TeX file.

Congratulations! We have successfully installed Tex Live and Texmaker. We have also created our first document.

Conclusion
TeX Live is a powerful cross-platform TeX typesetting computer program, and Texmaker is a free and popular LaTeX editor.
In the above tutorial, we have demonstrated the installation of Tex Live and Texmaker on Ubuntu. We have also demonstrated creating a document using Tex Live and Texmaker.
Thank you for reading! 😀
